Page 3 - Starter’s Guide
ENGLISH RFX9400 Starter’s Guide ESP AÑOL FRANÇAIS Starter’s Guide Manual de inicio Guide de démarrage RFX9400 RFX9400_SG_ESF_v06.qxd 04-07-2006 08:11 Pagina 3
Page 4 - Contents
1 RFX9400 Starter’s Guide RFX9400 Starter’s Guide Contents Before You Start . . . . . . . . . . . . . . . . . . . . . . . . . . . . . . . . . . . . . . . . . . . . . . 2 Unpacking the Extender . . . . . . . . . . . . . . . . . . . . . . . . . . . . . . . . . . . 3 Configuring the Extender . . . . . ...
Page 5 - ENGLISH; Before You Start; Configure; ‘Stand-alone Connection’; Network Connection’
ENGLISH 2 RFX9400 Starter’s Guide RFX9400 Starter’s Guide Before You Start The Pronto Wireless Extender is an important element of the Pronto System and makes it possibleto control AV-equipment via RF in the entire house.In order to use the Extender in a wireless Pronto Network: • Configure the Exte...
Page 6 - Unpacking the Extender
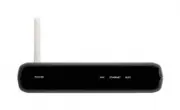
3 RFX9400 Starter’s Guide Unpacking the Extender Pronto Wireless Extender Front Panel Antenna Configuration switch• In Stand-alone Mode: changes the RFchannel. • In Network Mode: indicates theconnection type. Power input 4 IR outputs 4 dipswitches forthe IR outputs Back Panel Extender ID switch Ethe...
Page 7 - Configuring the Extender; Stand-alone Connection; Plug in the Extender’s; power adapter; Use the default; switch; settings of the Extender:; Configure the Control Panel’s; configuration file; so that the Control Panel can work; Network Connection; Wired; Wireless; connection
ENGLISH 4 RFX9400 Starter’s Guide Configuring the Extender Note Before you start configuring the Extender, check if there are any firmware updates available inthe Downloads section on www.pronto.philips.com . Refer to the chapter ‘Firmware Update’ on page 9 for further details. Stand-alone Connectio...
Page 9 - Configuring the Extender through a Router; The Configuration Tool opens in the browser.; Installing the Extender; Keep the Extender away from heat sources such as amplifiers.; Connecting the Extender to AV-equipment
ENGLISH 6 RFX9400 Starter’s Guide Configuring the Extender through a Router When the Extender is already installed and connected to external AV-equipment, it is possible toconfigure it through a router. 1 Connect the Extender to the router, and the router to the PC, as indicated below. 2 Set the Ext...
Page 10 - Adjusting the Power Level of the IR Outputs; Support; What Do the LEDs Indicate?; There is an IP conflict; If the problem persists, check the router settings.; The IP address cannot be determined; • When; using
7 RFX9400 Starter’s Guide LEDs Colors Ethernet LED WiFi LED Busy LED The Extender’s IP address isbeing determined. Green blinking The Extender’s IP address isbeing determined. The Extender is busy processinga short code or macro from theControl Panel. The Extender is functioningnormally. Green The E...
Page 11 - configuring; The Extender cannot communicate with the wireless network; The WiFi LED is red; Finding the Exact Location of an AV-component’s IR Receiver; Remove the protective tape of the Dual IR emitters.; Operating AV-components with the Extender; The AV-components do not respond to commands from the Extender; You can use up to 16 different Extenders in the same Pronto Network.
ENGLISH 8 RFX9400 Starter’s Guide • When configuring the Extender: make sure the PC is not using a fixed IP address but is using DHCP instead. • Make sure the router is switched on. If the router is using DHCP, the Extender’s IP address cannot be determined. Make sure to use the correct network sett...
Page 12 - The Busy LED blinks green when the Control Panel is not in use; Resetting the Extender; Firmware Update; Updating the Extender with the configuration cable; The; Updating the Extender through a router
9 RFX9400 Starter’s Guide The Busy LED blinks green when the Control Panel is not in use This does not mean that something is wrong with the Extender. It merely indicates that the Extenderis being operated by a different Control Panel. When the Busy LED stops blinking, you can use theExtender again....
Page 13 - ProntoEdit Professional; The Firmware Update page opens.; Specifications; Pronto Wireless Extender Starter’s Guide
ENGLISH 10 RFX9400 Starter’s Guide 3 Open the ProntoEdit Professional on the PC. 4 In the Tools menu, select Extender Discovery . The Extender Discovery tool appears, with a list of all the detected Extenders in the ProntoNetwork. 5 Select the Extender that you want to configure and click on the Con...
Page 14 - Contenido
1 RFX9400 Manual de inicio RFX9400 Manual de inicio Contenido Antes de empezar . . . . . . . . . . . . . . . . . . . . . . . . . . . . . . . . . . . . . . . . . . . 2 Contenido del paquete del Extensor . . . . . . . . . . . . . . . . . . . 3 Configuración del Extensor . . . . . . . . . . . . . . . ....
Page 15 - Antes de empezar; ‘Conexión Stand-alone’; Ventajas del modo Network:; ‘Conexión Network’
ESP AÑOL 2 RFX9400 Manual de inicio Antes de empezar El Pronto Wireless Extender es un elemento importante del Sistema Pronto y permite controlarequipos AV mediante RF en toda la casa.Para utilizar el Extensor en una red Pronto inalámbrica: • Configure el Extensor: conéctelo al PC y utilice la herra...
Page 16 - Contenido del paquete del Extensor
RFX9400 Manual de inicio 3 Contenido del paquete del Extensor Pronto Wireless Extender Panel frontal Antena Interruptor deConfiguración• En modo Stand-alone : cambia el canal RF. • En modo Network : indica el tipo deconexión. Entrada decorriente 4 salidas IR 4 conmutadores DIPpara las salidas IR Pan...
Page 17 - Configuración del Extensor; Conecte el; adaptador de corriente; Utilice la configuración de los; interruptores; por omisión del Extensor:; Configure el; archivo de configuración; del Control Panel (el Panel de Control) para que; Conexión Network; con cable; • Conexión; inalámbrica
RFX9400 Manual de inicio ESP AÑOL 4 Configuración del Extensor Nota Antes de empezar a configurar el Extensor, compruebe si hay alguna actualización de firmwaredisponible en la sección de Downloads de www.pronto.philips.com . Consulte el capítulo ‘Actualización de Firmware’ en la página 9 para obten...
Page 19 - Configuración del Extensor a través de un router; La herramienta Configuration Tool se abrirá en el navegador.; Instalación del Extensor; Conexión del Extensor a un equipo AV
RFX9400 Manual de inicio ESP AÑOL 6 Configuración del Extensor a través de un router Cuando el Extensor está instalado y conectado a un equipo AV externo, es posible configurarlo através de un router. 1 Conecte el Extensor al router, y el router al PC, tal como se indica a continuación. 2 Ajuste el ...
Page 20 - Ajuste del nivel de corriente de las salidas IR; Asistencia; ¿Qué indican los indicadores LED?; Hay un conflicto de IP; Si el problema persiste, compruebe la configuración del router.; La dirección IP no puede determinarse; • Al; utilizar
RFX9400 Manual de inicio 7 Ind. LED Colores Indicador LED Ethernet Indicador LED WiFi Indicador LED Busy Se está determinando ladirección IP del Extensor. Parpadeo verde Se está determinando ladirección IP del Extensor El Extensor está ocupadoprocesando una macro o un códigocorto desde el Control Pa...
Page 21 - configurar; El indicador LED WiFi está iluminado en rojo; Funcionamiento de los componentes AV con el Extensor; Los componentes AV no responden a las instrucciones del Extensor; Tool y que está conectado correctamente a los componentes AV.; Hay ID del Extensor duplicados
RFX9400 Manual de inicio ESP AÑOL 8 • Al configurar el Extensor: asegúrese de que el PC no esté utilizando una dirección IP fija, sino DHCP. • Asegúrese de que el router esté encendido. Si el router utiliza DHCP, la dirección IP del Extensor no podrá determinarse. Asegúrese de que utiliza la configu...
Page 22 - Reinicialización del Extensor; Actualización de Firmware; Actualización del Extensor con el cable de configuración; La herramienta; Actualización del Extensor a través de un router
RFX9400 Manual de inicio 9 El indicador LED Busy parpadea en verde cuando el Control Panel no está en uso Esto no significa que haya ningún problema con el Extensor. Sólo indica que el Extensor está siendoutilizado por un Control Panel distinto. Cuando el indicador LED Busy deja de parpadear, puedev...
Page 23 - Tools; Seleccione el Extensor que desee configurar y pulse el botón; en el panel de navegación de la izquierda.; Especificaciones; Pronto Wireless Extender Manual de inicio
RFX9400 Manual de inicio ESP AÑOL 10 4 En el menú Tools , seleccione Extender Discovery . Aparecerá la herramienta Extender Discovery Tool con una lista de los Extensores detectadosen la red Pronto. 5 Seleccione el Extensor que desee configurar y pulse el botón Configure . La herramienta Configurati...
Page 24 - Table des matières
1 RFX9400 Guide de démarrage RFX9400 Guide de démarrage Table des matières Avant de commencer . . . . . . . . . . . . . . . . . . . . . . . . . . . . . . . . . . . . . . . 2 Déballage du Prolongateur . . . . . . . . . . . . . . . . . . . . . . . . . . . . . . . 3 Configuration du Prolongateur . . . ...
Page 25 - FRANÇAIS; Avant de commencer; Configurez
FRANÇAIS 2 RFX9400 Guide de démarrage Avant de commencer Le Pronto Wireless Extender (le Prolongateur) est un élément important du système Pronto. Il permet de contrôler dans toute la maison l’équipement audio/vidéo via RF. Pour utiliser le Prolongateur dans un réseau Pronto sans fil : • Configurez ...
Page 26 - Déballage du Prolongateur
RFX9400 Guide de démarrage 3 Déballage du Prolongateur Pronto Wireless Extender Face avant Antenne Commutateur deConfiguration • En mode Stand-alone (autonome) : modifie le canal RF. • En mode Network (réseau) : indique le type de connexion. Entrée du courant 4 sortiesinfrarouges 4 commutateurs DIPp...
Page 27 - Configuration du Prolongateur; Pour configurer le Prolongateur autonome :; adaptateur secteur; Utilisez les paramètres de; commutateur; par défaut du Prolongateur :; Configurez le; fichier de configuration; du Control Panel (le Panneau de Commande) de; filaire; • Connexion; sans fil
RFX9400 Guide de démarrage FRANÇAIS 4 Configuration du Prolongateur Remarque Avant de commencer la configuration du Prolongateur, vérifiez s’il existe des mises à jour demicrologiciel disponibles à la section de Downloads du site www.pronto.philips.com . Reportez-vous au chapitre ‘Mise à jour du mic...
Page 29 - Configuration du Prolongateur par un routeur; Le Configuration Tool s’ouvre dans le navigateur.; Installation du Prolongateur; Connexion du Prolongateur à l’équipement audio/vidéo; • un émetteur IR double
RFX9400 Guide de démarrage FRANÇAIS 6 Configuration du Prolongateur par un routeur Dès que le Prolongateur est installé et connecté à l’équipement audio/vidéo externe, vous pouvez le configurer par un routeur. 1 Connectez le Prolongateur au routeur, puis le routeur au PC, tel qu’indiqué ci-dessous. ...
Page 30 - • un câble IR avec mini prise.; Ajustement du niveau de puissance des sorties IR; Qu’indiquent les voyants ?; Il existe un conflit IP; Si le problème persiste, vérifiez les paramètres du routeur.; Impossible de déterminer l’adresse IP; • Lors de; l’utilisation; moyen d’un câble Ethernet droit.
RFX9400 Guide de démarrage 7 Voyants Couleurs Voyant Ethernet Voyant WiFi Voyant Busy (occupé) L’adresse IP du Prolongateur esten cours de recherche. Vert clignotant L’adresse IP du Prolongateur esten cours de recherche. Le Prolongateur est occupé, en trainde traiter un code court ou unecourte macro...
Page 31 - configuration; mais un protocole DHCP.; Le Prolongateur n’arrive pas à communiquer avec le réseau sans fil; Le voyant WiFi est rouge; Il existe des ID de Prolongateur dupliqués
RFX9400 Guide de démarrage FRANÇAIS 8 • Lors de la configuration du Prolongateur : vérifiez que le PC n’utilise pas une adresse IP fixe mais un protocole DHCP. • Vérifiez que le routeur est sous tension. Si le routeur utilise un protocole DHCP, il est impossible de déterminer l’adresse IP du Prolong...
Page 32 - Réinitialisation du Prolongateur; Mise à jour du micrologiciel; Mise à jour du Prolongateur au moyen du câble de configuration; Le
RFX9400 Guide de démarrage 9 Le voyant Busy (occupé) vert clignote lorsque le Control Panel n’est pas encours d’utilisation Cet incident n’indique pas que le Prolongateur ne fonctionne pas correctement. Il indique que leProlongateur est en cours de fonctionnement avec un Control Panel différent. Dès...
Page 33 - dans le volet de navigation gauche.; Spécifications; Guide de démarrage du Pronto Wireless Extender
RFX9400 Guide de démarrage FRANÇAIS 10 4 Dans le menu Tools (Outils), sélectionnez Extender Discovery . L’Extender Discovery Tool apparaît, affichant la liste de tous les Prolongateurs détectés dans leréseau Pronto. 5 Sélectionnez le Prolongateur que vous souhaitez configurer, puis cliquez sur le bo...
Page 34 - FCC Compliancy; Notice for Canada / Remark pour le Canada; This class B digital apparatus complies with Canadian ICES-003.; IFU Approbation / Safety Content RFX9400
FCC Compliancy This device complies with Part 15 of the FCC Rules. Operation is subject to the following twoconditions: • This device may not cause harmful interference.• This device must accept any interference received, including interference that may cause undesired operation. This equipment has ...
Page 35 - Regulations According to R&TTE; Declaration; ii
Regulations According to R&TTE Declaration Hereby, Philips Consumer Electronics, BL Home Control declares that RFX9400 is in compliance withthe essential requirements and other relevant provisions of Directive 1999/5/EC: • Radio: ETSI EN 300 328• EMC: ETSI EN 301 489-1, ETSI EN 301 489-17• Safet...
Page 36 - Marking; iii
Czech Likvidace starého výrobku Tento výrobek je navržen a vyroben z materiálů a komponentů nejvyšší kvality, které je možné recyklovat aopětovně použít. Pokud je výrobek označen tímto symbolem přeškrtnutého kontejneru, znamená to, že výrobek podléhásměrnici EU 2002/96/EC. Informujte se o místním sy...
Page 37 - iv
French Mise au rebut des produits en fin de vie Ce produit a été conçu et fabriqué avec des matériaux et composants recyclables de haute qualité. Le symbole d’une poubelle barrée apposé sur un produit signifie que ce dernier répond aux exigences de ladirective européenne 2002/96/EC.Informez-vous aup...