Page 6 - Only use the powerplug supplied.; E N G L I S H
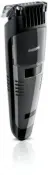
Introduction Dear customer, you have made the right choice!Your new maintenance-free Philips vacuum beard trimmer combinesinnovative technology and outstanding comfor t of use.The integrated vacuum mechanism absorbs cut-off hairs during use andguarantees a clean washbasin after use.The contour-follo...
Page 7 - Charging; It will take approx. 10 hours to fully charge the battery.; Optimising the lifetime of the rechargeable battery.; Do not charge the appliance for more than 24 hours.
◗ Do not use the appliance when the cutting unit is damaged orbroken, as this may cause injury. ◗ Do not use a damaged powerplug. ◗ If the powerplug is damaged, always have it replaced by one of theoriginal type in order to avoid a hazard. ◗ Make sure the appliance and the powerplug do not get wet. ...
Page 8 - Do not recharge the appliance between trimming sessions.; Preparing for use; If the batter y is low, you can also use the appliance from the mains:; Absorbing cut hairs
- Do not recharge the appliance between trimming sessions. - Discharge the batter y completely twice a year by letting the motorrun until it stops. Then fully recharge the batter y. - If the appliance has not been used for a long period of time, it mustbe fully recharged. Preparing for use Always co...
Page 9 - Trimming with comb attachment; Turn the adjustment ring (Precision Zoom Lock; Resulting hair length; Trimming length settings
B To ensure optimal functioning of the vacuum system, do not cut offmore than approx. 7mm of your overall beard length at a time. If youwant to cut your beard shorter, repeat the process one or more times. Trimming with comb attachment 1 Turn the adjustment ring (Precision Zoom Lock ` ) to the desir...
Page 10 - Full beards and single hairs.; Cleaning; Switch the appliance off.; Appliance; Remove the comb attachment.
Trimming at the unique 'stubble look' setting ◗ Use the trimmer with the comb attachment set to length setting1. This allows you to create a 'stubble look' (fig. 5). Trimming without comb attachment Full beards and single hairs. 1 Remove the comb attachment (fig. 6). B Never pull at the flexible top...
Page 11 - Follow the steps below to remove the batter y.
2 Remove the cutting unit (fig. 11). 3 Clean the cutting unit and the inside of the appliance with thebrush supplied (fig. 12). 4 Reattach the cutting unit and the comb attachment to theappliance (fig. 13). Replacement Worn or damaged cutting units and filters should only be replaced withoriginal Ph...
Page 12 - or contact the Philips Customer Care; Troubleshooting
2 Separate the two housing parts by means of a screwdriver (fig. 15). 3 Pull out the printed circuit board (fig. 16). 4 Remove the rechargeable battery by means of a screwdriver anddetach it by bending or turning it several times until theconnections break (fig. 17). 5 Dispose of the battery and the...
Page 14 - D E U T S C H
Einleitung Sehr geehr ter Kunde, Sie haben die richtige Wahl getroffen!Ihr neuer ölungsfreier Philips Bar tschneider verbindet innovative Technikmit besonderem Bedienkomfor t.Der integrier te Vakuummechanismus fängt während des Schneidens dieabgeschnittenen Bar thaare auf. So bleibt das Waschbecken ...
Page 15 - Den Akku aufladen; Nach ca. 10 Stunden ist der Akku voll aufgeladen.
◗ Verwenden Sie nur das mitgelieferte Netzteil. ◗ Das Netzteil enthält einen Transformator. Ersetzen Sie dasNetzteil keinesfalls durch einen anderen Stecker, da dies denBenutzer gefährdet. ◗ Benutzen Sie das Gerät nicht, wenn die Schneideeinheitbeschädigt oder zerbrochen ist (Verletzungsgefahr!). ◗ ...
Page 16 - Die Lebensdauer des Akkus optimieren.; Lassen Sie das Gerät nicht länger als 24 Stunden am Netz.; Vorbereitung zum Gebrauch
B Für einmaliges Schneiden muss das Gerät mindestens 90 Minuten langgeladen werden. Die Lebensdauer des Akkus optimieren. - Verwenden Sie den Bar tschneider nach dem ersten Aufladen solange, bis sich der Akku vollständig entleer t hat. - Lassen Sie das Gerät nicht länger als 24 Stunden am Netz. - La...
Page 17 - Drehen Sie den Zoom-Ring (Precision Zoom Lock
Auffangen abgeschnittener Barthaare Sobald Sie das Gerät einschalten, wird das Saugsystem automatischaktivier t. Bei jeder Ar t der Anwendung (beim Schneiden mit oder ohneKammaufsatz sowie beim Konturenschnitt) werden die abgeschnittenenHaare aufgefangen. Die bewegliche Haarführung folgt den Konture...
Page 18 - Verwendung ohne den Kammaufsatz; Vollbär te und einzelne Bar thaare.; Reinigung; Verbleibende Barthaarlänge; Schnittlängeneinstellungen
1 8 3-Tage-Bart-Einstellung ◗ Mit dem Kammaufsatz in Einstellung 1 können Sie einen 3-Tage-Bart kreieren (Abb. 5). Verwendung ohne den Kammaufsatz Vollbär te und einzelne Bar thaare. 1 Nehmen Sie den Kammaufsatz vom Gerät (Abb. 6). B Ziehen Sie niemals an der beweglichen Spitze des Kammaufsatzes,son...
Page 19 - Die Haarauffangkammer; Schalten Sie das Gerät aus.; Das Gerät; Nehmen Sie den Kammaufsatz vom Gerät.; Ersatzteile
Die Haarauffangkammer 1 Schalten Sie das Gerät aus. 2 Nehmen Sie die Haarauffangkammer ab und entfernen Sie dieBarthaare durch Ausschütteln oder Ausbürsten (Abb. 8). 3 Zur besonders gründlichen Reinigung - und zur Erhaltung deroptimalen Saugleistung - nehmen Sie den Filter ab.. (Abb. 9). 4 ... und r...
Page 20 - Entnehmen des Akkus; Den Akku können Sie wie folgt entfernen:; Garantie und Kundendienst
2 0 Entnehmen Sie den Akku, bevor Sie das Gerät entsorgen. Der Akkugehör t nicht in den Hausmüll, sondern muss an einer offiziellenSammelstelle abgegeben werden. Sie können das Gerät auch an einPhilips Ser vice Center geben. Dor t wird der Akku umweltgerechtentsorgt. Entnehmen des Akkus Wenn der Akk...
Page 21 - Problembehebung; Ist die Haarauffangkammer oder der Filter nass?
2 1 Problembehebung Der Bar tschneider funktionier t nicht, wenn er eingeschaltet wird. Esleuchtet auch keine Kontrolllampe: 1 Wenn der Akku vollkommen leer ist, funktioniert derBartschneider beim Einschalten des Geräts nicht, und es leuchtetauch keine Lampe. Laden Sie das Gerät vollständig auf (sie...
Page 22 - Bruk kun strømpluggen som følger med apparatet.; N O R S K
Innledning Kjære kunde, du har gjor t et riktig valg!Din nye, vedlikeholdsfrie Philips vakuum-skjeggtrimmer kombinerer nyteknologi med overlegen brukskomfor t.Den innebygde vakuummekanismen suger opp hår som blir klippet oggaranterer ren vaskeser vant etter bruk.Apparatet har en kam som følger ansik...
Page 23 - Lading; Sørg for at apparatet er slått av før du begynner å lade det.; Optimalisere levetiden til det oppladbare batteriet.; Lad ikke maskinen i mer enn 24 timer.
◗ Ikke bruk maskinen hvis kutteenheten er skadet eller ødelagt, dadet kan medføre personskade. ◗ Ikke bruk strømpluggen hvis den er skadet. ◗ Dersom strømledningen er ødelagt, må du alltid sørge for å bytteden ut med en av original type for å unngå at farlige situasjoneroppstår. ◗ Pass på at det ikk...
Page 24 - Hvis maskinen ikke har vær t brukt på lenge, må den fullades.; Før bruk; Bruk ikke maskinen med strøm når batteriet er fulladet.; Suge opp hår som er klippet
- Hvis maskinen ikke har vær t brukt på lenge, må den fullades. Før bruk Gre alltid skjegget eller bar ten med en fintannet kam før du star tertrimmingen. Bruke apparatet Bruke apparatet med ledning (gjelder kun QT4060) Bruk ikke maskinen med strøm når batteriet er fulladet. B Hvis batteriet er dårl...
Page 25 - Trimming med kam; Vri innstillingsringen (Precision Zoom Lock; Skjegglengde etter trimming; Lengdeinnstillinger
Trimming med kam 1 Vri innstillingsringen (Precision Zoom Lock ` ) til ønsket lengdeinnstilling (se tabellen) (fig. 3). ◗ Innstillingen vises i vinduet under innstillingsringen (Precision Zoom Lock ` ). Hvis det er første gang du trimmer skjegget eller barten, begynner du med maksimal lengdeinnstill...
Page 26 - Trimming uten kam; Helskjegg og enkelthår.; Rengjøring; Fjern kammen fra maskinen.
Trimming uten kam Helskjegg og enkelthår. 1 Fjern kammen fra maskinen (fig. 6). B Trekk aldri i den bøyelige, øverste delen av kammen. Ta i stedet tak iden nederste delen. 2 Bruk kontrollerte bevegelser og berør håret lett med trimmeren(fig. 7). Rengjøring Maskinen tåler kun tørr rengjøring.Bruk ikk...
Page 27 - Batteriene tas ut ved å følge trinnene nedenfor.
4 Sett kutteenheten og kammen tilbake på maskinen igjen (fig. 13). Utskifting Slitte eller ødelagte kutteenheter og filtre må bare skiftes ut medoriginale Philips-deler, som er å få hos din forhandler eller godkjentePhilips ser vicesenter. Miljø ◗ Ikke kast apparatet sammen med vanlig husholdningaav...
Page 28 - Trimmeren virker ikke når den er slått på, og ingen av lysene tennes:
Garanti og service Hvis du trenger informasjon eller hvis du har et problem medproduktet, kan du besøke Philips' websider på www.philips.com . Du kan også kontakte Philips Kundetjeneste i ditt land (du finnertelefonnummeret i garantiheftet). Hvis det ikke finnes en slikKundetjeneste i landet hvor du...
Page 29 - Använd endast den medföljande nätadaptern.; S V E N S K A
Introduktion Bästa kund - du har valt rätt!Din nya, underhållsfria skäggtrimmer med uppsugningsfunktion frånPhilips är skapad med innovativ teknik och är otroligt bekväm attanvända.Den integrerade uppsugningsmekanismen tar hand om allt avklippt hår,och garanterar att tvättstället är fritt från skägg...
Page 30 - Laddning; Det tar cirka 10 timmar för batteriet att laddas helt.; Optimera livslängden på det uppladdningsbara batteriet.; Ladda inte apparaten längre än 24 timmar.
◗ Nätadaptern innehåller en transformator. Skär inte av nätadapernför att byta ut den mot en annan adapter, eftersom det kommeratt orsaka en farlig situation. ◗ Använd inte trimmern när trimsaxen är skadad eller trasig,eftersom detta kan skada dig. ◗ Använd inte en skadad nätadapter. ◗ Om stickpropp...
Page 31 - Före användning
- Låt inte nätadaptern sitta i vägguttaget hela tiden. - Ladda inte upp apparaten mellan varje trimning. - Ladda ur batteriet helt två gånger om året genom att låta motorngå tills den stannar. Ladda sedan upp batteriet helt igen. - Om trimmern inte använts på länge, måste den laddas upp heltigen. Fö...
Page 32 - Trimning med kamtillsats; Vrid justeringsringen (Precision Zoom Lock; Hårlängd efter trimning; Inställning av trimningslängd
så att inte sugförmågan minskar (se även kapitlet 'Rengöring', avsnittet'Håruppsamlingskammaren'). B För att uppsugningsfunktionen ska fungera på bästa sätt, bör du inteklippa av mer än cirka 7 mm av skäggets längd åt gången. Om du villklippa skägget kortare måste du upprepa processen flera gånger. ...
Page 33 - Helskägg och enstaka hår.; Rengöring
Trimning med inställning för 'skäggstubbseffekt' ◗ Använd trimmern med kamtillsatsen inställd på 1. Det ger en'skäggstubbseffekt' (bild 5). Trimning utan kamtillsats Helskägg och enstaka hår. 1 Ta av kamtillsatsen (bild 6). B Dra aldrig i den mjuka/flexibla överdelen på kammen. Dra alltid i denkraft...
Page 34 - Sätt tillbaka trimsaxen och kamtillsatsen på trimmern (bild 13).; Byte; Anslut inte trimmern till nätet igen när du har öppnat den.
3 Rengör trimsaxen och apparatens insida med den medlevereradeborsten (bild 12). 4 Sätt tillbaka trimsaxen och kamtillsatsen på trimmern (bild 13). Byte Utslitna eller skadade trimsaxar och filter ska endast ersättas medPhilishave-originaldelar, som du kan köpa hos din lokala återförsäljareeller ett...
Page 35 - Felsökning; Är hårbehållaren eller filtret våta?
4 Lossa det laddningsbara batteriet med hjälp av en skruvmejseloch ta bort det genom att böja eller vrida det flera gånger tillsanslutningarna går sönder (bild 17). 5 Deponera batteriet och de övriga delarna på ett sätt som inteskadar miljön. Anslut inte trimmern till nätet igen när du har öppnat de...
Page 37 - Käytä vain laitteen mukana tulevaa verkkolaitetta.; S U O M I
Johdanto Hyvä asiakkaamme, olet tehnyt oikean valinnan!Uudessa Philips-par tatrimmerissä ei tar vita erityistä huoltoa, ja siinäyhdistyvät innovatiivinen tekniikka ja erinomainen käyttömukavuus.Sisäänrakennettu tyhjiömekanismi imee leikatut par takar vat ajon aikana,ja näin pesuallas pysyy puhtaana....
Page 38 - Lataus; Työnnä pistoke laitteeseen ja liitä verkkolaite pistorasiaan.; Akun käyttöiän pidentäminen; Älä pidä verkkolaitetta pistorasiassa jatkuvasti.
3 8 ◗ Älä käytä laitetta, jos sen teräyksikkö on vaurioitunut, silläkäyttämisestä voi tuolloin aiheutua vahinkoa. ◗ Älä käytä vahingoittunutta verkkolaitetta. ◗ Jos verkkolaite on vahingoittunut, vaihda sen tilalle omanturvallisuutesi vuoksi vain alkuperäistyyppiä oleva verkkolaite. ◗ Huolehdi siitä...
Page 39 - Käyttöönotto; Kampaa par ta tai viikset aina ennen tasaamisen aloittamista.; Käyttö
3 9 - Käytä laitetta kaksi ker taa vuodessa niin kauan, että moottori lakkaatoimimasta. Lataa sitten akku uudelleen. - Jos laite on ollut pitkään käyttämättä, lataa se uudelleen täyteen. Käyttöönotto Kampaa par ta tai viikset aina ennen tasaamisen aloittamista. Käyttö Parran muotoilu verkkojännitett...
Page 40 - Käyttö ohjauskamman kanssa; Kierrä säätörengasta (Precision Zoom Lock; Parran pituus; Parranpituuden asetukset
4 0 Käyttö ohjauskamman kanssa 1 Kierrä säätörengasta (Precision Zoom Lock ` ) haluamasi parran pituuden kohdalle (katso taulukkoa) (kuva 3). ◗ Asetus näkyy säätörenkaan (Precision Zoom Lock ` ) alla olevasta ikkunasta. Jos käytät laitetta ensimmäistä kertaa, aloita suurimmasta pituudesta (9). 2 Par...
Page 41 - Käyttö ilman ohjauskampaa; Täysparrat ja yksittäiset kar vat.; Puhdistus; Katkaise laitteesta virta.; Laite
4 1 Käyttö ilman ohjauskampaa Täysparrat ja yksittäiset kar vat. 1 Irrota ohjauskampa (kuva 6). B Älä vedä ohjauskampaa taipuisasta yläosasta. Vedä ainaohjauskamman pohjasta. 2 Liikuta laitetta tasaisesti ja rauhallisesti ja kosketa partakarvaakevyesti partatrimmerillä (kuva 7). Puhdistus Laitteen s...
Page 42 - Älä liitä laitetta pistorasiaan sen jälkeen kun laite on avattu.
4 2 4 Kiinnitä terä ja ohjauskampa takaisin laitteeseen (kuva 13). Varaosat Kuluneiden tai vahingoittuneiden terien ja suodattimien tilalle saa vaihtaavain alkuperäiset Philishave-varaosat, joita on saatavissa myyjältä taiPhilips Kodinkoneiden valtuuttamista huoltoliikkeistä. Ympäristöasiaa ◗ Älä hä...
Page 43 - tai ota yhteys; Tarkistusluettelo; Onko partakarvalokero tai suodatin märkä?
4 3 Takuu & huolto Jos haluat lisätietoja tai jos laitteen suhteen tulee ongelmia, katsoPhilipsin www-sivuja osoitteesta www.philips.com tai ota yhteys Philipsin asiakaspalveluun (puhelinnumero löytyy takuulehtisestä). Voitmyös kääntyä lähimmän Philips-kauppiaan puoleen tai ottaa suoraanyhteyden...
Page 44 - Brug kun det medfølgende stik.; DA N S K
Introduktion Kære kunde, du har netop truffet det helt rigtige valg!Din nye vedligeholdelsesfrie Philips vakum skægtrimmer kombinererinnovativ teknologi med fremragende komfor t og bruger venlighed.Det integrerede vakum-system absorberer de afklippede skæghår oggaranterer en ren håndvask.Den konturf...
Page 45 - Opladning; Sørg for, at trimmeren er slukket, inden opladningen påbegyndes.; Forlængelse af batteriets levetid; Lad aldrig skægtrimmeren stå til opladning i mere end 24 timer.
◗ Undlad at bruge skægtrimmeren, hvis skærenheden er beskadigeteller defekt, da det kan medføre personskade. ◗ Brug aldrig et beskadiget netstik. ◗ Hvis netstikket beskadiges, må det kun udskiftes med et originaltstik af samme type for at undgå enhver risiko ved efterfølgendebrug. ◗ Sørg for, at hve...
Page 46 - Klargøring; Brug ikke trimmeren via lysnettet, når batteriet er fuldt opladet.; Absorbering af skæghår
- Lad ikke netstikket sidde konstant i stikkontakten. - Oplad ikke trimmeren mellem hver trimning. - Aflad batteriet helt to gange om året ved at lade trimmeren køre, tilmotoren stopper. Genoplad herefter batteriet. - Hvis trimmeren ikke har været brugt i en længere periode, skalbatteriet oplades he...
Page 47 - Trimning med påsat kam; Drej justeringsringen (Precision Zoom Lock; Skæglængde efter trimning; Indstilling af trimmelængden
B For at sikre optimal vakum-effekt, skal du højst skære 7 mm afskæglængden ad gangen. Skal skægget være kortere, gentagesprocessen en eller flere gange. Trimning med påsat kam 1 Drej justeringsringen (Precision Zoom Lock ` ) til den ønskede trimme-længdeindstilling (se tabellen) (fig. 3). ◗ Den val...
Page 48 - Trimning uden kam; Fuldskæg og enkle hår.; Rengøring
Unik indstilling til det rå "skægstubbe-look" ◗ Brug trimmeren med påsat kam og længdeindstilling 1. Dervedopnår du det trendy "skægstubbe-look" (fig. 5). Trimning uden kam Fuldskæg og enkle hår. 1 Tag kammen af (fig. 6). B Træk aldrig i den øverste, fleksible del af kammen. Træk kun...
Page 49 - Slut aldrig strøm til apparatet igen, efter det har været åbnet.
2 Tag skærenheden af (fig. 11). 3 Rengør skærenhed og apparatets inderside med den medfølgendebørste (fig. 12). 4 Sæt skærenhed og kam tilbage på plads (fig. 13). Udskiftning En slidt eller beskadiget skærenhed eller filter må kun udskiftes medoriginale Philips dele, som fås eller bestilles hos din ...
Page 50 - Reklamationsret & service; eller det lokale Philips Kundecenter; Fejlsøgning; Er skægkammeret eller filteret vådt?
4 Tag det opladelige batteri ud ved hjælp af en skruetrækker - ogfrigør det ved at bøje/dreje det et par gange, til tilslutningerneknækker (fig. 17). 5 Skil dig af med batteri og de øvrige dele på en miljømæssig sikkerog forsvarlig måde. Slut aldrig strøm til apparatet igen, efter det har været åbne...