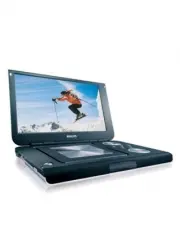
Page 4 - English; FUNCTIONAL OVERVIEW
English FUNCTIONAL OVERVIEW Main unit controls ( see figure 1 ) 1 3 , 4 , 1 , 2 ..........Up / down / left / right cursor OK .........................Confirm selection 2 OSD ....................... O n S creen D isplay on / off MENU .................Display MENU page VIDEO OUT .........Selection vid...
Page 5 - IR; Left of player; VOLUME; Digital audio output jack; COMPONENT VIDEO; .Component video output jack; DC IN 9V; CAUTION
FUNCTIONAL OVERVIEW Front of player ( see figure 1 ) 5 POWER/CHG ......Power and charging indicator IR ..........................Remote sensor Left of player ( see figure 1 ) 6 ON . POWER . OFF .....Switche the player on / off 7 ........... Headphones jack Right of player ( see figure 1 ) 8 VOLUME F...
Page 6 - or next
REMOTE CONTROL Remote controls ( see figure 2 ) 1 3 , 4 , 1 , 2 ..........Up / down / left / right cursor OK .........................Confirms selection 2 VOL+ / - ................Volume control 3 J( / § ... ...........For previous ( J( ) or next ( § ) chapters, tracks or titles ; ... .................
Page 8 - Zero Bright Dot
INTRODUCTION Playable disc formats In addition to DVD-Video disc, you will also be able to play all Video CDs and audio CDs (including CDR, CDRW, DVD ± R and DVR ± RW). DVD-Video Depending on the material on the disc (a movie, video clips, a drama series, etc.) these discs may have one or more Title...
Page 9 - heated. This is normal
GENERAL INFORMATION Power Sources This unit operates on a supplied AC adaptor, car adapter, or a rechargeable battery pack. • Make sure that the input voltage of the AC adaptor is in line with the local voltage. Otherwise, the AC adaptor and unit may be damaged. • Do not touch the AC adaptor with we...
Page 11 - Using the AC / DC adaptor; Using the car adapter; Batteries contain chemical substances, so they
PREPARATIONS Power supply Using the AC / DC adaptor Connect the supplied adapter to the set and the main power supply (as shown). TIP To avoid damage to the player, switch off before plugging or unplugging the AC adaptor. Using the car adapter Connect the supplied car adapter to the set and the car ...
Page 12 - * Rechargeable batteries have a limited
PREPARATIONS Attaching and charging the battery pack* 1 Switch off the set. Attach the battery pack as shown. 2 Connect the supplied adapter to the set andthe main power supply (as shown). Chargeuntil the red indicator turns off (approximately4.5 - 6.5 hours when unit is charged frompower off). TIP ...
Page 13 - PHONE 1; Connecting additional equipment
PREPARATIONS Connections Connecting headphones Connect the headphones into the PHONE 1 or the PHONE 2 jack of your set. Connecting additional equipment • Turn off your set before connecting to any additional equipment.• You can connect the player to a TV or an amplifier to enjoy DVDs or karaoke. AV ...
Page 14 - VIDEO OUT; On the DVD player panel, press; VIDEO OUT; TIP
PREPARATIONS Digital Audio Out S Video On the DVD player panel, press VIDEO OUT to select A/V OR S-VIDEO OUT Component Video On the DVD player panel, press VIDEO OUT to select COMPONENT OUT (YPBPR) orCOMPONENT OUT (YCBCR) TIP • You can also make use of the COAXIAL jack for digital audio output.• Ple...
Page 15 - appears on; Remote control operation; various settings and operations.
GENERAL EXPLANATION About this manual This manual gives the basic instructions for operating this DVD player. Some DVD discs however are produced in a way that requires specificoperation or allows only limited operation during playback. In these casesthe player may not respond to all operating comma...
Page 17 - keys to highlight your; Playing an audio or video CD disc; track and press; OK; to play the track. Press; RETURN; to go back to menu; Playing DivX® disc
BASIC FUNCTIONS Playing a DVD disc After switching on, inserting the disc and closing the door, playback startsautomatically. The screen shows the type of disc loaded. The disc may invite youto select an item from a menu. Use the 3 , 4 , 1 , 2 keys to highlight your selection,and press OK . Note: Si...
Page 18 - BASIC FUNCTIONS; Playing a JPEG discs; MENU
BASIC FUNCTIONS Playing a WMA/ MP3-CD The following playback features are available for WMA/MP3-CDs. Please refer to the corresponding sections for more information.Volume control, skipping tracks, searching, repeat, shuffle, etc.Use the 3 , 4 , 1 , 2 keys to highlight your selected music folder. Pr...
Page 19 - Search
GENERAL FEATURES Moving to another title / track / chapter When a disc has more than one title or track, you canmove to another title/track/chapter as follows:• Press § briefly during play to select the next title/ track / chapter. • Press J ( briefly during play to step back to the previous title/t...
Page 21 - GENERAL FEATURES; AB; Play modes; Volume Control; MONITOR; Sound; SOUND
GENERAL FEATURES Repeat A > B To repeat or loop a sequence in a title:• Press A > B at your chosen starting point; A appears on the screen. • Press A > B again at your chosen end point; AB appears on the display, and the repeat sequence begins. • To exit the sequence, press A > B . Play ...
Page 23 - OSD OPERATIONS; OSD
OSD OPERATIONS In addition to using remote control keys, you can also change disc playbackoptions from OSD. 1 Press OSD during disc playback. A list of features is shown. 2 Use the 3 4 keys to highlight your selection. When the cursor highlights these settings, press OK to: FILE key in desired file ...
Page 25 - Preferences; Password Setup
SETUP OPERATIONS Audio Setup When the cursor highlights these settings, press OK to: SPEAKER SETUP select speaker options DOLBY DIGITAL SETUP select dobly sound options CHANNEL EQUALIZER select equalizer options 3D PROCESSING select surround sound options Press 1 to abort current setting or go back ...
Page 26 - TROUBLESHOOTING
TROUBLESHOOTING If it appears that the DVD-Video player is faulty, first consult this checklist. It may be that something has been overlooked. WARNINGUnder no circumstances should you try to repair the set yourself as thiswill invalidate the guarantee.If a fault occurs, first check the points listed...
Page 28 - TECHNICAL DATA
TECHNICAL DATA Dimensions 26 x 18 x 3.0 cm10.2 x 7 x 1.2 inches Weight 1.13 kg / 2.48 lb Power supply DC 9V 2.2A Power Consumption 30W Operating temperature range 0 - 50°C (32 ~ 122°F) Laser wavelength 650nm Video system NTSC / PAL / AUTO Frequency response 20Hz ~ 20KHz ± 1dB Signal/noise ratio ≥ 85...
Page 29 - Important notes for users in the UK; Mains plug; Remove fuse cover and fuse.; How to connect a plug; Connect the blue wire to the terminal marked N or coloured black.
Important notes for users in the UK Mains plug This apparatus is fitted with an approved 13 Amp plug. To change afuse in this type of plug proceed as follows: 1. Remove fuse cover and fuse. 2. Fix new fuse which should be a BS1362 5 Amp, A.S.T.A. or BSIapproved type. 3. Refit the fuse cover. If the ...
Page 30 - Veuillez vous renseigner sur les systèmes locaux de collecte des
COPYRIGHT INFORMATION The making of unauthorized copies of copy-protected material, including computer programmes, files, broadcasts and sound recordings, may be aninfringement of copyrights and constitute a criminal offence. This equipmentshould not be used for such purposes.. DISPOSAL OF YOUR OLD ...
Page 31 - Printed in China; CLASS 1
http://www.philips.com Printed in China CLASS 1 LASER PRODUCT Specifications are subject to change without notice. Trademarks are the property of Koninklijke Philips Electronics N.V. or their respective owners 2005 © Koninklijke Philips Electronics N.V. All rights reserved. PET1002