Page 2 - Canada
2 EN Canada English: This digital apparatus does not exceed the Class B limits for radio noise emissions from digital appar atus as set out in the Radio Interference Regulations of the Canadian Depar tment of Communications.This Class B digital apparatus complies with Canadian ICES-003. Français: Ce...
Page 3 - Contents
3 English EN Contents 1 Important 6 Impor tant Safety Instructions 6 Notice 9 2 Your portable DVD player 12 Introduction 12 What’s in the box 12 Over view of the main unit 13 3 Get started 15 Preparation 15 Connect a main unit as the second screen 16 Connect power 16 4 Use your player 18 Turn on 18 ...
Page 6 - Important; Important Safety Instructions
6 1 Important Important Safety Instructions a Read these instructions. b Keep these instructions. c Heed all warnings. d Follow all instructions. e Do not use this apparatus near water. f Clean only with dry cloth. g Do not block any ventilation openings. Install in accordance with the manufacturer’...
Page 8 - Hearing safety
8 Warning Never remove the casing of this appar atus. Never lubr icate any par t of this appar atus. Never place this appar atus on other elec tr ical equipment . .HHSWKLVDSSDU DWXVDZD\IURPGLUHF WVXQOLJKWQDNHGÁDPHVRUKHDW Never look into the laser beam inside this appar atus. Ensure that yo...
Page 9 - Notice
9 Do not tur n up the volume so high that you can’t hear what’s around you.You should use caution or tempor arily discontinue use in potentially ha zardous situations. Do not use headphones while oper ating a PRWRUL]HGYHKLFOHF\FOLQJVNDWHERDUGLQJHWFLWPD\FUHDWHDWUDIÀF ha zard and is illegal in man...
Page 10 - Disposal of your old product and batteries
10 Environmental information All unnecessar y packaging has been omit ted. We have tried to make the packaging easy to separ ate into three materials: cardboard (box), polystyrene foam (buf fer) and polyethylene (bags, protec tive foam sheet.) Your system consists of materials which can be recycled ...
Page 12 - Your portable DVD player; Introduction
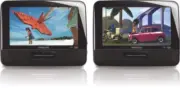
12 2 Your portable DVD player &RQJUDWXODWLRQVRQ\RXUSXUFKDVHDQGZHOFRPHWR3KLOLSV7RIXOO\EHQHÀW from the suppor t that Philips offers, register your product at www.philips.com/welcome. Introduction Your por table DVD player plays digital video discs that conform to the universal DVD Video standard. ...
Page 13 - Overview of the main unit
13 Overview of the main unit a BRIGHTNESS Adjusts screen brightness. b SETUP Accesses or exits the setup menu. c , Skips to the previous or nex t title, chapter, or tr ack . d OPEN Opens the disc compar tment. e DISC MENU For DVD, accesses or exits disc menu. For VCD, tur ns on or of f PBC...
Page 15 - Get started; Preparation
15 3 Get started Caution Use the controls only as s tated in this user manual. Always follow the ins tr uc tions in this chapter in sequence. If you contact Philips, you will be asked for the model and serial number of your apparatus. The model number and serial number are on the back of the app...
Page 16 - Connect a main unit as the second screen; Connect power
16 Connect a main unit as the second screen Caution Tur n of f the main units before you connec t a main unit as the second screen. You can either watch movies individually on each por table DVD player or connect the DVD players together to watch one movie simultaneously on both players.To view th...
Page 18 - Use your player; Turn on; Play discs
18 4 Use your player Turn on 1 Slide the ON/OFF switch on the main units to the ON position. Select OSD language You can choose a diffrent language for the on-screen display text. 1 Slide the DVD/AV IN switch to DVD . 2 Press SETUP . The setup menu appears. » 3 Selec t [General Setup] > [OSD Lang...
Page 19 - Play options
19 To selec t the previous/nex t item, press or . To star t search within video/audio, press or once or more. Play options 1 During play, press OPTIONS to selec t some play options. 2 Follow the on-screen instr uc tions. English EN
Page 20 - Adjust settings; Set the main unit
20 5 Adjust settings Set the main unit To maximize your play experience, use SETUP WRÀQHWXQH\RXUVHWWLQJV 1 In DVD mode, press SETUP . The setup menu is displayed. » 2 Press to selec t an option and press / OK WRFRQÀUP [General Setup] [OSD Language] Selec t on-screen display language. [Screen Saver] ...
Page 21 - Use more of your player; Connect additional equipment; TV
21 6 Use more of your player Connect additional equipment Caution Tur n of f your player before connec ting to any additional equipment . <RXFDQFRQQHFWWKHSOD\HUWRD79RUDQDPSOLÀHUWRHQMR\'9'VRU Karaoke.Match the color of the AV cables (the AV cable connected to TV is not supplied) with the jacks: ...
Page 22 - Connect power from household source
22 Connect power from household source Caution Risk of produc t damage! Ensure that the power supply voltage cor responds to the voltage pointed on the back or the under side of the player. Risk of elec tr ic shock ! When you unplug the AC adaptor, always pull the plug from the socket . Never pu...
Page 23 - Product information
23 7 Product information Note Produc t infor mation is subjec t to change without pr ior notice. Dimensions- Main unit (each) 199 x 38 x 153 mm Weight- Main unit (each) 1.2 kg Power supply Input: 10 0 -240V~ 50/60HzOutput: DC 9V 1A Power consumption 9 W Oper ating temper ature r ange 0 - 45°C Lase...
Page 24 - Troubleshooting
24 8 Troubleshooting Warning Risk of elec tr ic shock . Never remove the casing of the player. To keep the warranty valid, never tr y to repair the system yourself. If you encounter problems when using the player, check the following points before requesting ser vice. If the problem remains unsolv...