Page 3 - Contents
1 EN Contents 1 Important 2 Safety 2 Notice 2 2 Your Micro Music System 4 Introduction 4 What's in the box 4 Over view of the main unit 5 Over view of the remote control 6 3 Get started 7 Connect speakers 7 Connect power 7 Prepare the remote control 7 Demonstrate the features 8 Power on 8 Set the cl...
Page 4 - Important; Safety; Notice
2 EN 1 Important Safety Read and understand all instructions before you use this micro music system. If damage is caused by failure to follow the instructions, the warranty does not apply. This 'bolt of lightning' indicates uninsulated material within the device may cause an electrical shock. For th...
Page 5 - Compliance; Care of the environment; Care for your product
3 EN Compliance Hereby, Gibson Innovations declares that this product is in compliance with the essential requirements and other relevant provisions of Directive 2014/53/EU. You can find the Declaration of Conformity on www.philips.com/ suppor t. This apparatus includes this label: Care of the envir...
Page 6 - Introduction
4 EN 2 Your Micro Music System Congratulations on your purchase, and welcome to Philips! To fully benefit from the suppor t that Philips offers, register your product at www.philips.com/suppor t. Introduction With this unit, you can: • enjoy audio from discs, USB devices, and other external devices;...
Page 7 - Overview of the main unit
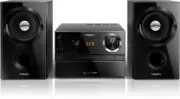
5 EN Overview of the main unit a • Turn on the product. • Switch to standby mode or ECO power standby mode. b AUDIO IN • Connect external audio devices. c Display panel • Show current status. d / • Skip to previous/next track. • Search within a track/disc. • Tune to a radio station. • Adjust time. e...
Page 9 - Get started; Connect speakers; Connect power; Prepare the remote control
7 EN 3 Get started Caution • Use of controls or adjustments or performance of procedures other than herein may result in hazardous radiation exposure or other unsafe operation. Always follow the instructions in this chapter in sequence. Connect speakers Note • Inser t the stripped por tion of each s...
Page 10 - Switch to standby mode; Switch to ECO power standby mode; Set the clock
8 EN Demonstrate the features In standby mode, press to demonstrate features of this device. » The features are displayed one by one across the display panel. • To turn off the demonstration, press again. Power on Press . » The product switches to the last selected source. Switch to standby mode Pre...
Page 11 - Select a source
9 EN Select a source On the main music system Press SOURCE repeatedly to select a source. • [DISC] : the disc in the disc compar tment • [USB] : .mp3 files stored on the connected USB storage device • [TUNER] : the FM tuner • [AUDIO IN] : the audio input through the AUDIO IN socket On the remote con...
Page 12 - Play from disc; Play from USB; Control play
10 EN 4 Play Play from disc 1 Press CD to select CD source. 2 Press to open the disc compar tment. 3 Inser t a disc with the label side up. 4 Press to close the disc compar tment. » Play star ts automatically. If not, press . Play from USB Note • Make sure that the USB device contains playable audio...
Page 13 - Skip tracks; Program tracks
11 EN Skip tracks When playing a CD: Press / to select tracks. When playing an MP3 disc and USB: 1 Press / to select an album or a folder. 2 Press / to select a track or a file. Program tracks This function allows you to program 20 tracks in the desired sequence. 1 In stop mode, press PROG to activa...
Page 15 - Adjust sound; Select a preset sound effect; Adjust volume level
13 EN 6 Adjust sound The following operations are applicable to all suppor ted media. Select a preset sound effect • Press SOUND repeatedly to select a preset sound effect. • DSC1 , DSC2 , DSC3 , DSC4 , and DSC5 Adjust volume level • On the remote control, press VOL +/- repeatedly. • On the main uni...
Page 16 - Other features; Set the alarm timer; Activate/deactivate alarm timer; Set the sleep timer
14 EN 7 Other features Set the alarm timer This product can be used as an alarm clock. You can select the disc, FM, or .mp3 files on a USB storage device as alarm source. Note • Make sure that you have set the clock correctly. • If the selected alarm source is unavailable, this product switches to F...
Page 18 - Amplifier; Speakers; General information
16 EN 8 Product information Note • Product information is subject to change without prior notice. Specifications Amplifier Total Output Power Maximum 30 W Frequency Response 60 Hz - 20 kHz; ±3 dB Signal to Noise Ratio ≥75 dBA Total Harmonic Distor tion <1% Aux Input 600 mV ± 100 mV RMS 22 kohm Sp...
Page 19 - USB playability information; Supported MP3 disc formats
17 EN USB playability information Compatible USB devices: • USB flash memor y (USB2.0 or USB1.1) • USB flash players (USB2.0 or USB1.1) • memor y cards (requires an additional card reader to work with this unit) Supported USB formats: • USB or memor y file format: FAT12, FAT16, FAT32 (sector size: 5...
Page 20 - Troubleshooting
18 EN 9 Troubleshooting Warning • Never remove the casing of this device. To keep the warranty valid, never tr y to repair the system yourself. If you encounter problems when using this device, check the following points before requesting ser vice. If the problem remains unsolved, go to the Philips ...