Philips HTL5140B/12 - User Manual
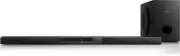
Philips HTL5140B/12 – User Manual, read for free online in PDF format. We hope this helps you resolve any issues you may have. If you have further questions, please contact us through the contact form.


Table of Contents:
- Page 3 – Contents; Product specifications
- Page 4 – Important; Safety
- Page 5 – Care for your product; Care of the environment; Help and support
- Page 6 – Your SoundBar; Main unit; Remote control
- Page 7 – Connectors
- Page 8 – Wireless subwoofer; Connect and set; Pair up with the subwoofer
- Page 9 – Connect digital devices
- Page 10 – Option 1: Connect audio through a; Option 2: Connect audio through
- Page 11 – Choose your sound; Sound mode; Surround sound mode
- Page 12 – Night mode; Play audio through Bluetooth; Connect Bluetooth via NFC
- Page 13 – Auto standby
- Page 14 – Apply factory settings; Update software; Check software version
- Page 15 – Wall mount
- Page 16 – Amplifier
- Page 17 – Standby information; Troubleshooting
Register your product and get support at
www.philips.com/support
Always there to help you
User manual
Question?
Contact
Philips
HTL5140B
"Loading the manual" means you need to wait until the file loads and becomes available for online reading. Some manuals are very large, and the time they take to appear depends on your internet speed.
Was this manual helpful?
About this manual
- Brand
- Philips
- Model
- HTL5140B/12
- Document type
- User Manual
- Language(s)
- English
- Pages
- 20
- File size
- 345.2 KB
- Format
Other Manuals for Philips HTL5140B/12
Summary
1 EN Contents 1 Important 2 Safety 2 Care for your product 3 Care of the environment 3 Compliance 3 Help and suppor t 3 2 Your SoundBar 4 Main unit 4 Remote control 4 Connectors 5 Wireless subwoofer 6 3 Connect and set up 6 Pair up with the subwoofer 6 Placement 7 Connect to TV 7 Connect digital dev...
2 EN 1 Important Read and understand all instructions before you use your product. If damage is caused by failure to follow instructions, the warranty does not apply. Safety Risk of electric shock or fire! • Never expose the product and accessories to rain or water. Never place liquid containers, su...
3 EN This is CLASS II apparatus with double insulation, and no protective ear th provided. Care for your product Use only microfiber cloth to clean the product. Care of the environment Your product is designed and manufactured with high quality materials and components, which can be recycled and reu...
Ask a question
Related manuals
Popular Philips Other


More Philips Other models
 Philips HTL3325/10 User Manual
 Philips HTL4110B Manual
 Philips HTL4110B/12 User Manual
 Philips HTL4111B/12 Quick Guide
 Philips HTL5120 Manual
 Philips HTL5120/12 User Manual
 Philips HTL5160B/12 User Manual
 Philips HTL6145C Manual
 Philips HTL9100 Manual
 Philips HTR5000 Manual
 Philips HTS335W Manual
 Philips HTS2500/12 Manual