Page 2 - Contents
1 EN Contents 1 Important 2 Impor tant notes for users in the U.K. 2 Safety 2 2 Your Micro Music System 4 Introduction 4 What's in the box 4 Over view of the remote control 4 Over view of the main unit 6 3 Before use 8 Place the product 8 Connect speakers 8 Connect power 8 Install/replace the remote...
Page 3 - Important; Important notes for users in; Safety
2 EN 1 Important Read and understand all instructions before you use this product. If damage is caused by failure to follow the instructions, the warranty does not apply. Important notes for users in the U.K. Mains fuse This information applies only to products with a UK mains plug. This product is ...
Page 4 - Hearing safety
3 EN Risk of overheating! • Never install this product in a confined space. Always leave a space of at least four inches around the product for ventilation. Make sure that cur tains or other objects never cover the ventilation slots on the product. Risk of contamination! • Remove the batter y if fla...
Page 5 - Introduction; Overview of the remote
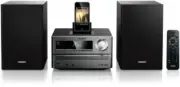
4 EN 2 Your Micro Music System Congratulations on your purchase, and welcome to Philips! To fully benefit from the suppor t that Philips offers, register your product at www.philips.com/welcome. Introduction With this product, you can: • enjoy audio from discs, USB storage devices, iPod, iPhone, iPa...
Page 7 - Overview of the main unit
6 EN Overview of the main unit a Dock for iPod/iPhone/iPad b Disc compartment c • USB socket. d MP3-LINK • Connect an external audio device. e • Headphone socket. f • Turn on the product. • Switch to eco-power standby mode or normal standby mode. g IR sensor • Receive signals from the remote control...
Page 9 - Before use; Place the product; Connect speakers; Connect power; Install/replace the remote
8 EN 3 Before use Place the product Place the speakers at an angle of approximately 45 degrees from the listening position. Note • To avoid magnetic interference or unwanted noise, never place this product too close to any radiation devices. Connect speakers Note • Make sure that the colors of the s...
Page 10 - Get started; Turn on; Switch modes
9 EN 1 Open the batter y compar tment. 2 Inser t 2 AAA batteries with correct polarity (+/-) as indicated. 3 Close the batter y compar tment. Note • If you are not going to use the remote control for a long time, remove the batteries. • Do not use old and new or different types of batteries in combi...
Page 11 - Play a disc; Play from a USB storage
10 EN Set clock1 In standby mode, press and hold PROG / CLOCK SET to activate clock setting. » [CLOCK SET] (set clock) scrolls on the display, and then [CLOCK 24] (24-hour time format) is displayed with "24" blinking. 2 Press / or VOL +/- to select [CLOCK 24] or [CLOCK 12] (12- hour time for...
Page 12 - Basic control; Adjust sound
11 EN Make sure that the USB storage device contains playable audio contents. 1 Inser t the USB storage device into the ( USB ) socket. 2 Press USB to select the USB source. » Play star ts automatically. If the play does not start automatically, 1 Press PRESET/ALBUM / to select a folder. 2 Press / t...
Page 13 - Install the rubber bumper
12 EN 6 Play from iPod/ iPhone/iPad You can enjoy audio from iPod/iPhone/iPad through this product. Note • No audio output from the headphone socket in this situation. Compatible iPod/iPhone/iPad This product suppor ts the following iPod, iPhone and iPad models. • iPad 2 • iPad • iPhone 4 • iPhone 3...
Page 14 - Listen to radio; Store DAB radio stations; Basic operations
13 EN Charge the iPod/iPhone/iPad When the product is connected to power, the docked iPod/iPhone/iPad star ts charging automatically. Tip • For cer tain iPod models, it may take up to a minute before the charging indication appears. Listen to the iPod/iPhone/ iPad1 Press DOCK to select the iPod/iPho...
Page 15 - Use the menu
14 EN Tune to the next FM radio station with sufficient signal strength at the lower/higher frequency : Press and hold / to star t the auto search. Tune to the FM radio station at a specific frequency : Press / repeatedly until the frequency digitals are displayed. Program FM radio stations automati...
Page 16 - Other features; Set sleep timer; Listen to external audio device
15 EN 8 Other features Set sleep timer In working mode, press SLEEP / TIMER repeatedly to select a set period (in minutes). » When sleep timer is activated, is displayed. • To deactivate sleep timer, press SLEEP / TIMER again until disappears. Set alarm timer This product can be used as an alarm clo...
Page 17 - Check the current firmware
16 EN 9 Upgrade the firmware Note • Power supply must not be interrupted during the upgrade. • The firmware upgrade can only be available through the mini-USB por t on the back plate. • When the firmware upgrade succeeds, all settings are restored to the factor y default status. Register your produc...
Page 18 - information; Amplifier
17 EN 10 Product information Note • Product information is subject to change without prior notice. Specifications Amplifier Rated Output Power 2 x 10 W RMS Frequency Response 40 Hz-20 kHZ, ±3 dB Signal to Noise Ratio > 77 dB MP3-Link Input 600 mV RMS 22 kohm Disc Laser Type Semiconductor Disc Dia...
Page 19 - USB playability information; Supported MP3 disc formats
18 EN USB playability information Compatible USB devices: • USB flash memor y (USB 2.0 or USB1.1) • USB flash players (USB 2.0 or USB1.1) • memor y cards (requires an additional card reader to work with this product) Supported formats: • USB or memor y file format FAT12, FAT16, FAT32 (sector size: 5...
Page 20 - 1 Troubleshooting
19 EN 11 Troubleshooting Warning • Never remove the casing of this apparatus. To keep the warranty valid, never tr y to repair the product yourself. If you encounter problems when using this product, check the following points before requesting ser vice. If the problem remains unsolved, go to the Ph...