Page 2 - EC DECLARATION OF CONFORMITY
Philips Consumer Lifestyle Philips Consumer Lifystyle AMB 544-9056 AQ95-56F-1224KR 2010 ........................................................ ........................................................................... (Report No. / Numéro du Rapport) (Year in which the CE mark is affixed / Année ...
Page 3 - 0 Self-defined settings; Contents
3 English EN 6 Text and numbers 20 Enter text and number 20 Switch between uppercase and lower case 20 7 Phonebook 21 View the phonebook 21 Search a record 21 Call from the phonebook 21 Access the phonebook during a call 21 Add a record 21 Edit a record 22 Delete a record 22 Delete all records 22 Di...
Page 5 - Declaration of conformity; Important safety
5 This equipment is not designed to make • emergency calls when the power fails. An alternative has to be made available to allow emergency calls.Do not expose the phone to excessive heat • caused by heating equipment or direct sunlight.Do not drop your phone or allow objects to • fall on your phone...
Page 6 - Disposal of your old product; Compliance with EMF
6 Philips is committed to develop, produce and market products that cause no adverse health effects. Philips confirms that if its products are handled properly for their intended use, they are safe to use according to scientific evidence available today. Philips plays an active role in the developme...
Page 8 - What is in the box
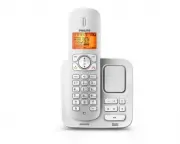
8 Handset** Charger** Power adapter** 2 Your CD270/ CD275 Congratulations on your purchase and welcome to Philips! To fully benefit from the suppor t that Philips offers, register your product at www.philips. com/welcome. What is in the box Base station with bracket (CD270) Base station with bracket...
Page 9 - Overview of the phone
9 Overview of the phone Line cord* Guarantee User manual Quick star t guide Note * In some countries, you have to connect the • line adapter to the line cord, then plug the line cord to the telephone socket. Note ** In multi-handset packs, there are additional • handsets and chargers and power adapt...
Page 10 - Overview of the base station
10 13 MENU Access the main • menu. 14 Make and receive • calls. 15 Confirm selection. • Enter the options • menu. 16 Loudspeaker 17 Battery door Overview of the base station CD270 1 Find handsets. • Enter registration mode. • CD275 1 Earpiece 2 Select the function • displayed on the handset screen d...
Page 11 - Display icons
11 Display icons In standby mode, the icons shown on the main screen tell you what features are available on your handset. Icon DescriptionsWhen the handset is off the base station/charger, the bars indicate the battery level (full, medium and low). When the handset is on the base station/charger, t...
Page 12 - Install the handset; Get started; Connect the base station and
12 3 Connect each end of the line cord to: the telephone socket at the bottom of • the base station;the telephone socket on the wall. • Install the handset Caution Risk of explosion! Keep batteries away from • heat, sunshine or fire. Never discard batteries in fire. Use only the supplied batteries. ...
Page 13 - Check the battery level; Set the country
13 Check the battery level The batter y icon displays the current batter y level. When the handset is off the base station/charger, the bars indicate the battery level (full, medium and low). When the handset is on the base station/charger, the bars keep scrolling until charging completes. The empty...
Page 14 - What is standby mode?
14 Check the signal strength It displays the link status between the handset and base station. The more bars are shown, the better the signal strength is. Ensure the handset is linked to the base • station before you make or receive calls and carry out the phone functions and features. If you hear w...
Page 15 - Calls; Make a call
15 Redial the most recent number 1 Press . 2 Press REDIAL . 3 Press [OK] . The most recent number is then dialed » out. Call from the redial list You can make a call from the redial list. Tip For more information, see “Redial a call” in the • Redial list section. Call from the phonebook You can make...
Page 16 - Answer a second call; End a call; Answer a call; Turn off the ringer for all incoming; Adjust the earpiece volume
16 Mute the microphone1 Press during a call. The handset displays » [MUTE ON] . The caller cannot hear you, but you » can still hear his voice. 2 Press again to unmute the microphone. You can now communicate with the » caller. Turn the speaker on or off Press . Make a second call Note This ser vice ...
Page 18 - Toggle between calls; Make a conference call; During an external call; Intercom and; Make a call to another; While you are on the phone
18 Wait for the other side to answer your » call. Toggle between calls Press INT to switch between the outside call and the intercom call. Transfer a call1 Press INT during a call. 2 Select a handset number, then press [OK] to confirm. 3 Press when the other side answers your call. The call is now t...
Page 19 - During the conference call
19 Note Press • to join an ongoing conference with another handset if [ADVANCED SET] > [CONFERENCE] is set to [ON] . During the conference call 1 Press INT to put the external call on hold and go back to the internal call. The external call is put on hold. » 2 Press INT to toggle between the exte...
Page 20 - Text and
20 Key Characters (Lower case) 0 . 0 , / : ; “ ‘ ! ¡ ? ¿ * + - % \ ^ ~ | 1 [Sp] 1 @ _ # = < > ( ) & € £ $ ¥ [ ] { } ¤ § … 2 a b c 2 à â Æ á ã â ä å ą ç ć č 3 d e f 3 ď đ ė ĕ è é ê ë ę Δ Φ 4 g h i 4 ğ í ì î ï l Γ 5 j k l 5 Λ ł ĺ ľ 6 m n o 6 ñ ň ń ó ô õ ö ő 7 p q r s 7 ř ş š ś β Π Θ Σ 8 t u ...
Page 21 - Access the phonebook during; Phonebook; View the phonebook; Search a record; Scroll the contact list; Enter the first character of a contact
21 The first record that star ts with this » character is displayed. Call from the phonebook1 Press or press MENU > [PHONEBOOK] > [LIST] to access the phonebook. 2 Select a contact in the phonebook list. 3 Press to make the call. Access the phonebook during a call1 Press [OK] , select [PHONEBO...
Page 22 - Direct access memory; Edit the direct access memory
22 Delete all records1 Press MENU . 2 Select [PHONEBOOK] > [DELETE ALL] , press [OK] to confirm. The handset displays a confirmation » request. 3 Press [OK] to confirm. All records are deleted. » Direct access memory You have 2 direct access memories (Keys 1 and 2). To dial the saved phone number...
Page 23 - Call log; Save a call record to the
23 6 Enter and edit the number, then press [OK] to confirm. The record is saved. » Return a call1 Press . 2 Select [CALL LIST] , then press [OK] . 3 Select a record on the list. 4 Press to make the call. Delete a call record1 Press . 2 Select [CALL LIST] , then press [OK] to confirm. 3 The incoming ...
Page 24 - Delete a redial record; Delete all redial records; Redial list; Redial a call; Save a redial record to the
24 Delete a redial record 1 Press REDIAL to enter the list of dialed calls. 2 Select a record, then press [OK] to confirm. 3 Select [DELETE] , then press [OK] to confirm. The handset displays a confirmation » request. 4 Press [OK] to confirm. The record is deleted. » Delete all redial records 1 Pres...
Page 25 - Personalize the sounds; Set the handset’s ringtone; Set the handset’s ringtone volume; Set the key tone; settings; Personalize the phone display; Name the handset; Set the display language
25 Personalize the sounds Set the handset’s ringtone You can select from 10 ringtones. 1 Press MENU . 2 Select [PERSONAL SET] > [HANDSET TONES] > [RING TONES] , then press [OK] to confirm. 3 Select a ringtone, then press [OK] to confirm. The setting is saved. » Set the handset’s ringtone volum...
Page 26 - Enhance the audio quality
26 Enhance the audio quality XHD (Extreme High Definition) sound mode is an exclusive feature which transmits high fidelity signals to the handset. It makes the phone conversations sound like real-life conversations. When you are in standby mode, 1 Press MENU . 2 Select [ADVANCED SET] > [XHD SOUN...
Page 27 - Dial mode; Set the dial mode; Select the recall duration; Set the recall duration; 1 Call features; Auto hang up; Activate/Deactivate auto hang up; Auto conference; Activate/Deactivate auto conference
27 Dial mode Note This feature only applies to models that • suppor t both tone and pulse dial. Dial mode is the telephone signal used in your countr y. The phone suppor ts tone (DTMF) and pulse (rotar y) dial. Consult the ser vice provider for detailed information. Set the dial mode 1 Press MENU . ...
Page 28 - First ring; Turn the first ring on/off; ECO mode
28 Note When • ECO is activated, the connection range between the handset and the base station can be reduced. The setting is saved. » First ring If you have subscribed to the caller ID ser vice with your ser vice provider, your phone can suppress the first ring before the caller ID displays on the ...
Page 29 - Keypad lock; 2 Extra features; Alarm clock
29 Keypad lock You to lock the keypad to prevent accidental button presses. Lock the keypad 1 Press and hold in standby mode. The keypad is locked. » Note When the keypad is locked, no call can be • made. You can still answer the incoming calls. The keypad is unlocked during the call but is locked a...
Page 30 - Restore default settings; Network type; 3 Advanced settings; Register the handsets; Auto registration
30 Unregister the handsets1 If two handsets share the same base station, you can unregister a handset with another handset. 2 Press MENU . 3 Select [ADVANCED SET] > [UNREGISTER] , then press [OK] to confirm. 4 Select the handset number to be unregistered. 5 Press [OK] to confirm. The handset is u...
Page 31 - Set the answer mode; 4 Telephone; Turn on/off the answering; Through the handset; Through the base
31 Set the answering machine language Note This feature only applies to models with • multiple-language suppor t. The answering machine language is the language for the announcements. 1 Press MENU . 2 Select [ANSWER MACHINE] > [SETTINGS] > [VOICE LANGUAGE] . 3 Press [OK] to confirm. 4 Select a...
Page 32 - Delete an announcement; Announcements; Record an announcement; Listen to the announcement
32 4 Select [PLAY] , then press [OK] to confirm. You can listen to the current » announcement. Note You can no longer listen to the announcement • when you pick up an incoming call. Delete an announcement 1 Press MENU . 2 Select [ANSWER MACHINE] > [ANNOUNCEMENT] , then press [OK] to confirm. 3 Se...
Page 34 - Remote access; Change the PIN code; Call screening; From the base; Set the sound quality of the; Set the ring delay
34 Tip When you access the answering machine • remotely, you are recommended to set the ring delay to [ECONOMY] mode. This is a cost effective way to manage your messages. When there are new messages, the answering machine picks up the call after 3 rings; When there is no messages, it picks up the c...
Page 35 - Remote access commands; Activate/deactivate the remote access; Access the answering machine
35 Remote access commands Key Function 1 Repeat the current or listen to the previous message. 2 Listen to messages. 3 Skip to the next message. 6 Delete the current message. 7 Switch the answering machine on. (not available when you listen to the messages). 8 Stop listening to the message. 9 Switch...
Page 36 - 5 Default settings
36 15 Default settings Language* Country dependent Handset name PHILIPS Date 01/01/10 Date format* Country dependent Time* Country dependent Time format* Country dependent Alarm Off Phonebook list Unchanged Auto hang up On Recall time* Country dependent First ring* Country dependent Conference Off D...
Page 37 - 6 Technical data
37 Weight and dimensions (CD275) Handset: 125.6 grams • 46.1 x 164.5 x 27.7 mm (W x H x D) • Base: 125.5 grams • 108.4 x 79.5 x 102.0 mm (W x H x D) • Charger: 49 grams • 73.1 x 78.6 x 89.0 mm (W x H x D) • Temperature range Operation: 0°C to +35°C (32°F to 95°F) • Storage: -20°C to +45°C (-4°F to 1...
Page 38 - 7 Frequently
38 Bad audio (crackles, echo, etc.) The handset is nearly out of range. Move • it closer to the base station. The phone receives interference from • the nearby electrical appliances. Move the base station away from them. The phone is at a location with thick • walls. Move the base away from them. Th...