Page 2 - Welcome mode
EN Before using your CD 130, you need to configure it according to the country of use. Install the batteries. After a few minutes of charge, the Welcome screen appears. 1. Press . 2. Browse through the different countries. 3. Press to confirm the country that suits you. Your phone is ready to be use...
Page 4 - Contents
EN 3 Welcome mode ................................................... 2 Contents .............................................................. 3 Important information ....................................... 4 What’s in the box ................................................ 5 Handset and base stat...
Page 5 - For your safety; Power requirements; Important information
4 EN For your safety Before installing your CD 130, carefully read the following informations: Power requirements > This product requires an electrical supply of 220-240 volts, alternating monophased power, excluding IT installations defined in standard EN 60950. In case of power failure, the com...
Page 6 - What’s in the box
5 EN *Note : You may find in the box the line adaptor delivered separately from the line cable. In this case, please connect the line adaptor to the line cable before connecting it to the line socket. Note : In CD 130 multi handset packs, you will also find one or more additional handsets, chargers ...
Page 7 - Handset and base station
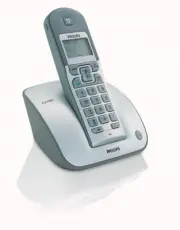
6 EN Handset and base station 1 2 34 5 6 789 10 12 11 CD 130 Handset 1 Earpiece 2 Display Icons see page 8 3 Menu key & Softkey OK - In idle mode, short press to access the main menu. - Short press to select next menu level. - In Edit & Phonebook mode, short press to confirm OK. - In Call lo...
Page 8 - Paging key
7 EN 8 Intercom - Short press to initiate an internal call. 9 Recall key - In idle mode, long press to switch from handset name display to Date/Time display. - To insert R for operator services when on line. 10 Microphone 11 Keypad lock & insert - Short press to insert - Long press to lock/unloc...
Page 9 - Icons on the handset display
8 EN The display gives information about the operation of your telephone. Following icons can be shown in the headline of the display: When being used for the first time, it is sometimes necessary to wait until the battery is sufficiently charged before the icons appear on the display. When ON the b...
Page 10 - Installing the base station
9 EN Installing the base station Place your product close enough to the telephone and mains power sockets so that the cables will reach. To properly install the base station, plug the line cord and the power cable into the base station. Plug the cord and the cable into the wall. If you have a broadb...
Page 11 - Using GAP standard compliance
10 EN Installing and replacing the batteries in the handset To insert the batteries, open the battery cover, place the batteries as indicated and then replace the battery cover. When the battery icon is blinking, charge is needed. Allow 24 hours for the batteries to fully charge. On first use it may...
Page 12 - Using the menus
11 EN To register a handset of another make to the CD130 base station, place the base station into registration mode (page 30), then follow the procedure in the manufacturer’s instructions.DECT TM is a Trade Mark of ETSI registered for the benefit of the implementers of the DECT technology. Using th...
Page 13 - Menu structure
12 EN PHONEBOOK EDIT NUMBERDEL.NUMBERDELETE LIST ADD NUMBER CLOCK/ALARM SET ALARM ALARM TONE DATE & TIME OFF/ON ONCE/ON DAILY MELODY 1/2/3 PERSONAL SET HANDSET NAME HANDSET TONE RING VOLUME HIGH/MEDIUM/ LOW/RINGER OFF RING MELODY MELODY 1 - 10 KEY TONE ON/OFF AUTO ANSWER ON/OFF Language list LAN...
Page 14 - Example to write “Peter”; Handset power OFF and ON
13 EN You can enter the names of your phonebook entries character by character, pressing the corresponding key as many times as necessary to reach the desired character. Press under the label to delete a character. Example to write “Peter” Press once : P Press twice : PE Press once : PET Press twice...
Page 15 - Calling directly; Call
14 EN Answering a call / Hanging up 1. When the phone rings, press to answer the call. flashes on an incoming call. 2. To end the conversation, press key or replace the handset on the base station. Making a call Calling directly 1. Press . 2. Dial the phone number . Predialling the number before cal...
Page 17 - Editing a number from the redial list; Redial list
16 EN The redial list contains the 5 most recently dialled numbers. Accessing / exiting the redial list 1. Press . 2. Scroll through the redial list . 3. Press to exit. Calling a number from the redial list 1. Press . 2. Scroll through the redial list . 3. Press . Saving redial list numbers into the...
Page 19 - Phonebook
18 EN 30 names and numbers can be stored in the built-in phonebook of the handset. The names are stored in alphabetical order. Adding a new entry 1. In idle mode, press , PHONEBOOK is shown. 2. Press , ADD NUMBER is shown. 3. Press , ENTER NAME is shown. 4. Enter the name and press , ENTER NUMBER is...
Page 20 - Viewing the phonebook list; Edit a number when browsing phonebook list; Delete an entry when browsing phonebook list
19 EN Viewing the phonebook list 1. In idle mode, press Down and scroll Up/Down in the list, OR Enter the first letter of the wanted name (e.g., 3 for “D” or 33 for “E”). The first entry starting with this letter is selected in the list. 2. To view the details : Press . Edit a number when browsing p...
Page 21 - Delete a phonebook entry when in idle mode; Delete whole phonebook list when in idle mode
20 EN Delete a phonebook entry when in idle mode 1. In idle mode, press , PHONEBOOK is shown. 2. Press and press Down to reach DEL. NUMBER . 3. Press to view the list and scroll to select an entry. 4. Press , DELETE? is shown, press to confirm. You will hear a long confirmation beeptone. Delete whol...
Page 22 - Calling a number from the call log; Call log
21 EN This feature is available if you have registered to the caller identification service with your operator.The call log stores the last 20 external calls received :- network message service information (subject to a subscription with your operator). Accessing / exiting the call log 1. Press Up a...
Page 23 - Deleting a Call log entry; Deleting all the Call log entries
22 EN Deleting a Call log entry 1. Press Up and scroll to select an entry. 2. Press and press Down to reach DEL NUMBER . 3. Press , DELETE? is shown, press to confirm. Deleting all the Call log entries 1. Press Up and press . 2. Press Down to reach DELETE LIST . 3. Press to confirm. Call log
Page 24 - Internal call; Call transfer to a specific handset when on line; Using the Intercom
23 EN This function can only be used with a multi-handset configuration. It allows you to make free internal calls, transfer external calls from one handset to another and to use the conference option. Internal call 1. Press . 2. Enter the handset number (up to 5 handsets can be registered to the sa...
Page 25 - To set the Date and Time; Other functions
24 EN Paging This feature allows you to locate the handset(s). Press on the base station. All the subscribed handsets ring. Press any key on the handset to stop ringing once relocated. Chain Dialing If you have entered in your phonebook for example only the main number of a company without the exten...
Page 26 - To set the alarm tone; To set the handset ringer volume or silence mode; Personal settings
25 EN 3. Press , scroll to select the appropriate setting ( OFF or ON ONCE or ON DAILY ). 4. Press to confirm. If you select ON ONCE or ON DAILY : Enter the time and press to confirm. The alarm rings for at most 1 minute and is shown in idle mode. To set the alarm tone 1. Press and press Down to rea...
Page 28 - Advanced settings
27 EN To activate / deactivate the auto answer mode If ON you take the line by lifting the handset from the charge cradle. 1. Press and press Down to reach PERSONAL SET . 2. Press and press Down to reach AUTO ANSWER . 3. Press , scroll to select ON or OFF and press to confirm. To change the display ...
Page 31 - To set or change an SOS number; To register a handset
30 EN To set or change an SOS number The SOS number feature allows you to enter 3 SOS phone numbers, which can be dialed out although the call barring is activated. The maximum length of an SOS number is 4 digits. The PIN code is required when modify the SOS number. 1. Press and press Down to reach ...
Page 33 - Country selection
32 EN Country selection Use this feature if you need to re-configurate your CD 130. 1. Press and press Down to reach ADVANCE SET . 2. Press and press Down to reach COUNTRY SEL. . 3. Browse through the different countries and press to select the country that suits you. 4. CONFIRM? is shown, press to ...
Page 34 - Telephone troubleshooting; Troubleshooting
33 EN Telephone troubleshooting PROBLEMS CAUSES SOLUTIONS The battery icon is not blinking when the handset is placed on the base. • Bad battery contact. • Dirty contact. • Battery is full. • Move the handset slightly. • Clean the contact with a cloth moistened with alcohol. • No need to charge. No ...
Page 36 - Safety information; Conformity; Safety precautions; Environmental care; Informations
35 EN Safety information This equipment is not designed to make emergency calls when the power fails. An alternative has to be made available to allow emergency calls. Conformity Hereby, Philips declares that the CD 130 is in compliance with the essential requirements and other relevant provisions o...
Page 37 - Notes