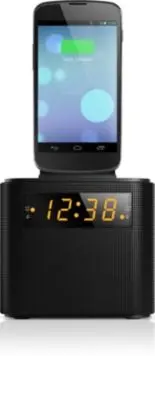
Philips AJ3200/12 – User Manual, read for free online in PDF format. We hope this helps you resolve any issues you may have. If you have further questions, please contact us through the contact form.
1
2
3
4
5
6
7
8
9
10
11
Table of Contents:
Page 2 – Contents
Page 3 – Important; Your clock radio; Introduction
Page 4 – Overview of the clock radio
Page 5 – Get started; Install battery; Connect power; Turn on
Page 6 – Tune to FM radio stations; Store FM radio stations in; Select a preset radio station; Adjust volume
Page 7 – Other features; Charge your mobile devices
Page 8 – Set alarm timer; Activate or deactivate the alarm timer; Snooze the alarm; Set sleep timer
Page 9 – Amplifier; Troubleshooting
Page 10 – Notice; Disposal of your old product
Loading the manual
www.philips.com/support
User manual
Always there to help you
Register your product and get support at
AJ3200
Question?
Contact
Philips
"Loading the manual" means you need to wait until the file loads and becomes available for online reading. Some manuals are very large, and the time they take to appear depends on your internet speed.
2 EN Contents 1 Important 3 2 Your clock radio 3 Introduction 3 What's in the box 3 Over view of the clock radio 4 3 Get started 5 Install batter y 5 Connect power 5 Turn on 5 Set time 5 4 Listen to FM radio 6 Tune to FM radio stations 6 Store FM radio stations in memor y 6 Select a preset radio sta...
Page 3 - Important; Your clock radio; Introduction
3 EN 1 Important Warning • Never remove the casing of this clock radio. • Never lubricate any par t of this clock radio. • Never place this clock radio on other electrical equipment. • Keep this clock radio away from direct sunlight, naked flames or heat. • Make sure that you always have easy access...
Page 4 - Overview of the clock radio
4 EN Overview of the clock radio a Dock for charging mobile devices b SOURCE • Turn on the clock radio. • Switch the clock radio to standby mode. • Select FM radio source. c PRESET/SET TIME • Store radio stations in memor y. • Select a preset radio station. • Set time. d AL1/AL2/- VOLUME + • Set ala...
Page 5 - Get started; Install battery; Connect power; Turn on
5 EN 3 Get started Always follow the instructions in this chapter in sequence. Install battery The batteries can only back up clock and alarm settings when AC power is disconnected. Caution • The batteries contain chemical substances, so they should be disposed of properly. 1 Open the batter y compa...
Page 6 - Tune to FM radio stations; Store FM radio stations in; Select a preset radio station; Adjust volume
6 EN 4 Listen to FM radio Note • Keep the clock radio away from other electronic devices to avoid radio interference. • For better reception, fully extend and adjust the position of the FM antenna. Tune to FM radio stations 1 Press SOURCE to turn on FM radio. 2 Press and hold TUNE - or TUNE + for 2 ...
Page 7 - Other features; Charge your mobile devices
7 EN 5 Other features Charge your mobile devices With this clock radio, you can charge your Android-powered mobile phone with a micro USB socket and Apple devices with a lightning or 30-pin connector. 1 Connect the clock radio with your mobile device. • For Android-powered mobile device with a micro...
Page 8 - Set alarm timer; Activate or deactivate the alarm timer; Snooze the alarm; Set sleep timer
8 EN Set alarm timer You can set two alarms to ring at different time. Note • You can only set the alarm in standby mode. • Make sure that you have set the clock correctly. 1 Press and hold AL1 or AL2 for two seconds to activate alarm setting mode. » The hour and minute digits blink. 2 Press HR repe...
Page 9 - Amplifier; Troubleshooting
9 EN 6 Product information Note • Product information is subject to change without prior notice. Specifications Amplifier Total Output Power 500 mW Tuner (FM) Tuning Range 87.5-108 MHz Tuning Grid 50 KHz Sensitivity - Mono, 26 dB S/N Ratio <22 dBf Total Harmonic Distor tion <3% Signal to Noise...
Page 10 - Notice; Disposal of your old product
10 EN 8 Notice Any changes or modifications made to this device that are not expressly approved by Gibson Innovations may void the user’s authority to operate the equipment. Hereby, Gibson Innovations declares that this product is in compliance with the essential requirements and other relevant prov...