Philips 32PF9541/10 - Manual
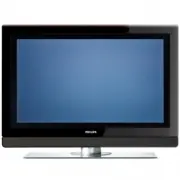
Philips 32PF9541/10 – Manual, read for free online in PDF format. We hope this helps you resolve any issues you may have. If you have further questions, please contact us through the contact form.


Table of Contents:
- Page 2 – Safety warnings; General
- Page 3 – and; Getting started; Before you start
- Page 4 – Tip: for best quality use the suppressor cable supplied.; Overview of the side connector panel
- Page 5 – Colour keys; OPTION; Cursor keys; OK; Mute key: interrupt the sound or restore it.
- Page 6 – Channel selection; AV; Select your peripherals; MODE; : Press this key repeatedly to toggle through the; Ò ‡ π †; Audio and Video equipment keys; CANCEL
- Page 7 – Use of the OPTION key; Keys at the right side of the TV
- Page 8 – Switch the TV on; Press the power switch; First time installation
- Page 9 – Television is highlighted.; PHILIPS; PHILIPS
- Page 10 – Step 3: Settings assistant: select your TV settings
- Page 11 – How to navigate through the menus; Introduction
- Page 12 – How to navigate through the menus (continued); Adjust viewing and listening settings
- Page 13 – Select Settings assistant and press the cursor right.; Press the green colour key to return to the TV menu again.; C. Individual settings for Picture, Sound and Ambilight; Press the green colour key to store the selected setting.
- Page 14 – Adjust picture menu settings
- Page 15 – Custom tint (only when Tint is set to Custom); WP; Pixel Plus; DNR; Adjust picture menu settings (Continued)
- Page 16 – MPEG; On; Tip: this function is also accessible via the; key on
- Page 17 – Adjust sound menu settings
- Page 19 – Enjoy Ambilight
- Page 21 – Custom colour; Allows you to customise the ambilight colour.; Select Saturation to adjust the colourfulness of the light.; Separation; Press the; Ambilight in standby mode
- Page 22 – Adjust feature menu settings
- Page 23 – Childlock; Adjust feature menu settings (Continued); Important: you have forgotten your code !
- Page 24 – On timer
- Page 25 – How to search for and store TV channels; Select your menu language; Installation menu; Select your country
- Page 26 – How to search for and store TV channels (Continued); Automatic installation; Store TV channels
- Page 27 – Uninstall - reinstall; Rearrange the channel number list
- Page 28 – Select your location; Select Teletext 2.5 On to take advantage of this feature.; Display a Programme title; key on the; Set your preferences
- Page 29 – Digital Audio In; DIGITAL; Select your connections
- Page 30 – Reset the Factory settings; USB device upgrade; This allows you to reset most of the predefined factory states.; How to upgrade the TV software
- Page 31 – Create your favourite list; To select a channel from the displayed favourite list
- Page 32 – -Following file formats can be reproduced:; To insert a USB device; key on the remote control to; Multimedia Browser; To view content from a USB device; Note: USB devices are not supplied with this TV.
- Page 33 – Multimedia Browser menu; Following icons may appear:
- Page 35 – Select subpages; Teletext; Note: Teletext is not available via equipment connected to the; HDMI
- Page 36 – Language; Menu; Reveal; Teletext menu
- Page 37 – To make video and audio connections; Connector table; Best video performance
- Page 38 – To make video and audio connections - Side panel overview; VIDEO; Headphone; Warning: do not connect cable
- Page 39 – To make video and audio connections - Rear panel overview
- Page 40 – Connect a VCR or DVD recorder; With a eurocable
- Page 41 – Connect two VCRs or VCR and DVD recorder; With eurocables; Connect a satellite receiver
- Page 42 – Connect a DVD player, Cable box or game console; With a HDMI connector; With a DVI connector; Connect a DVD player or Cable box
- Page 43 – Connect a DVD player, a satellite receiver or Cable box; With Component Video Connectors
- Page 44 – Connect a PC; PC equipped with a VGA connector:; AUDIO R; PC equipped with a DVI connector:
- Page 45 – Connect a Home Cinema amplifier; Digital Home Cinema amplifier; DIGITAL AUDIO OUT; Analogue Home Cinema amplifier; AUDIO OUT L
- Page 46 – Select connected equipment; Press the cursor right again to enter the list of types of; Record a TV programme; See the handbook for your recorder.; Record with your recorder
- Page 47 – To select between Normal and Expert mode; Audio- and video equipment keys
- Page 48 – Troubleshooting
- Page 49 – Annex 1:To set the remote control to work a Philips DVD or DVD/R; To cancel the selected mode
- Page 50 – Annex 2 - Philips TV software upgrade with portable memory
- Page 51 – Automatic software upgrade procedure
- Page 52 – Manual software upgrade procedure; Insert the portable memory that contains the downloaded; Select Software Upgrade in the Installation menu. Go to; Select the correct upgrade version and press the red colour
- Page 53 – key on the remote control after having inserted a USB device and; General Rules; files using simple tools.; General Format; Annex 3 - Philips TV-Slideshow Format with background music
- Page 54 – Tag Name; title; Use
- Page 55 – Digital Camera Issues; is switched on before connecting to the TV.; USB Memory Device Issues; before you can access your files.; Annex 4 - Philips TV - Digital camera and USB issues
- Page 56 – PC; Note: teletext will not be available via equipment connected to a
- Page 57 – Index
- Page 58 – The packaging of this product is intended to; Disposal of your old product; Recycling; Product information; water pollution. Very low standby power consumption.; Disposal of batteries
Safety warnings . . . . . . . . . . . . . . . . . . . . . . . . . 2
Getting started . . . . . . . . . . . . . . . . . . . . . . . . . 3
Use of the remote control RC4401/01 . . . . . . 5
Use of the option key . . . . . . . . . . . . . . . . . . . 7
Keys at the right side of the TV . . . . . . . . . . . . 7
Switch the TV on . . . . . . . . . . . . . . . . . . . . . . . 8
First time installation . . . . . . . . . . . . . . . . . . . . 8
How to navigate through the menus . . . . . . . 11
Use of the TV menu settings . . . . . . . . . . . . . 12
Adjust picture menu settings . . . . . . . . . . 14
Adjust sound menu settings . . . . . . . . . . 17
Enjoy Ambilight . . . . . . . . . . . . . . . . . . . . 19
Adjust feature menu settings . . . . . . . . . . 22
Search for and store TV channels . . . . . . 25
Rearrange the channel number list . . . . . 27
Set your preferences . . . . . . . . . . . . . . . . 28
Select your connections . . . . . . . . . . . . . 29
Select a decoder channel number . . . . . . 29
Reset the factory settings . . . . . . . . . . . . 30
How to upgrade the TV software . . . . . . 30
Create your favourite list . . . . . . . . . . . . . . . . 31
Multimedia Browser . . . . . . . . . . . . . . . . . . . . 32
Teletext . . . . . . . . . . . . . . . . . . . . . . . . . . . . . 35
To make video and audio connections . . . . . 37
Side panel overview . . . . . . . . . . . . . . . . . 38
Rear panel overview . . . . . . . . . . . . . . . . 39
Connect:
a VCR or DVD recorder . . . . . . . . . . . . . 40
two VCRs or VCR and DVD recorder . . .41
a satellite receiver . . . . . . . . . . . . . . . . . . 41
a DVD player, Cable box/game console . .42
a DVD player or Cable box . . . . . . . . . . . 42
a DVD player, sat. receiver or cable box .43
a PC . . . . . . . . . . . . . . . . . . . . . . . . . . . . . 44
a Home Cinema amplifier . . . . . . . . . . . . 45
Select connected equipment . . . . . . . . . . . . . 46
Record with your recorder . . . . . . . . . . . . . . 46
Audio- and video equipment keys . . . . . . . . . 47
Troubleshooting . . . . . . . . . . . . . . . . . . . . . . . 48
Annex 1: To set the remote control to
work a Philips DVD or DVD/R . . . . . . . . 49
Annex 2 - Philips TV software upgrade
with portable memory . . . . . . . . . . . . . . . 50
Annex 3 - Philips TV-Slideshow Format
with background music . . . . . . . . . . . . . . 53
Annex 4 - Philips TV - Digital camera
and USB issues . . . . . . . . . . . . . . . . . . . . . 55
Annex 5 - Issues referring to connected
peripherals with a HDMI connector . . . . 56
Index . . . . . . . . . . . . . . . . . . . . . . . . . . . . . . . . 57
Recycling . . . . . . . . . . . . . . . . . . . . . . . . . . . . . 58
Product information . . . . . . . . . . . . . . . . . . . . 58
Contents
EN
1
If this instruction manual does not give an answer or if ‘Troubleshooting’ does not solve your TV
problem, you can call your Local Philips Customer or Service Centre. See the supplied Worldwide
guarantee booklet.
Please, have the Model and Product number which you can find at the back or the bottom of your television
set or on the packaging, ready, before calling the Philips customer support service.
Model:
Product No: ....................................
About this User Manual
This manual contains all information you will need to initially install and operate your new TV.
Also read the help texts which are being displayed at the bottom of the screen.
32PF9541/10 - 32PF9551/10
"Loading the manual" means you need to wait until the file loads and becomes available for online reading. Some manuals are very large, and the time they take to appear depends on your internet speed.
Was this manual helpful?
About this manual
- Brand
- Philips
- Model
- 32PF9541/10
- Document type
- Manual
- Language(s)
- English
- Pages
- 58
- File size
- 1 MB
- Format
Summary
2 EN Safety warnings Do not insert the power plug in a wall socketor hang the TV to the wall before allconnections are made. • Place or hang the TV wherever you want, but make sure that air can circulate freely through theventilation slots. • Do not install the TV in a confined space such as a book ...
Before you switch on your TV, connect all your peripheral equipment. See To make video and audioconnections, p. 37. There is a wide range of audio and video equipment that can be connected to your TV. See To makeaudio and video connections, p. 37. EXT1 can handle CVBS, RGB and Audio L/R; EXT2 can ha...
< Insert the aerial plug firmly into the aerial socket x at the bottom of the TV. Getting started (Continued) EN 4 - To connect a camera, camcorder or game, see To make video and audio connections, p. 38. - To connect a headphone, see To make video and audio connections, p. 38. - To connect a USB...
Ask a question
Related manuals
Popular Philips Other


More Philips Other models
 Philips 32M2N6800M/00 User Manual
 Philips 32M2N8900/00 Installation Manual
 Philips 32MD357B Manual
 Philips 32PF1700T/96 Manual
 Philips 32PF5331/10 User Manual
 Philips 32PF7421D/37 User Manual
 Philips 32PF9641D/10 Manual
 Philips 32PFH4100/88 Quick Guide
 Philips 32PFH4101/88 Quick Guide
 Philips 32PFH4309 Manual
 Philips 32PFH4309/88 Quick Guide
 Philips 32PFH5500/88 Quick Guide