Page 2 - Dear customer; DO NOT EXPOSE THIS APPARATUS TO RAIN,
RQ TX00 99 2 Dear customer Thank you for purchasing this product. For optimum performance and safety, please read these instructions carefully. Indicates features applicable to: [Southeast]Asia,[Thailand,[The[Middle[East,[South[Africa,][Saudi[Arabia[and[Kuwait] [Australia]and]N.Z.] -If you see this ...
Page 3 - TABLE OF CONTENTS; Simple Setup; Digital transmitter; TV Audio
RQ TX00 99 3 Reference TABLE OF CONTENTS Caution for AC Mains Lead. . . . . . . . . . . . . . . . 4Safety precaution . . . . . . . . . . . . . . . . . . . . . . . 4Accessories . . . . . . . . . . . . . . . . . . . . . . . . . . . . 5 Simple Setup step 1 Assembling the speakers . . . . . . . . . . 6 ...
Page 4 - Caution for AC Mains Lead; IMPORTANT; How to replace the fuse; Open the fuse cover with a screwdriver.; Safety precaution; Placement
4 Caution f o r A C Mains Lea d / Safety pr ecaution RQ TX00 99 Caution for AC Mains Lead (For Saudi Arabia and Kuwait) (“GS” area code model only) For your safety, please read the following text carefully.This appliance is supplied with a moulded three pin mains plug for your safety and convenience...
Page 5 - Acce; Accessories
5 RQ TX00 99 Acce ssories Please check and identify the supplied accessories. [PT565] [PT560] ∏ 1 Remote control [PT565] (N2QAYB000205) [PT560] (N2QAYB000255) ∏ Speaker cables [PT565] 1 k short cable (for center speaker) [PT560] 1 k short cable (for center speaker) 2 k long cable (for surround speak...
Page 6 - Asse; Preventing the speakers from falling; Speaker assembly option; step; Assembling the speakers
6 Sim ple S etu p Asse mb ling the s p ea ker s RQ TX00 99 [PT565] [PT865] Front speakers and surround speakers [PT560] Front speakers Preparation ≥ To prevent damage or scratches, lay down a soft cloth and perform assembly on it. ≥ For assembly, use a Phillips-head screwdriver. ≥ For optional wall ...
Page 7 - Po; Positioning
7 Sim ple S etu p Po s it io n in g RQ TX00 99 How you set up your speakers can affect the bass and the sound field. Note the following points: ≥ Place speakers on flat secure bases. ≥ Placing speakers too close to floors, walls, and corners can result in excessive bass. Cover walls and windows with...
Page 8 - Notes on speaker use; Attaching to a wall; Caution; Speaker installation options; DO
8 Si mp le S etu p Po s it io n in g RQ TX00 99 Notes on speaker use ≥ Use only supplied speakers Using other speakers can damage the unit, and sound quality will be negatively affected. ≥ You can damage your speakers and shorten their useful life if you play sound at high levels over extended perio...
Page 9 - Cab; Speaker connections; Cable connections; Speaker
9 Sim ple S etu p Cab le connections RQ TX00 99 Turn off all equipment before connection and read the appropriate operating instructions. Do not connect the AC mains lead until all other connections are complete. (Continued on next page) 1 Speaker connections step 3 Cable connections L R CENTER S UB...
Page 10 - le co; Audio and video connections; Other video connections for improved picture quality; TV terminal; VIERA Link “HDAVI Control”
10 Si mp le S etu p C a b le co nn e c ti on s RQ TX00 99 Basic setup example [Note] ≥ Do not make the video connections through the video cassette recorder. Due to copy guard protection, the picture may not be displayed properly. ≥ Only one video connection is required. Choose one of the video conn...
Page 11 - Other audio connections; TV or external; Radio antenna connections
11 Sim ple S etu p Cab le connections RQ TX00 99 Other audio connections TV or external equipment terminal Cable required (not included) Main unit terminal Features Optical digital audio cable ≥ Do not bend sharply when connecting. [\\\\\\OPTICAL\IN\\\\\\] This unit can decode the surround signals r...
Page 12 - Digital transmitte; Digital transmitter connection; AC mains lead connection; Before connecting the AC mains lead
12 Sim ple S etu p Digital transmitte r connection [PT865] / A C mains lea d connection RQ TX00 99 Conserving power The main unit consumes a small amount of power, even when it is in standby mode (approx. 0.4 W). To save power when the unit is not to be used for a long time, unplug it from the house...
Page 13 - AC mains lead connection for the wireless system:; Batteries; Preparing the remote control
13 Sim ple S etu p A C mains lead con n ectio n / Pr eparing the re mote contr o l 13 RQ TX00 99 [PT865] AC mains lead connection for the wireless system: ∫ Batteries ≥ Do not use rechargeable type batteries. ≥ Do not heat or expose to flame. ≥ Do not leave the battery(ies) in an automobile exposed ...
Page 14 - rf; The QUICK SETUP screen assists you to make necessary settings.; Details of settings; Performing QUICK SETUP; ETUP; MENU LANGUAGE
14 Si mp le S etu p P e rf orming Q U ICK SETU P RQ TX00 99 The QUICK SETUP screen assists you to make necessary settings. ∫ Details of settings ≥ Underlined items are the factory settings in the above table. § Language options [The[Middle[East,[South[Africa,[Saudi[Arabia[and[Kuwait] : FRANÇAIS, ESP...
Page 15 - Pr; If noise is excessive; Press; Presetting the radio stations; Presetting stations automatically; Numbered; SELECTOR; MEMORY; Confirming the preset channels
15 Sim ple S etu p Pr esetting the radio stations RQ TX00 99 Up to 30 stations can be set. [Australia[and[N.Z.] Up to 30 stations can be set in each band, FM and AM. ≥ “SET OK” is displayed when the stations are set, and the radio tunes to the last preset station. ≥ “ERROR” is displayed when automat...
Page 16 - TV operations; Control reference guide
16 Co ntr o l re fe re nc e gu id e RQ TX00 99 Other Panasonic audio/video equipment may start functioning when you operate the unit using the supplied remote control.You can operate this unit in another mode by setting the remote control operating mode to “REMOTE 2”. The main unit and remote contro...
Page 17 - When “Input Selection” is selected; Utilising the START menu
17 Con tr o l ref e rence g u id e / Uti lisin g the ST AR T men u 17 RQ TX00 99 You can select desired source or access playback/menus by using the START menu. When “Input Selection” is selected You can select a desired source from the menu. ≥ DVD/CD ( ➜ 14), FM ( ➜ 15), [Australia[and[N.Z.] AM ( ➜...
Page 18 - Basic pla; Basic play; Using the main unit
18 Basic pla y RQ TX00 99 Basic play PreparationTo display the picture, turn on your TV and change its video input mode. [Note] ≥ DISC CONTINUES TO ROTATE WHILE MENUS ARE DISPLAYED. To preserve the unit’s motor and your TV screen, press [ ∫ ] (Stop) when you are finished with the menus. ≥ Total titl...
Page 19 - If you are experiencing problems, refer to troubleshooting (; Disc menu
19 Basic pla y RQ TX00 99 If you are experiencing problems, refer to troubleshooting ( ➜ 38 to 40). Using the remote control One touch play The main unit automatically turns on and starts playing the disc in the tray. Stop The position is memorised while “RESUME STOP” is on the screen. ≥ Press [ 1 P...
Page 20 - Other playback functions; Repeat play; Show the repeat mode.; Program and Random play; Select the play mode.; Random play; Select a group or title.
20 O ther p la y b a c k fu ncti on s RQ TX00 99 Other playback functions This works only when the elapsed play time can be displayed. It also works with all JPEG content. Items shown differ depending on the type of disc and playback mode. Preparation ≥ [DVD-VR] Select “DATA” in “DVD-VR/DATA” ( ➜ 27...
Page 21 - Using navigation menus; Selecting the picture in Thumbnail menu; Playing data discs; Using PLAYBACK MENU; Playing the programs; Playing a play list; Select the play list.
21 Us in g na v ig a ti on m e n u s RQ TX00 99 Using navigation menus ≥ [DVD-VR] Select “DATA” in “DVD-VR/DATA” ( ➜ 27, “OTHERS” menu) to play WMA, MP3, JPEG, MPEG4 or DivX contents. “PLAYBACK MENU” screen appears when the disc contains both video (MPEG4/DivX) and other format (WMA/MP3/JPEG). You c...
Page 22 - Using on-screen menus; O F F; AUDIO; REPEAT MODE
22 Us ing on-scr een m e n u s RQ TX00 99 Using on-screen menus ∫ Menu 1 (Disc/Play) CANCEL - S LEEP - REPEAT MUTING -FL DI S PLAY -PLAY MODE S UBWOOFER -CH S ELECT S ETUP S OUND LEVEL TOP MENU MENU DIRECT NAVIGATOR S TART PLAYLI S T S LOW/ S EARCH PLAY PAU S E S TOP S KIP 1 2 3 4 5 6 7 8 9 0 10 CAN...
Page 23 - Except; PLII
23 Us ing on-scr een m e n u s RQ TX00 99 ∫ Menu 2 (Video) ∫ Menu 3 (Audio) ∫ Except [Australia[and[N.Z.] Menu 4 (Karaoke) ∫ Menu 5 (HDMI) (Continued on next page) DATE DISPLAY [JPEG] To select “ON” or “OFF” for picture’s date display ROTATION To rotate a picture (during pause) [JPEG] : 0 ,------. 9...
Page 24 - Confirming HDMI information; Display the unit’s registration code; About DivX VOD contents
24 Us ing on-sc reen men u s / About DivX V O D contents RQ TX00 99 Confirming HDMI information e.g. 1 Connection status 2 Shows the output signal type. 3 Shows the number of audio channels. 4 ( ➜ 23, VIDEO FORMAT) 5 [ ➜ 23, COLOR SPACE (or COLOUR SPACE)] [Note] When “OFF” is selected in “AUDIO OUT”...
Page 25 - Changing the player settings; DISC; PASSWORD
25 Ch an gi ng th e pl a y er s e ttin g s RQ TX00 99 Changing the player settings ≥ The settings remain intact even if you switch the unit to standby. ≥ Underlined items are the factory settings in the following table. ∫ “ DISC ” menu § 1 Language options [The[Middle[East,[South[Africa,[Saudi[Arabi...
Page 26 - VIDEO
26 Ch an gi ng th e pl a y er s e ttin g s RQ TX00 99 Changing the player settings ∫ “ VIDEO ” menu ∫ “ AUDIO ” menu § 5 Refer to “Frame still and field still” ( ➜ 41, Glossary). § 6 When audio is output from HDMI AV OUT terminal, and the connected equipment does not support the item selected, the a...
Page 27 - Language code list
27 Ch an gi ng th e pl a y er s e ttin g s RQ TX00 99 ∫ “ DISPLAY ” menu ∫ “ HDMI ” menu ∫ “ OTHERS ” menu (Continued on next page) QUICK SETUP enables successive settings of the items in the shaded area. LANGUAGE Choose the language for the on-screen messages. [The[Middle[East,[South[Africa,[Saudi[...
Page 28 - Presetting stations manually; Selecting the delay time of the speakers; Manual tuning; Select the frequency.; Enjoying the radio
28 RQ TX00 99 Ch an gi ng th e pla y er settin g s Enjo ying the radio Changing the player settings (Effective when playing 5.1-channel sound) (Center and surround speakers only)For optimum listening with 5.1-channel sound, all the speakers, except for the subwoofer, should be the same distance from...
Page 29 - Enjoying Karaoke (except; Start playback and adjust the volume of the main unit.; Using Karaoke mode; K A R A O K E M O D E; OFF; Adding echo effect
29 Enjo ying Kara oke (e xc ept ]Australia[an d[N.Z.] ) RQ TX00 99 Enjoying Karaoke (except ]Australia[and[N.Z.] ) [Note] Before connecting/disconnecting the microphone(s), reduce the volume of the main unit to its minimum. Preparation 1 Select “DVD/CD” as the source. 2 Press [ s , MIC VOL] on the m...
Page 30 - Using the VIERA Link “HDAVI Control; Automatic setup; One touch play
30 Us ing the VIERA Link “H D A VI Contr o l TM ” RQ TX00 99 Using the VIERA Link “HDAVI Control TM ” VIERA Link “HDAVI Control” VIERA Link “HDAVI Control” is a convenient function that offers linked operations of this unit, and a Panasonic TV (VIERA) under “HDAVI Control”. You can use this function...
Page 31 - Speaker control
31 Using the VIERA Link “HD A VI Contr o l TM ” RQ TX00 99 You can select whether audio is output from this unit’s speakers or the TV speakers by using the TV menu settings. For details, refer to the operating instructions of your TV. Home Cinema This unit’s speakers are active. ≥ When this unit is ...
Page 32 - Using sound effects; Equalizer; Surround Enhancer; Setting the sound effects; SW BOOST; Using Dolby Pro Logic
32 Us ing sound effects RQ TX00 99 Using sound effects [Note] ≥ The following sound effects may not be available or have no effect with some sources, or when headphones are used ( ➜ 17). ≥ You may experience a reduction in sound quality when these sound effects are used with some sources. If this oc...
Page 33 - To adjust speaker level during play; Adjusting the subwoofer level; Enter test tone mode.; Start the setup
33 Usi n g so un d eff e cts RQ TX00 99 You can adjust the amount of bass. The unit automatically selects the most suitable setting according to the type of playback source. ≥ To check the current setting, press [SUBWOOFER LEVEL]. ≥ The setting you make is retained, and recalled every time you play ...
Page 34 - Operating other equipment; Enjoying TV audio; Making settings for digital audio input; Playing from an USB device
34 Op eratin g oth e r eq uip m en t RQ TX00 99 Operating other equipment You can play an external source through your home theater system. Preparation Confirm the audio connection to the AUX terminal on the main unit ( ➜ 10). ≥ Reduce the volume on the TV to its minimum, and then adjust the volume ...
Page 35 - Using the iPod; Enjoying music; Enjoying photos/videos; Play a slideshow or video on your iPod.
35 RQ TX00 99 Preparation ≥ To view photos/videos from the iPod.– Ensure the video connection to the VIDEO OUT terminal on this unit ( ➜ 10). – Operate the iPod menu to make the appropriate photo/video output settings for your TV. (Refer to the operating instructions of your iPod.) ≥ To display the ...
Page 36 - Discs that can be played; Commercial discs; Discs that cannot be played
36 Discs that can be pla y ed RQ TX00 99 Discs that can be played Commercial discs Recorded discs ( ± : Playable, — : Not playable) ≥ It may not be possible to play all the above-mentioned discs in some cases due to the type of disc, the condition of the recording, the recording method, or how the f...
Page 37 - Tips for making data discs; Format; Maintenance
37 D is cs that ca n be p la y e d / Mai n te nan c e RQ TX00 99 ∫ Tips for making data discs ≥ There may be differences in the display order on the menu screen and computer screen. ≥ This unit cannot play files recorded using packet write. DVD-RAM ≥ Discs must conform to UDF 2.0. DVD-R/RW ≥ Discs m...
Page 38 - Troubleshooting guide; Power
38 T rou b lesh oo tin g gu id e RQ TX00 99 Troubleshooting guide Before requesting service, make the following checks. If you are in doubt about some of the check points, or if the solutions indicated in the char t do not solve the problem, consult your dealer for instructions. Power No power. ≥ In...
Page 39 - General operations; Picture
39 T rou b lesh oo tin g gu id e RQ TX00 99 (Continued on next page) General operations (Continued) The setting you made in “TV ASPECT” ( ➜ 26, “ VIDEO ” menu) or “LANGUAGE” ( ➜ 27, “ DISPLAY ” menu) does not work. ≥ The settings for “TV ASPECT” § 1 and “LANGUAGE” § 2 will automatically follow to th...
Page 40 - rou
40 RQ TX00 99 T rou b lesh oo tin g gu id e Troubleshooting guide Picture (Continued) Picture stops. [DivX] ≥ Picture may stop if the DivX files are greater than 2 GB. — Picture size does not fit the screen ≥ Change “TV ASPECT” in the “VIDEO” menu. ≥ Use the TV to change the aspect. ≥ Change the zoo...
Page 41 - Gloss; Glossary
41 Gloss ar y RQ TX00 99 Glossary Decoder A decoder restores the coded audio signals on DVDs to normal. This is called decoding. DivX DivX is a popular media technology created by DivX, Inc. DivX media files contain highly compressed video with high visual quality that maintains a relatively small f...
Page 42 - Specifications; AMPLIFIER SECTION
42 Sp ec ifi c ati o n s RQ TX00 99 Specifications [PT565] RMS Output Power: Dolby Digital Mode Front Ch 125 W per channel (3 ≠ ), 1 kHz, 10 % THD Surround Ch 125 W per channel (3 ≠ ), 1 kHz, 10 % THD Center Ch 250 W per channel (6 ≠ ), 1 kHz, 10 % THD Subwoofer Ch 250 W per channel (6 ≠ ), 100 Hz, ...
Page 43 - WIRELESS TRANSMITTER AND RECEIVER
43 Sp ec ifi c ati o n s RQ TX00 99 [PT565] [Surround\speakers\SB-HS860] Type 1 way, 1 speaker system (Bass reflex) Speaker unit(s) Impedance 3 ≠ Full range 6.5 cm Cone type Input power (IEC) 125 W § 8 (Max) Output sound pressure 80 dB/W (1.0 m) Frequency range 76 Hz t o 2 5 kHz ( j 16 dB) 89 Hz t o...


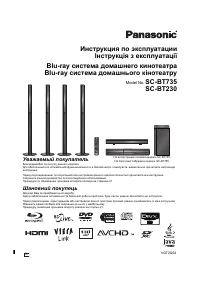 Panasonic SC-BT230 Manual
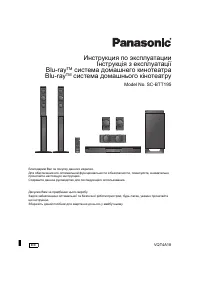 Panasonic SC-BTT195 User Manual
 Panasonic SC-BTT785GNK User Manual
 Panasonic SC-HT05, SC-HT07 Manual
 Panasonic SC-HT15, SC-HT17 Manual
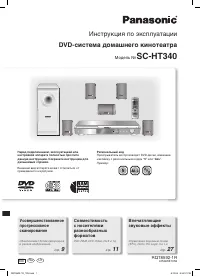 Panasonic SC-HT340 Manual
 Panasonic SC-HT520, SC-HT878 Manual
 Panasonic SC-HT600, SC-HT860 Manual
 Panasonic SC-HT623 Manual
 Panasonic SC-HT700, SC-HT900 Manual
 Panasonic SC-HT840, SC-HT880 Manual
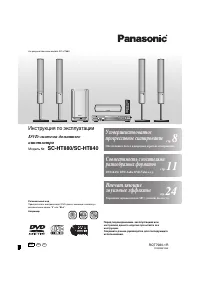 Panasonic SC-HT880 User Manual
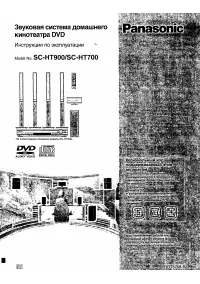 Panasonic SC-HT900 Manual
 Panasonic SC-HT928 Manual
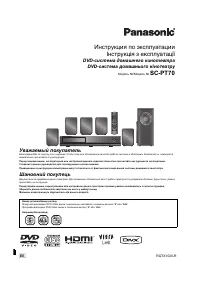 Panasonic SC-PT70 Manual
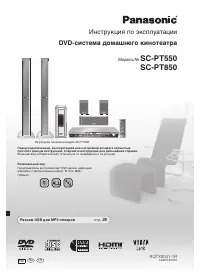 Panasonic SC-PT550 Manual
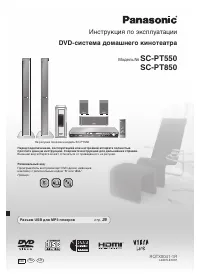 Panasonic SC-PT850 Manual
 Panasonic SC-XH155 Manual
 Panasonic SC-XH165 Manual