Palmgren 9681061 - User Manual
Palmgren 9681061 Grinding Machine – User Manual, read for free online in PDF format. We hope this helps you resolve any issues you may have. If you have further questions, please contact us through the contact form.


Table of Contents:
- Page 2 – GETTING STARTED; STRUCTURAL REQUIREMENTS; UNPACKING; SEE GENERAL SAFETY INSTRUCTIONS, CAUTIONS AND; SAFETY RULES; PROPOSITION 65 WARNING:; BE PREPARED FOR JOB; NOT; PREPARE WORK AREA FOR JOB
- Page 3 – SPECIFICATIONS; ATTACH ABRASIVE DISC TO ALUMINUM DISC; Figure 1 - Assemble and adjust disc table.
- Page 4 – ASSEMBLE BELT TABLE; INSTALLATION; POWER SOURCE; Figure 4 – 3-Prong receptacle
- Page 5 – Wire Size; OPERATION; BELT INSTALLATION; Figure 5 – 2-Prong receptacle with adapter
- Page 6 – MAINTENANCE
- Page 7 – TROUBLESHOOTING; SYMPTOM POSSIBLE CAUSE(S) CORRECTIVE ACTION
- Page 10 – NOTES
- Page 12 – WARRANTY; Failure to follow these
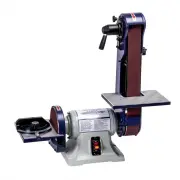
Operating Manual & Parts List 9681061C
2 x 6"
belt and disc
Sander
Read carefully and follow all safety rules and operating instructions before
first use of this product.
9631694.01-1117
"Loading the manual" means you need to wait until the file loads and becomes available for online reading. Some manuals are very large, and the time they take to appear depends on your internet speed.
Summary
2 Palmgren Operating Manual & Parts List 9681061C GETTING STARTED STRUCTURAL REQUIREMENTS Make sure all supporting structures and load attaching devices arestrong enough to hold your intended loads. If in doubt, consult aqualified structural engineer. ELECTRICAL REQUIREMENTS The power supply to ...
3 Palmgren Operating Manual & Parts List 9681061C SAFETY RULES (CONTINUED) TOOL SHOULD BE MAINTAINED • Always unplug tool prior to inspection. • Consult manual for specific maintaining and adjusting proce- dures. • Keep tool lubricated and clean for safest operation. • Remove adjusting tools. Fo...
4 Palmgren Operating Manual & Parts List 9681061C ASSEMBLY (CONTINUED) ASSEMBLE BELT TABLE Refer to Figure 2. 1. Mount belt table to left side of belt housing using hex socket head screw and flat washer. 2. Set the belt table at right angle to the belt 3. Be sure gap between table and belt is 1/...