Page 2 - Contents
Guide to the appliance . . . . . . . . . . . . . . . . . . . . . . . . . . . . . . . . . . . . . . . . . . . . . 4 Oven interior and accessories . . . . . . . . . . . . . . . . . . . . . . . . . . . . . . . . . . . . . . . . . 4Control panel . . . . . . . . . . . . . . . . . . . . . . . . . . . . . ...
Page 4 - Oven interior and accessories; Guide to the appliance
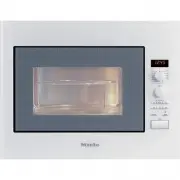
Oven interior and accessories a Oven door b Door locking mechanism c Quartz grill d Control panel e Turntable f Grilling rack g Glass tray h Gourmet plate i Cover j Boiling rod Guide to the appliance 4
Page 5 - Control panel
Control panel k Electronic timer and clock display l Rotary selector for microwave power,grill and combination programmes m Rotary selector to enter time andweight n Automatic programme buttons o Time of day button m p Minute minder button l q Memory button (to save a 1-3 stageprogramme sequence) r ...
Page 6 - Accessories supplied
Accessories supplied Grilling rack The grilling rack can be used for allfunctions with and withoutmicrowave power, except for Microwave Solo mode. To avoid the grilling rack being usedinadvertently on Microwave Solo, itshould not be kept inside themicrowave oven. Glass tray The glass tray is suitabl...
Page 7 - Disposal of your old appliance; Caring for the environment
Disposal of the packingmaterial The transport and protective packaginghas been selected from materials whichare environmentally friendly for disposaland should be recycled.Ensure that any plastic wrappings,bags, etc are disposed of safely andkept out of the reach of babies andyoung children. Danger ...
Page 8 - Correct application; The appliance is not designed for commercial use. It; Warning and Safety instructions
This appliance complies with all relevant safetyrequirements. Inappropriate use can, however,present a risk of both personal injury and damage toproperty.To avoid the risk of accidents and damage to theappliance, please read these instructions carefullybefore installation and before using it for the...
Page 10 - Technical safety; Check the appliance for visible signs of damage. Do
~ This appliance is not a toy! To prevent the risk of injury, do not let children play with the appliance or itscontrols. ~ Danger of suffocation. Packaging, e.g. cling film, polystyrene and plastic wrappings, must be kept out ofthe reach of babies and children. Dispose of or recycleall packaging sa...
Page 14 - Correct use; Danger of burning. The microwave oven gets hot
Correct use , Danger of burning. The microwave oven gets hot during grilling (with and without the microwavefunction). You could burn yourself on the oveninterior, grill element, hot food, accessories and ovendoor. Use oven gloves when working with hot food inthe oven or placing food in or removing ...
Page 16 - and; teat must be loosened. Otherwise pressure; This is particularly important when preparing
~ Always ensure that food has been placed in the microwave oven and that the turntable is in positionbefore switching on. ~ Do not cook or reheat food or liquids in sealed containers, jars or bottles. With baby bottles the screwtop and teat must be loosened. Otherwise pressure builds up which can ca...
Page 24 - How the microwave oven works
In a microwave oven there is ahigh-frequency tube called amagnetron. This converts electricalenergy into microwaves. Thesemicrowaves are distributed evenlythroughout the oven interior, andrebound off the metal sides of the oveninterior to reach the food from all sides.Microwave distribution is impro...
Page 25 - Microwave Solo mode; Modes of operation
What can a microwave ovendo? In the microwave oven, food can becooked, reheated or defrosted quickly. You can use the microwave in thefollowing ways: – Food can be defrosted, reheated or cooked by entering a power settingand a duration. – Deep-frozen, ready-made meals can be defrosted and then rehea...
Page 26 - Material and shape; Metal; Suitable containers for microwave ovens
Microwaves – are reflected by metal, – pass through glass, porcelain, plastic and card, – and are absorbed by food. Material and shape The material and shape of containersused affect cooking results anddurations. Heat distribution is moreeven in round and oval shaped flatcontainers than in rectangul...
Page 28 - Disposable containers
Disposable containers, such as traysmade from polystyrene, can only beused for very short, timed warming andreheating of food. Plastic boiling bags can be used forcooking and reheating. They shouldbe pierced beforehand so thatsteam can escape. This prevents abuild-up of pressure and reducesthe risk ...
Page 29 - The cover; Do not use a lid or cover if
The cover – prevents too much steam escaping, especially when cooking foods whichneed longer to cook such aspotatoes. – speeds up the cooking process. – prevents food from drying out. – helps keep the oven interior clean. Always cover food with the coversupplied. Alternatively, use lids or covers ma...
Page 30 - Before using for the first time
Important:After unpacking, let the appliancestand for approx. 2 hours at roomtemperature after transporting it toits final location before connecting itto the mains. This is important for the correctelectronic functioning of the appliance. ^ Remove all the packaging materialsfrom the appliance. Do n...
Page 31 - To switch the display back on; Time of day display
Setting the time of day ^ Connect the appliance to the mainselectricity supply. 12:00 and the m symbol will flash in the display until the current time ofday is set. Before this, the time ofday will start to run from 12:00, asthe clock will start as soon as theappliance is connected to the mainselec...
Page 32 - To open the door; Placing the dish in the oven; Turntable; To close the door; Starting a programme; Operation
To open the door ^ Press the a button to open the door. If the microwave oven is being used,opening the door will interrupt thecooking programme. Placing the dish in the oven Ideally the dish should be placed in themiddle of the oven. Turntable The turntable helps the food to cook,reheat or defrost ...
Page 33 - door
When heating up food which cannot bestirred or turned during cooking, as witha plated meal, it is best to use a lowermicrowave power level. This ensures the heat is distributedevenly. Heat for long enough to cookthe food properly. ^ Set the required duration using thetime selector. Any time between ...
Page 34 - Altering the settings; microwave power level; To cancel a programme
Interrupting or re-starting aprogramme At any time you can . . . . . interrupt a programme: ^ Press the Stop/C button or open theappliance door. The time stops counting down. . . . continue the programme: ^ Close the door and press Start. The programme continues. Altering the settings If you discove...
Page 35 - Programming durations; System lock; To activate the system lock
Quick start (programmable) Pressing the Start button c is sufficient to set the appliance operating onmaximum power.Three set durations are stored in thememory: ^ 30 secs: Press Start c once ^ 1 min: Press Start c twice ^ 2 min: Press Start c three times Pressing the Start c button four times in suc...
Page 36 - Minute minder; Altering a minute minder entry
Minute minder The minute minder can be used to timeany activity in the kitchen, e.g. boilingeggs. The time set counts down in onesecond steps. ^ Press the l button. 0:00 flashes in the display and the l symbol lights up. ^ Use the time selector to set theminute minder time you require. ^ Press the S...
Page 37 - To change a cooking duration
The grill can be used on 4 settings: byitself, and in combination with theMicrowave function at one of threedifferent power levels. If the total grilling time required is lessthan 15 minutes, the grill should bepre-heated for approx. 5 minutesbefore placing food under it. Thin, flat cuts of fish and...
Page 39 - Use; Gourmet plate
Use The gourmet plate gets extremelyhot when in use. Always use ovengloves when handling it to avoidburns. Place it on a suitableheat-resistant mat or pot rest. Before using for the first time Before using the gourmet plate for thefirst time, fill it with 400 ml water andadd 3-4 tbsps vinegar or lem...
Page 40 - Some suggested uses; Hamburgers; Fillet steak; Recipes
Some suggested uses Pre-heat the gourmet plate directly onthe turntable for up to 5 minutes at 450W + Grill L . Fish fingers (frozen) , 150 g + 2 tbsp oil L , 3-4 minutes each side Hamburgers 2 burgers + 2 tbsp oil L , 3-4 minutes each side Croquette potatoes (frozen) , 10-12 + 2 tbsp oil L , 6-8 mi...
Page 42 - Pork fillet in a Roquefort sauce
Pork fillets (Serves 2) 1 piece pork fillet (approx. 400 g)4 rashers streaky baconSalt, pepper10 g butter200 g sliced mushrooms200 ml double cream2 tbsp brandy Cut the pork into 4 slices. Season eachslice with salt and pepper, and wrap ina rasher of streaky bacon. Secure witha cocktail stick if nece...
Page 44 - Pineapple cake; Quick almond tart
Pineapple cake For the cake:2 eggs80 g sugar1 1 / 2 ripe bananas 30 g chocolate chips100 g plain flour 3 / 4 tsp. baking powder Topping:1 tin pineapple chunks(drained weight 240 g)1 1 / 2 tbsp brown sugar 1 1 / 2 tbsp desiccated coconut Beat together the eggs and sugar untilfrothy. Mash the bananas ...
Page 45 - Cooking food from frozen; Operation - Automatic programmes
All of the Automatic programmes areweight dependent. The weight of the food can bedisplayed as metric (g) or imperial (lb).See "Changing the settings" After selecting a programme, enter theweight of the food. The microwave ovenautomatically calculates the durationaccording to the weight ente...
Page 47 - Vegetables; Recipes for Automatic programmes
Below are some recipe suggestions forthe Automatic programmes using the"Cooking fresh food" function ° . These can be adapted to suit yourrequirements. It is important to follow the weightguidelines for the programmeconcerned. If the weight guidelinesare exceeded, the food will not cooksuffi...
Page 48 - Potatoes; Fish
AC 2 E Potatoes This programme can be used to cooknew potatoes and boiled potatoes.Enter the weight for the potatoes andthe cooking liquid. When cooking potatoes, add approx.1 tbsp water per potato. If cooking thepotatoes in their skins, pierce the skinsseveral times with a fork or skewerbefore cook...
Page 49 - Kebabs
AC 4 3 Kebabs Pork kebabs(makes 8 kebabs) 1 piece of pork fillet, approx. 300 g1 red pepper2 onions For the marinade:8 tbsp vegetable oilSalt, pepper, paprika and chilli powder 8 wooden kebab skewers Cut the pork fillet into 16 cubes. Washthe pepper and cut into bite-sizedpieces. Peel the onion and ...
Page 51 - Savoury bakes
Rosefish and tomato gratin(serves 4) 500 g rosefish fillet2 tbsp lemon juice500 g tomatoesHerb salt2 tsp oregano, finely chopped150 g Cheddar cheese, grated Cut the rosefish into pieces, drizzle withlemon juice and leave to stand forapprox. 10 minutes.Dice the tomatoes, and place in abaking dish wit...
Page 53 - Programming; Changing an entry
One favourite programme can besaved in memory. This programme canbe used for your most frequentlycooked recipe. The programme canhave up to 3 stages (e.g.: 1 minute at600 W, followed by 2 minutes on Grill,and finally 3 minutes at 150 W + Grill). Programming (The example given is for a 3-stageprogram...
Page 54 - To call up your favourite programme
To call up your favourite programme ^ Turn the programme selector to the12 o'clock position. ^ Press the M button. ^ Press the Start button. In the event of a power cut, thefavourite programme is no longersaved and must be re-entered. Saving your favourite programme (Memory) 54
Page 55 - Changing the settings
Some of the standard settings for theappliance (which are set at the factory)have an alternative which you canselect if required. Please consult the chart for the differentoptions. The factory settings aremarked with a star* on the chart. Proceed as follows: ^ Press and hold the m and M buttons at t...
Page 56 - Setting
Setting Settings available (* factory default) P I Night time switch-off S 0 * S I Night time switch-off is deactivated. Night time switch-off is activated.The time of day display is switched off from11 pm to 4 am. P 2 Automatickeep-warm function S I * S 0 The automatic keep-warm function isactivate...
Page 57 - Reheating
Select the following microwave powerlevels to reheat food: Drinks . . . . . . . . . . . . . . . . . . . . . 900 WFood . . . . . . . . . . . . . . . . . . . . . . 600 WFood for babies and toddlers . . . 450 W We do not recommend heating orreheating food or drinks for babiesor young children in the mi...
Page 58 - rice or semolina; Tips on cooking; Cooking
Place the food in a microwave-proofdish and cover it. When cooking, it is a good idea toselect a power level of 900 W to startwith and then when the food is hotreduce the power level to 450 W formore gentle continued cooking. For dishes such as rice or semolina pudding , first select a power level o...
Page 59 - Defrosting; Defrosting/Defrosting and reheating or cooking
Do not re-freeze partially or fullydefrosted food. Consume defrostedfood as soon as possible, as it willlose its nutritional value and spoil ifleft for too long. Defrosted food mayonly be re-frozen after it has beencooked. Defrosting Select the following microwave powersettings to defrost food: – 80...
Page 61 - Cleaning and care
Miele branded cleaning andconditioning products are availablefrom the Miele Spare Parts Departmentor via the internet atwww.miele-shop.com. Disconnect the microwave ovenfrom the power supply beforecleaning (e.g. switch off at thesocket and remove the plug). Do not use a steam-cleaningappliance to cl...
Page 62 - Appliance front
The door should be kept clean at alltimes and checked at regular intervalsfor any signs of damage. If any damage is noticed, theappliance should not be used untilthe fault has been rectified by aMiele authorised and trained servicetechnician. To clean the interior: ^ Remove the turntable, and wash i...
Page 63 - Boiling rod
To avoid damaging the surface ofyour appliance, do not use: – cleaning agents containing soda, ammonia, acids or chlorides, – cleaning agents containing descaling agents, – abrasive cleaning agents, e.g. powder cleaners and creamcleaners. – solvent-based cleaning agents, – stainless steel cleaning a...
Page 64 - Problem solving guide
Repairs to this appliance must onlybe carried out by a Miele approvedservice technician in strictaccordance with current local andnational safety regulations. Repairsand other work by unqualifiedpersons could be dangerous. Themanufacturer cannot be held liablefor unauthorised work. However, some min...
Page 66 - Guarantee; After sales service
In the event of any faults which youcannot remedy yourself, or if theappliance is under guarantee, pleasecontact: – your Miele Dealer or – the Miele Service Department (see back cover for contact details). Please note that telephone calls maybe monitored and recorded toimprove our service. When cont...
Page 67 - must; Non-rewireable plugs BS 1363; Electrical connection
Before connecting the appliance,ensure that it has not beendamaged in any way. Do not use adamaged appliance. Electrical connection U.K. All electrical work should be carried outby a suitably qualified and competentperson in strict accordance with currentnational and local safety regulations(BS 7671...
Page 69 - Building-in dimensions; Installation
When building in the appliance,ensure that the vents at the front ofthe appliance are not obstructed orblocked by any objects.Make sure that there is a gap of atleast 2.5 mm between the sides ofthe appliance and adjoining furnituredoors and at least 4 mm above theappliance. The appliance is designed...


 Miele 04 950 470 Manual
 Miele 07 682 190 Manual
 Miele 09 798 350 Manual
 Miele 09 900 700 Manual
 Miele 10 014 160 Manual
 Miele 217 Manual
 Miele 2013 Manual
 Miele 2819i Manual
 Miele 10502220 User Manual
 Miele 10639470 User Manual
 Miele 11423630 User Manual
 Miele 11502710 User Manual
 Miele 11502940 User Manual
 Miele 11614040 User Manual
 Miele 11648140 User Manual
 Miele 11695330 User Manual
 Miele 11754260 User Manual
 Miele 11754290 User Manual