Page 2 - Contents
Caring for the environment . . . . . . . . . . . . . . . . . . . . . . . . . . . . . . . . . . . . . . . . . . 3 Warning and Safety instructions . . . . . . . . . . . . . . . . . . . . . . . . . . . . . . . . . . . . . 4 Guide to the appliance . . . . . . . . . . . . . . . . . . . . . . . . . . . . ...
Page 3 - Caring for the environment
Disposal of the packing material The transport and protective packinghas been selected from materials whichare environmentally friendly fordisposal, and should be recycled. Packaging e.g. cling film, polystyreneand plastic wrappings must be kept outof the reach of babies and youngchildren. Danger of...
Page 4 - Warning and Safety instructions
This appliance complies with allrelevant local and national safetyrequirements. Inappropriate usecan, however, lead to personal injuryand damage to property. To avoid the risk of accidents anddamage to the appliance, pleaseread these instructions carefullybefore using it for the first time.They cont...
Page 5 - Technical safety
Technical safety ~ Before installation, check the cooker hood for visible signs of damage. Donot install and use a damagedappliance. It could be dangerous. ~ Before connecting the appliance to the mains supply, make sure that thevoltage and frequency details given onthe data plate correspond with th...
Page 6 - and
~ Do not connect the appliance to the mains electricity supply by amulti-socket adapter or an extensionlead. These do not guarantee therequired safety of the appliance (e.g.danger of overheating). ~ For appliances with an external fan motor (...EXT models) the connection ofthe two units must be made...
Page 7 - The overall ventilation condition
In order to ensure safe operation, andto prevent gases given off by theheating appliances from being drawnback into the room when the cookerhood and the heating appliance are inoperation simultaneously, anunderpressure in the room of 0.04 mbar(4 pa) is the maximum permissible. Ventilation can be mai...
Page 8 - Correct use
Correct use ~ Never use an open flame beneath the cooker hood. To avoid the dangerof fire, do not flambé or grill over anopen flame.When switched on, the cooker hoodcould draw flames into the filter. Fatparticles drawn into the cooker hoodpresent a fire hazard. ~ When using the cooker hood over a ga...
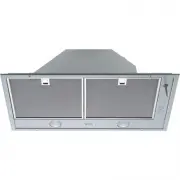
Page 10 - Guide to the appliance
Page 12 - The cooker hood works with; charcoal filters; Modes of operation
The cooker hood works with . . . air extraction: The air is drawn in and cleaned by thegrease filters and directed outside. If the on-site ventilation system doesnot have a non-return flap , then the non-return flap supplied with theappliance must be fitted in the exhaustsocket in the motor unit. Th...
Page 13 - Joystick; To switch the fan on; Press the joystick once to the right.; To select a power level; or; Operation
Joystick This is used to operate the fan settingsand the lighting. To switch the fan on ^ Press the joystick once to the right. The fan will come on at power level lI.The second fan power level indicatorlamp will light up. To select a power level ^ Press the joystick repeatedly to theright to select...
Page 16 - Filter operating hours counter; Switch the fan on with the joystick.
Filter operating hours counter The number of hours the appliance hasbeen in operation is stored in memory. The operating hours counter tells youwhen the grease filters or charcoalfilters need to be cleaned or replaced. Resetting the grease filter operatinghours counter After 30 hours of operation (o...
Page 18 - deactivated; Switch the fan off with the joystick.
Activating and altering the charcoalfilter operating hours counter (in recirculation mode) The charcoal filters must be fitted forthe cooker hood to be used inrecirculation mode. On delivery, the operating hours counterfor the charcoal filter is deactivated . For recirculation mode, the operatinghou...
Page 20 - Housing; – cleaning agents containing soda,; Grease filters; An oversaturated filter is a fire; Cleaning and care
A range of Miele branded cleaning andconditioning agents are available toorder through your Miele Dealer /Chartered Agent, the Miele Spare PartsDepartment, or via the internet onwww.miele-shop.com. , Before any cleaning or maintenance work is carried out,disconnect the cooker hood from themains supp...
Page 21 - Cleaning the grease filters by hand; – cleaning agents containing
^ To take out the grease filters, releasethe locking clip on the filter, lower thefilter 45°, unhook it at the back andremove it. To avoid damaging the filters or thehob below, make sure you hold thefilters securely at all times whenhandling them. Cleaning the grease filters by hand ^ Clean the filt...
Page 22 - If the grease filters are cleaned; before; the operating hours counter
^ When removing the filters forcleaning, also clean off any residuesof oil or fat from the now accessiblehousing to prevent the risk of thesecatching fire. When putting the grease filters back inposition, ensure that the locking clipsare facing down towards the hob. ^ If a grease filter is inadverte...
Page 24 - Changing a halogen lamp; Remove the grease filter.
Changing a halogen lamp Before any cleaning or maintenancework is carried out, disconnect thecooker hood from the mains supply. ^ Remove the grease filter. ^ Remove the charcoal filters if thecooker hood is being used inrecirculation mode. , Exercise caution when changing halogen lamps. They get ver...
Page 25 - Guarantee; After Sales Service
In the event of a fault which you cannotcorrect yourself, or if the appliance isunder guarantee, please contact: – Your Miele Dealer / Chartered Agent or – The Miele Service Department (see back cover for address). When contacting your Dealer or Miele,please quote the model and serialnumber of your ...
Page 26 - Appliance dimensions
Page 27 - minimum; – When deciding on the safety distance
*Cut-out dimensions A depth T of at least 25 mm must be provided at the back of the building-inniche. Safety distance between hob andcooker hood When planning the installation heightof your cooker hood, the minimum safety distance between the top of acooker or hob and the bottom of thecooker hood is...
Page 28 - Installation
Fitting the non-return flap (not needed for recirculation mode) ^ If a non-return flap is not present inthe venting system, the non-returnflap supplied must be fitted onto theexhaust socket in the motor unit. Theflaps must open upwards.DA 2250, DA 2270: 1 non-return flapDA 2210: 2 non-return flaps B...
Page 29 - Preparation for extraction; When using
Preparation for extraction ^ When using C 150 mm ducting, secure the exhaust connectionsupplied to exhaust ducting withhose clips. ^ If using C 125 mm ducting, fit the reducing collar into the exhaustconnection, and secure the exhaustducting to the reducing collar with ahose clip. (See "Connecti...
Page 30 - Recirculation
Recirculation If site conditions are not suitable for thecooker hood to be used with airextraction, the appliance must be setup for recirculation. For this, conversion kit DUU 151(available from your Miele dealer or theMiele Spare Parts Dept.) is required.One conversion kit is required for theDA 225...
Page 31 - Fitting the joystick; Screw the spring into the holder and; Then fit the middle section onto the; Do not; Then fit the lower section of the; Do not
Fitting the joystick 1. Screw the spring into the holder and tighten by hand. Whilst doing socounterhold the joystick with an SW 9spanner. Do not turn the spanner! 2. Then fit the middle section onto the spring and tighten by hand whilstcontinuing to counterhold thejoystick. Do not turn the spanner....
Page 32 - Electrical connection
Electrical connection ^ If the cooker hood is to be connectedto an external motor (EXT models):Use the connection cable with 6 poleplug to connect the cooker hood andthe external motor. ^ Connect the appliance to the mainsvia a fused spur or fused socket asappropriate. Before connecting the applianc...
Page 33 - Connection for air extraction
Important: To avoid the danger oftoxic fumes, please observe theWarning and Safety instructions.This is especially crucial when usingthe cooker hood at the same time asanother heating appliance whichrelies on air from the same room.The cooker hood should be installedaccording to local and nationalbu...
Page 34 - Condensate trap
– If the exhaust air is to be ducted into the open air, the installation of atelescopic wall vent or roof vent(available as an optional accessory)is recommended. – If the exhaust air is to be ducted into a vent flue, the ducting must bedirected in the flow direction of theflue. Important: If the exh...
Page 35 - Silencer; . The space needs to be checked in
Silencer (optional accessory) To achieve even further reductions innoise levels, a special silencer can befitted in the ducting system. ...with air extraction: The silencer not only reduces noisefrom the fan, but also sounds fromoutside (e.g. traffic noise).For this reason the silencer must bepositi...
Page 36 - . This is visible when the; Important; Blue
All electrical work should beundertaken by a suitably qualifiedand competent person in strictaccordance with current nationaland local safety regulations(BS 7671 in the UK). Installation, repairs and other workby unqualified persons could bedangerous, for which themanufacturer cannot be held liable....
Page 37 - It enables the following:; Potential free connection; on; Connection to a light switch; Operation with Control module DSM 400
The Miele DSM 400 control module canbe used to combine the cooker hoodwith other components. It enables the following: Potential free connection This can be used to operate a furtherappliance via the On/Off button s on the cooker hood. The potential free contact on theDSM 400 a can, for example, be ...
Page 38 - – Hob lighting; – Conversion kit DUU 151; Extraction power according to EN 61591; Technical data
Total connected load*DA 2250, DA 2270. . . . . . . . . . . . 300 WDA 2210. . . . . . . . . . . . . . . . . . . . 780 W– Fan motor DA 2250, DA 2270 . . . . . . . . . . 200 WDA 2210 . . . . . . . . . . . . . . . 2 x 290 W – Hob lighting DA 2250, DA 2270 . . . . . . . . 2 x 50 WDA 2210 . . . . . . . . ...