Maytag MGDE200XW- User Manual
Maytag MGDE200XW– User Manual, read for free online in PDF format. We hope this helps you resolve any issues you may have. If you have further questions, please contact us through the contact form.


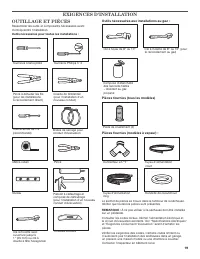
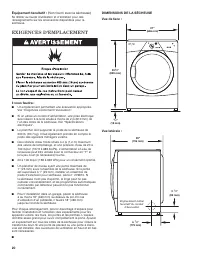
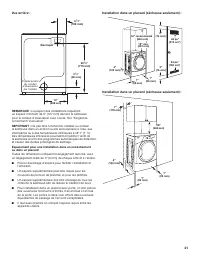
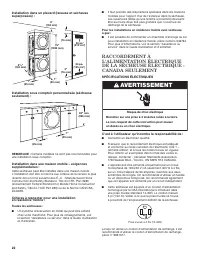
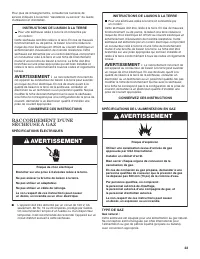
Table of Contents:
- Page 2 – DRYER SAFETY; Your safety and the safety of others are very important.; DANGER
- Page 3 – or any other appliance.
- Page 4 – TOOLS AND PARTS; Tools needed for all installations:; INSTALLATION REQUIREMENTS
- Page 5 – LOCATION REQUIREMENTS; DRYER DIMENSIONS
- Page 6 – Installation spacing for recessed area or closet
- Page 7 – ELECTRIC DRYER; ELECTRICAL REQUIREMENTS; WARNING; It is your responsibility:
- Page 8 – GAS DRYER POWER HOOKUP; GROUNDING INSTRUCTIONS; GAS SUPPLY REQUIREMENTS; GAS TYPE
- Page 10 – VENTING REQUIREMENTS; Flexible metal vent:; INSTALLATION INSTRUCTIONS
- Page 11 – PLAN VENT SYSTEM; Choose your exhaust installation type; Optional exhaust installations:
- Page 12 – Vent system chart; INSTALL VENT SYSTEM; Install exhaust hood; INSTALL LEVELING LEGS; Connect vent to exhaust hood; Determine vent length and elbows needed for best
- Page 13 – CONNECT INLET HOSE; MAKE GAS CONNECTION
- Page 15 – LEVEL DRYER; Level Dryer; Tighten and adjust leveling legs; CONNECT VENT; Connect vent to exhaust outlet
- Page 16 – DOOR REVERSAL; TROUbLESHOOTING
- Page 17 – SéCURITé DE LA SéCHEUSE; Votre sécurité et celle des autres est très importante.; AVERTISSEMENT
- Page 19 – EXIGENCES D'INSTALLATION; Outils nécessaires aux installations au gaz :; OUTILLAGE ET PIÈCES
- Page 20 – Équipement facultatif :; EXIGENCES D'EMPLACEMENT; DIMENSIONS DE LA SÉCHEUSE
- Page 22 – RACCORDEMENT À
- Page 23 – INSTRUCTIONS DE LIAISON À LA TERRE; SéCHEUSE À GAZ; INSTRUCTIONS DE LIAISON À LA TERRE; TYPE DE GAZ
- Page 25 – EXIGENCES CONCERNANT; Conduit métallique rigide :; (Acceptable uniquement si; Clapets de décharge :; INSTRUCTIONS POUR L'INSTALLATION
- Page 26 – PLANIFICATION DU SYSTÈME; Installations d'évacuation facultatives :; Dispositions spéciales pour les maisons mobiles :
- Page 27 – Tableau des systèmes d'évacuation; INSTALLATION DU CIRCUIT; Installer le clapet d'évacuation
- Page 28 – RACCORDEMENT AU GAZ
- Page 29 – RACCORDEMENT DU TUYAU
- Page 30 – RACCORDEMENT DU CONDUIT
- Page 31 – Régler l'aplomb de la sécheuse; LISTE DE VéRIFICATION; Modèles électriques :
- Page 32 – INVERSION DE LA PORTE; Si vous préférez inverser le sens d'ouverture de la; DéPANNAGE
1
W10240584B
W10240585B-SP
GAS DRYER INSTALLATION INSTRUCTIONS
CANADIAN ELECTRIC DRYER INSTRUCTIONS
INSTRUCTIONS POUR L'INSTALLATION DE LA SÉCHEUSE
À GAZ (É.-U. ET CANADA)
ET ÉLECTRIQUE (CANADA UNIQUEMENT)
Table of Contents
DRYER SAFETY ................................................................
2
INSTALLATION REQUIREMENTS ....................................
4
Tools and Parts .................................................................... 4
Location Requirements ...................................................... 5
Electric Dryer Power Hookup-Canada Only ..................... 7
Gas Dryer Power Hookup ................................................... 8
INSTALLATION INSTRUCTIONS .............................................. 10
Venting Requirements ....................................................... 10
Plan Vent System ............................................................... 11
Install Vent System ............................................................ 12
Install Leveling Legs ......................................................... 12
Make Gas Connection ...................................................... 13
Connect Inlet Hose............................................................ 13
Connect Vent ..................................................................... 15
Level Dryer ......................................................................... 15
Complete Installation Checklist ....................................... 16
Door Reversal .................................................................... 16
Troubleshooting ................................................................. 16
INSTALLATION NOTES
Date of purchase:
_________________________________
Date of installation:
_______________________________
Installer:
________________________________________
Model number:
___________________________________
Serial number:
___________________________________
Date d'achat :
_____________________________________
Date d'installation :
________________________________
Installateur :
______________________________________
Numéro de modèle :
________________________________
Numéro de série :
__________________________________
NOTES CONCERNANT L'INSTALLATION
Table des matières
SÉCURITÉ DE LA SÉCHEUSE .......................................
17
EXIGENCES D'INSTALLATION ......................................
19
Outillage et pièces ............................................................ 19
Exigences d'emplacement ............................................... 20
Raccordement à l'alimentation électrique de
la sécheuse électrique - Canada seulement ................. 22
Raccordement d'une sécheuse à gaz ............................. 23
INSTRUCTIONS POUR L'INSTALLATION ............................... 25
Exigences concernant l'évacuation ................................ 25
Planification du système d'évacuation ........................... 26
Installation du circuit d'évacuation ................................. 27
Installation des pieds de nivellement .............................. 28
Raccordement au gaz ....................................................... 28
Raccordement du tuyau d'arrivée d'eau ......................... 29
Raccordement du conduit d'évacuation ......................... 30
Réglage de l'aplomb de la sécheuse ............................... 31
Achever l'installation - liste de vérification ..................... 31
Inversion de la porte ......................................................... 32
Dépannage ......................................................................... 32
"Loading the manual" means you need to wait until the file loads and becomes available for online reading. Some manuals are very large, and the time they take to appear depends on your internet speed.
Summary
2 DRYER SAFETY You You can be killed or seriously injured if you don't immediately can be killed or seriously injured if you don't follow All safety messages will tell you what the potential hazard is, tell you how to reduce the chance of injury, and tell you what canhappen if the instructions are n...
3 WARNING: Gas leaks cannot always be detected by smell. Gas suppliers recommend that you use a gas detector approved by UL or CSA.For more information, contact your gas supplier.If a gas leak is detected, follow the “What to do if you smell gas” instructions. WARNING: For your safety, the informati...
4 TOOLS AND PARTS Gather the required tools and parts before starting installation. Tools needed for all installations: Level Tape measure Pliers Parts package is located in dryer drum. Check that all parts are included. NOTE: If installing dryer on pedestal, do not use leveling legs. Check local co...





