Maytag MAT15MN - Manual

Maytag MAT15MN – Manual, read for free online in PDF format. We hope this helps you resolve any issues you may have. If you have further questions, please contact us through the contact form.


Table of Contents:
- Page 3 – Your safety and the safety of others are very important.; DANGER; WASHER SAFETY
- Page 4 – Recessed Area and Closet Installation Instructions; Location Requirements; INSTALLATION REQUIREMENTS; Tools and Parts; Tools needed
- Page 5 – Drain System; Standpipe Drain System; Electrical Requirements; Using the universal cord included with this washer:
- Page 6 – Remove Shipping Strap; INSTALLATION INSTRUCTIONS; WARNING; EARTHING INSTRUCTIONS; Recommended Earthing Method; Connect the Hoses; Connect the inlet hose
- Page 7 – Level the Washer; Install the front leveling feet
- Page 8 – Level the washer; Complete Installation; Moving the washer to a new location
- Page 10 – Votre sécurité et celle des autres est très importante.; AVERTISSEMENT; SECURITE DU LAVE-LINGE
- Page 11 – Exigences d’emplacement; EXIGENCES D’INSTALLATION; Outillage et pièces; Outils nécessaires
- Page 12 – Système de vidange; Système de vidange avec tuyau de rejet à l’égout; Dimensions du produit
- Page 13 – Spécifications électriques; INSTRUCTIONS DE LIAISON À LA TERRE; Méthode recommandée de mise à la terre
- Page 14 – Enlever la sangle d’expédition; INSTRUCTIONS D’INSTALLATION; Raccordement des tuyaux; Connecter les tuyaux d’alimentation au lave-linge
- Page 15 – Réglage de l’aplomb du lave-linge; Installation des pieds de réglage de l’aplomb avant
- Page 16 – Achever l’installation
- Page 18 – Piezas y herramientas; Herramientas necesarias; ELIMINACIÓN DE LA LAVADORA
- Page 19 – Medidas del producto; Requisitos de ubicación
- Page 20 – Requisitos eléctricos; INSTRUCCIONES PARA; Método recomendado de conexión a tierra; Sistema de desagüe; Sistema de desagüe por tubería vertical
- Page 21 – Cómo quitar la correa de embalaje; INSTRUCCIONES DE INSTALACIÓN; Conecte las mangueras; Conecte las mangueras de entrada a la lavadora
- Page 22 – Conecte la manguera de desagüe; Nivelación de la lavadora; Instale las patas niveladoras delanteras
- Page 23 – Complete la instalación; Cómo cambiar la lavadora a una nueva ubicación
- Page 25 – La sicurezza dell’utente e degli altri è fondamentale.; PERICOLO; SICUREZZA DELLA LAVATRICE
- Page 26 – Istruzioni per l’incasso in un vano o in un armadietto; Requisiti di posizionamento; REQUISITI D’INSTALLAZIONE; Attrezzi e componenti; Attrezzi necessari
- Page 27 – Sistema di scarico; Colonna di scarico
- Page 28 – Requisiti elettrici; Utilizzo del cavo universale con questa lavatrice:; ISTRUZIONI PER LA MESSA A TERRA; Consigliato sistema di messa a terra
- Page 29 – Rimozione della fascetta d’imballaggio; ISTRUZIONI D’INSTALLAZIONE; Collegamento dei tubi; Collegare i tubi d'ingresso alla lavatrice
- Page 30 – Collegamento del tubo di scarico; Livellamento della lavatrice; Installazione dei piedini anteriori di livellamento
- Page 31 – Installazione completa; Per spostare la lavatrice in una nuova posizione
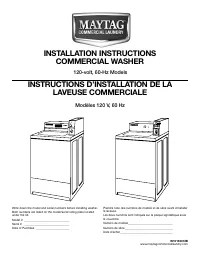
COMMERCIAL WASHER INSTALLATION INSTRUCTIONS
220-240-volt, 50-Hz Models
W10135309B
www.maytagcommerciallaundry.com
INSTRUCTIONS D’INSTALLATION DU LAVE-LINGE COMMERCIAL
Modèles 220 - 240 V, 50 Hz
LAVADORA COMERCIAL INSTRUCCIONES DE INSTALACIÓN
Modelos de 220 y 240 voltios, 50 Hz
LAVATRICE COMMERCIALE ISTRUZIONI D’INSTALLAZIONE
Modelli a 220-240 V, 50 Hz
MAT15MN
MAT14CS
W10135309B v07.qxd:YC70811_W10135283A-En Fr 4/28/10 4:01 PM Page 1
"Loading the manual" means you need to wait until the file loads and becomes available for online reading. Some manuals are very large, and the time they take to appear depends on your internet speed.
Was this manual helpful?
About this manual
- Brand
- Maytag
- Model
- MAT15MN
- Document type
- Manual
- Language(s)
- English, Spanish, French, Italian
- Pages
- 32
- File size
- 2 MB
- Format
Summary
3 You can be killed or seriously injured if you don't immediately You can be killed or seriously injured if you don't follow All safety messages will tell you what the potential hazard is, tell you how to reduce the chance of injury, and tell you what canhappen if the instructions are not followed. ...
4 Recessed Area and Closet Installation Instructions This washer may be installed in a recessed area or closet. The installation spacing is in inches and is the minimumallowable. Additional spacing should be considered for easeof installation, servicing, and compliance with local codes andordinances...
5 Drain System Standpipe Drain System The standpipe drain requires a minimum diameter standpipe of50 mm (2"). The minimum carry-away capacity can be no lessthan 64 L (17 gal.) per minute. The top of the standpipe must be at least 990 mm (39") highand no higher than 1.83 m (72") from the ...
Ask a question
Related manuals
Popular Maytag Other



More Maytag Other models
 Maytag MAH4000AWW Manual
 Maytag MAH5500BWW User Manual
 Maytag MAH6500AWW User Manual
 Maytag MAH6700AWW User Manual
- Maytag MAH8700AWW User Manual
 Maytag MAT14PDAWW User Manual
 Maytag MAT20PRAWW0 Installation Manual
 Maytag MAV-2 Manual
 Maytag MAV-15 Manual
 Maytag MAV208DAWW User Manual
 Maytag MAV408DAWW, MAV3955EWW, MAV4755AWW, MAVT346AWW, MAV3855AWW, MAV2755AWW, MAV5920EWW, 62621890, MAV208DAWW Manual
- Maytag MAV2755AWW User Manual