Page 2 - TABLE OF CONTENTS; SAFETY INSTRUCTIONS; PRODUCT OVERVIEW; 9 TROUBLESHOOTING
2 TABLE OF CONTENTS TABLE OF CONTENTS 3 SAFETY INSTRUCTIONS 3 IMPORTANT SAFETY INSTRUCTIONS 8 PRODUCT OVERVIEW 8 Exterior Parts8 Interior Parts 18 MAINTENANCE 18 Air Filter 19 TROUBLESHOOTING 19 Before Calling for Service19 Normal Sounds You May Hear 22 WARRANTY 11 How to Install the Unit 11 Window ...
Page 3 - SAFETY INSTRUCTIONS; READ ALL INSTRUCTIONS BEFORE USE; Your safety and the safety of others are very important.; WARNING; including the following:; INSTALLATION
ENGLISH 3 SAFETY INSTRUCTIONS SAFETY INSTRUCTIONS READ ALL INSTRUCTIONS BEFORE USE Your safety and the safety of others are very important. We have provided many important safety messages in this manual and on your appliance. Always read and follow all safety messages. This is the safety alert symbo...
Page 4 - OPERATION
4 SAFETY INSTRUCTIONS ● When the power cord is to be replaced, replacement work shall be performed by authorized personnel only using only genuine replacement parts. and authorized personnel only. ● Connect to a properly rated, protected, and sized power circuit to avoid electrical overload. ● Alway...
Page 5 - GROUNDING INSTRUCTIONS
ENGLISH 5 SAFETY INSTRUCTIONS ● If water enters the product, turn off the power at the main circuit, then unplug the product and call for service. ● If the product has been submerged, contact an LG Electronics Customer Information Center for instructions before resuming use. ● Unplug the product whe...
Page 6 - CAUTION
6 SAFETY INSTRUCTIONS CAUTION To reduce the risk of minor or moderate injury to persons, malfunction, or damage to the product or property when using this product, follow basic precautions, including the following: INSTALLATION ● Take care when installing the product that exhaust or condensation doe...
Page 7 - SAVE THESE INSTRUCTIONS
ENGLISH 7 SAFETY INSTRUCTIONS REFRIGERANT (FOR R32 ONLY) WARNING ● Do not use means to accelerate the defrosting process or to clean, other than those recommended by the manufacturer. ● The appliance shall be stored in a room without continuously operating ignition sources (for CAUTION associated wi...
Page 8 - PRODUCT OVERVIEW; Exterior Parts
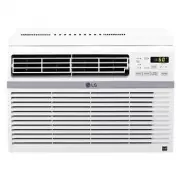
8 PRODUCT OVERVIEW PRODUCT OVERVIEW Exterior Parts Interior Parts 86 3 1 4 5 7 3 45 6 7 1 2 1 Evaporator 2 Air Guide 3 4 Brace 5 Compressor 6 Condenser 7 Base Pan Power Cord 1 Control Panel 2 Remote Controller 3 Air Filter 4 5 6 Front Grille 7 8 Cabinet Air Outlet 2
Page 9 - Electrical Data
ENGLISH 9 INSTALLATION INSTALLATION Electrical Data Power cord may include a current interrupter device. TEST and RESET buttons are provided on the plug case. The device should be tested on TEST button and then the RESET button. If the TEST button does not trip or if the RESET button will not stay e...
Page 10 - Installation Overview; Accessories
10 INSTALLATION Installation Overview Accessories Type 'A' Screws (14) Type 'B' Screws (3) Type 'C' Screws (5) Carriage Bolt (2) Lock Nut (2) Tools Needed Phillips-head screwdriver Flat-blade screwdriver Adjustable wrench Level Tape measure Cutting knife Scissors Pencil Heatproof foam (2) (Adhesive ...
Page 11 - How to Install the Unit; NOTE; Preparation of Cabinet
ENGLISH 11 INSTALLATION How to Install the Unit Window Requirements ● This unit is designed for installation in standard double hung windows with actual opening widths from 27" to 39". The top and bottom window sashes must open 16" from the bottom of the upper sash to the inside sill. ● ...
Page 12 - Cabinet Installation
12 INSTALLATION Cabinet Installation 1 Open the window. Mark a line on the center of the inside sill. Carefully place the cabinet in the window and align the center hole on the cabinet bottom front with the bracket using a carriage bolt and a lock nut. 2 Pull the bottom window sash down behind the u...
Page 15 - Control Panel and Remote Control; Remote Control
ENGLISH 15 OPERATION Control Panel and Remote Control Remote Control OPERATION 4 3 2 1 5 7 6 1 Power Press to turn the air conditioner ON or OFF. 2 Fan Speed Press to set the fan speed to Low (F1), Medium (F2), or High (F3). 3 Delay ON/OFF TimerDelay ON - When the air conditioner is off, set it to a...
Page 16 - Wireless Remote Control; Inserting Battery
16 OPERATION Wireless Remote Control Inserting Battery 1 Remove the cover on the back of the remote control. 2 Insert the new batteries and make sure that the + and - terminals of the batteries are installed correctly. NOTE ● New batteries are supplied with the air conditioner for use in the remote ...
Page 17 - Air Direction; Direction; Additional Features; Slinger Fan
ENGLISH 17 OPERATION Close Open Air Direction Ventilation Push the ventilation lever in to the closed position to maintain the best cooling performance. Pull the ventilation lever out to open the vent and draw fresh air into the room. of the air conditioner’s louvers. Direction levers of the vertica...
Page 18 - Cleaning the Air Conditioner; MAINTENANCE; Air Filter; Cleaning the Air Filter
18 MAINTENANCE 2 40 °C (104 °F). 3 Gently shake the excess water from the Cleaning the Air Conditioner ● Wipe the front grille and inlet grille with a cloth dampened in a mild detergent solution. ● Wash the cabinet with mild soap or detergent and lukewarm water, then polish using liquid appliance wa...
Page 19 - TROUBLESHOOTING; Before Calling for Service; Normal Sounds You May Hear
ENGLISH 19 TROUBLESHOOTING TROUBLESHOOTING Before Calling for Service The appliance is equipped with an automatic error-monitoring system to detect and diagnose problems at an early stage. If the appliance does not function properly or does not function at all, check the following before you call fo...
Page 20 - Problem
20 TROUBLESHOOTING Problem Possible Cause Solutions Air conditioner does not start. The air conditioner is unplugged. Make sure the air conditioner plug is pushed completely into the outlet. The fuse is blown/circuit breaker is tripped. Check the house fuse/circuit breaker box and replace the fuse o...
Page 22 - WARRANTY
22 WARRANTY WARRANTY WHAT THIS WARRANTY COVERS: LG Electronics U.S.A., Inc. (“LG”) warrants your LG Room Air Conditioner ("product") against defect in THIS LIMITED WARRANTY CONTAINS AN ARBITRATION PROVISION THAT REQUIRES YOU AND LG TO RESOLVE DISPUTES BY BINDING ARBITRATION INSTEAD OF IN COU...
Page 23 - FOR YOUR RECORDS
ENGLISH 23 ● Product where the original factory serial numbers have been removed, defaced or changed in any way. ● Repairs when product is used in other than normal and usual household use (e.g. rental, commercial ’s manual. ● The removal and reinstallation of the Product if it is installed in an in...
Page 26 - MEMO; Memo
Page 27 - MANUAL DEL PROPIETARIO; Lea detenidamente el manual del propietario antes de poner el; AIRE
www.lg.com ESPAÑOL Copyright © 2018 LG Electronics Inc. Todos los Derechos Reservados. MANUAL DEL PROPIETARIO Lea detenidamente el manual del propietario antes de poner el electrodoméstico en funcionamiento y consérvelo a mano en todo momento para su referencia. TIPO: DE VENTANA AIRE ACONDICIONADO L...
Page 28 - TABLA DE CONTENIDOS
2 TABLA DE CONTENIDOS TABLA DE CONTENIDOS 3 INSTRUCCIONES DE SEGURIDAD 3 INSTRUCCIONES IMPORTANTES DE SEGURIDAD 8 DESCRIPCIÓN GENERAL DEL PRODUCTO 8 Piezas exteriores8 Piezas interiores 18 MANTENIMIENTO 18 Filtro de aire 19 SOLUCIÓN DE PROBLEMAS 19 Antes de llamar al servicio técnico19 Sonidos Norma...
Page 29 - PAÑOL; INSTRUCCIONES DE SEGURIDAD; LEA TODAS LAS INSTRUCCIONES ANTES DE UTILIZAR; Su seguridad y la de los demás son muy importantes.; ADVERTENCIA; podría suceder si no se siguen las instrucciones.; INSTRUCCIONES IMPORTANTES DE SEGURIDAD; quemaduras, lesiones o muerte para las personas que usen este; INSTALACIÓN
3 ES PAÑOL INSTRUCCIONES DE SEGURIDAD INSTRUCCIONES DE SEGURIDAD LEA TODAS LAS INSTRUCCIONES ANTES DE UTILIZAR Su seguridad y la de los demás son muy importantes. Tanto en este manual como en el equipo, hemos proporcionado muchos mensajes de seguridad importantes. Siempre debe leer y respetar todos ...
Page 30 - FUNCIONAMIENTO
4 INSTRUCCIONES DE SEGURIDAD ● Cuando sea necesario sustituir el cable de alimentación, el trabajo de sustitución deberá realizarlo personal autorizado utilizando únicamente piezas de repuesto originales. estadounidense National Electrical Code (NEC). protegido para evitar la sobrecarga eléctrica. ●...
Page 31 - INSTRUCCIONES DE CONEXIÓN A TIERRA
5 ES PAÑOL INSTRUCCIONES DE SEGURIDAD ● Si entra agua en el producto, interrumpa la alimentación del circuito principal y, a continuación, desenchufe el producto y llame al servicio técnico. ● Si el producto se ha mojado accidentalmente, comuníquese con el Centro de Información al Cliente de LG Elec...
Page 32 - PRECAUCIÓN; Para reducir el riesgo de lesiones leves o moderadas a personas, el
6 INSTRUCCIONES DE SEGURIDAD PRECAUCIÓN Para reducir el riesgo de lesiones leves o moderadas a personas, el mal funcionamiento o daño al producto o propiedad cuando use este producto, siga las precauciones básicas, incluido lo siguiente: INSTALACIÓN ● Al instalar el producto, tenga cuidado de que lo...
Page 33 - GUARDE ESTAS INSTRUCCIONES
7 ES PAÑOL INSTRUCCIONES DE SEGURIDAD REFRIGERANTE (SOLO PARA R32) ADVERTENCIA ● No utilice medios para acelerar el proceso de descongelación ni para limpiar que no sean los recomendados por el fabricante. ● El aparato debe almacenarse en una habitación sin fuentes de ignición que estén continuament...
Page 34 - DESCRIPCIÓN GENERAL DEL PRODUCTO; Piezas exteriores
8 DESCRIPCIÓN GENERAL DEL PRODUCTO DESCRIPCIÓN GENERAL DEL PRODUCTO Piezas exteriores Piezas interiores 3 45 6 7 1 2 1 Evaporador 2 Guía de aire 3 4 Abrazadera 5 Compresor 6 Condensador 7 Bandeja base Cable de alimentación 1 Panel de control 2 Mando a distancia 3 Filtro de aire 4 (Lamas horizontales...
Page 35 - Datos eléctricos
9 ES PAÑOL INSTALACIÓN INSTALACIÓN Datos eléctricos El cable de alimentación puede incluir un interruptor de corriente. En la carcasa del enchufe hay un botón de TEST (prueba) y otro de RESET (restablecer). El dispositivo debe probarse periódicamente pulsando en primer lugar el botón TEST y, a conti...
Page 36 - Descripción general de la instalación; Accesorios
10 INSTALACIÓN Descripción general de la instalación Accesorios Tornillos de tipo “A” (14) Tornillos de tipo “B” (3) Tornillos de tipo “C” (5) Tuerca de cierre (2) Herramientas necesarias Destornillador Phillips Destornillador de hoja plana Llave ajustable Nivel Cinta medidora Cuchilla Tijeras Lápiz...
Page 37 - Requisitos de la ventana; NOTA; Preparación de la carcasa
11 ES PAÑOL INSTALACIÓN Requisitos de la ventana ● Esta unidad ha sido diseñada para instalarse en ventanas dobles de guillotina estándar con anchos de abertura de 27" (68,58 cm) a 39" (99,06 cm). Las ventanas de guillotina superior e inferior deben abertura vertical libre de 16" (40,64 ...
Page 41 - Panel de control y control remoto
15 ESPAÑOL FUNCIONAMIENTO FUNCIONAMIENTO Panel de control y control remoto Remote Control Remote Control 4 3 2 1 5 7 6 1 Power ( ) (Alimentación) Pulse este botón para encender o apagar el acondicionador de aire. 2 3 Delay ON/OFF Timer (Temporizador de retraso de encendido o apagado)Delay ON (Retras...
Page 42 - Control remoto inalámbrico; Inserción de las batería
16 FUNCIONAMIENTO Control remoto inalámbrico Inserción de las batería NOTA ● ● No utilice pilas recargables. Asegúrese de que las pilas sean nuevas. ● Para que no se descarguen, saque las pilas del mando a distancia cuando el acondicionador de aire vaya a estar un largo período sin utilizarse. ● Man...
Page 43 - Ventilación; aire horizontal; Funciones adicionales; Ventilador Slinger
17 ES PAÑOL FUNCIONAMIENTO Ventilación Empuje la palanca de ventilación hacia la posición de cierre para mantener el mejor rendimiento del enfriamiento. Tire de la palanca de ventilación para fresco en la habitación. Dirección del aire dirección de las lamas del acondicionador de aire. aire horizont...
Page 44 - Limpieza del acondicionador de; MANTENIMIENTO
18 MANTENIMIENTO 40 °C (104 °F). 3 exceso de agua y vuelva a colocarlo. Limpieza del acondicionador de aire ● Limpie la rejilla delantera y la rejilla de entrada con un paño humedecido en una solución de detergente suave. ● Lave la carcasa con jabón o detergente suaves y agua tibia y, a continuación...
Page 45 - SOLUCIÓN DE PROBLEMAS; Antes de llamar al servicio técnico
19 ES PAÑOL SOLUCIÓN DE PROBLEMAS SOLUCIÓN DE PROBLEMAS Antes de llamar al servicio técnico El artefacto está equipado con un sistema automático de monitoreo de errores para detectar y diagnosticar problemas en una etapa temprana. Si el artefacto no funciona adecuadamente o si no funciona en absolut...
Page 46 - Problema
20 SOLUCIÓN DE PROBLEMAS Problema Causa posible Soluciones El acondicionador de aire no se inicia. El aire acondicionado está desenchufado. Asegúrese de que el enchufe del acondicionador de aire esté completamente introducido en la toma. El fusible se ha fundido o el disyuntor se ha activado. Revise...
Page 48 - GARANTÍA
22 GARANTÍA GARANTÍA COBERTURA DE LA GARANTÍA: LG Electronics Inc. ("LG") garantiza que reparará o sustituirá, gratuitamente, su producto si resulta defectuoso ESTA GARANTÍA LIMITADA CONTIENE UNA CLÁUSULA DE ARBITRAJE QUE LE DEMANDA A USTED Y A LG RESOLVER CONFLICTOS A TRAVÉS DE UN ARBITRAJE...
Page 49 - PARA SUS REGISTROS
23 ES PAÑOL GARANTÍA ● Los productos cuyos números de serie de fábrica originales hayan sido quitados, borrados o cambiados de ninguna manera. ● Las reparaciones cuando el producto se utiliza para cualquier cosa fuera de lo normal y del uso doméstico instrucciones que se indican en el manual del pro...