Page 2 - TABLE OF CONTENTS
2 TABLE OF CONTENTS Important Safety Instructions Grounding Requirements Refrigerator Features Refrigerator Installation Unpacking you Refrigerator Installation Base Grille Installation Handle Removal Removing and Replacing Refrigerator Doors Door Alignment Using Your Refrigerator Ensuring Proper Ai...
Page 3 - read and obey; NOTE; IMPORTANT SAFETY INSTRUCTIONS; SAVE THESE INSTRUCTIONS
3 SAVE THESE INSTRUCTIONS This guide contains many important safety messages. Always read and obey . This is the safety alert symbol. It alerts you to safety messages that inform you of hazards that can kill or hurt you or others, or cause damage to the product. All safety messages will be preceded ...
Page 4 - Please read carefully.; TO CONNECT ELECTRICITY; Electrical Shock Hazard; RECOMMENDED GROUNDING METHOD; only and fused at 15 or 20 amperes.; USE OF EXTENSION CORD; DANGER; RISK OF CHILD ENTRAPMENT; CFC DISPOSAL; : Before performing any type of installation,; WARNING; POWER CORD REPLACEMENT
IMPORTANT: Please read carefully. TO CONNECT ELECTRICITY Electrical Shock Hazard FOR PERSONAL SAFETY, this appliance must be properly grounded. Have the wall outlet and thecircuit checked by a qualified electrician to make surethe outlet is properly grounded. WARNING 4 RECOMMENDED GROUNDING METHOD T...
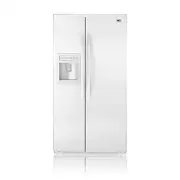
Page 5 - REFRIGERATOR FEATURES
5 REFRIGERATOR FEATURES Use this page to become more familiar with the parts and features. Page references are included for your convenience. Note: This guide covers several different models.The refrigerator you have purchased may have some or all of the items listed below. The locations of the feat...
Page 6 - REFRIGERATOR INSTALLATION; UNPACKING YOUR REFRIGERATOR; INSTALLATION; Excessive Weight Hazard; Explosion Hazard; MUST; Important; BASE GRILLE INSTALLATION; To remove the base grille
REFRIGERATOR INSTALLATION 6 UNPACKING YOUR REFRIGERATOR When Moving Your Refrigerator: Your refrigerator is heavy. When moving therefrigerator for cleaning or service, be sure to protectthe floor. Always pull the refrigerator straight out whenmoving it. Do not wiggle or walk the refrigerator whentry...
Page 7 - Electric Shock Hazard; HANDLE REMOVAL
REFRIGERATOR INSTALLATION 7 REMOVING AND REPLACING REFRIGERATOR DOORS WARNING Electric Shock Hazard • Disconnect electrical supply to the refrigerator before installing. Failure to do so could result in death or serious injury. • Do not put hands or feet or other objects into the air vents, base gri...
Page 8 - Figure 1; Reinstalling the rigth (Refrigerator) door; to secure
REFRIGERATOR INSTALLATION 8 Removing the left (freezer) door with water lineconnection. • Pull up the water feed tube while pressing area (Figure 1) as shown in the figure below. If a tube end is deformed or abraded, trim the part away. Disconnecting the tube under the door causes about 1.5 liters w...
Page 9 - DOOR ALIG; Tools you need; AFTER LEVELING THE DOOR HEIGHT; Up
REFRIGERATOR INSTALLATION 9 DOOR ALIG N MENT Before adjust the doors, remove the Base Grille. See BASE GRILLE INSTALLATION for reference. If the freezer compartment door is lower than the refrigerator compartment door, make them level by inserting flat blade screwdriver into the groove of the left l...
Page 10 - Do not block any of these vents; If you; NEXT; USING YOUR REFRIGERATOR; ENSURING PROPER AIR CIRCULATION; When changing control settings, wait 24 hours
• Do not block any of these vents with food packages. If the vents are blocked, airflow will be interruped and temperature and moisture problems may occur. IMPORTANT: Because air circulates between both sections, any odorsformed in one section will transfer to the other. You mustthorougly clean both...
Page 11 - Buzzer sound mute mode; Freezer Compartment; Refrigerator Compartment
USING YOUR REFRIGERATOR 11 Buzzer sound mute mode The buzzer sound is set to OFF. It activates by sounding the recognition sound of “Ding~” after pressing and holding “Ice Plus” button more than 5 seconds. Dispenser selection You can select water or ice. • Select Water, Crushed Ice or Cubed Ice by p...
Page 12 - FOOD STORAGE GUIDE
USING YOUR REFRIGERATOR 12 CONDITION/REASON : RECOMMENDED ADJUSTMENT : REFRIGERATOR section toowarm – Door opened often– Large amount of food added– Room temperature very warm FREEZER section toowarm/ice not made fast enough – Door opened often– Large amount of food added– Very cold room temperature...
Page 13 - STORING FROZEN FOOD; Packaging; WATER DISPENSER
USING YOUR REFRIGERATOR 13 STORING FROZEN FOOD NOTE: For further information about preparing food for freezing or food storage times, check a freezer guide or a reliable cookbook. Packaging Successful freezing depends on correct packaging. When you close and seal the package, it must not allow air o...
Page 14 - CRISPER AND CRISPER COVER; After dispenser is used; SNACK PAN
USING YOUR REFRIGERATOR 14 CRISPER AND CRISPER COVER The crisper allows a better conservation of the fruits and vegetables, letting keep moisture in the interior easily. • To remove the crisper compartment cover, pull out the crisper compartment a bit to the front , lift the front part of the cove...
Page 15 - ICE STORAGE BIN; Car; REFRIGERATOR SHELVES; Fixed shelf; FREEZER SHELF
USING YOUR REFRIGERATOR 15 • To assemble the ice storage bin, push it ƒ while slightly lifting it „ . Make sure it is fully engaged into the auger drive … . If you need remove the Ice storage bin, please follow the next steps: NOTE: Use both hands to remove the ice bin to avoid dropping it. If the i...
Page 16 - Removing the water filter:; WATER FILTER; Before removing or installing water filter:; Take out the top shelf and move it to the lowest level.; After installing water filter; of water to purge the
USING YOUR REFRIGERATOR 16 Removing the water filter: 1. For first-time installation, remove filter substitute cap (A) by turning it counterclockwise a quarter turn and pulling it down.2. For subsequent installation, remove old filter by slowly turning it to the left a quarter turn and pulling it do...
Page 17 - CARE AND CLEANING; ELECTRICAL SHOCK HAZARD
CARE AND CLEANING 17 Both the refrigerator and freezer sections defrostautomatically. However, clean both sections about once a month to prevent odors. Wipe up spills immediately. GENERAL CLEANING TIPS • Unplug refrigerator or disconnect power.• Remove all removable parts, such as shelves, crispers,...
Page 18 - POWER INTERRUPTIONS; To change the refrigerator lamp:; OFF; WHEN YOU MOVE; To change the
CARE AND CLEANING 18 POWER INTERRUPTIONS 1. If the power will be out for 24 hours or less, keep all refrigerator doors closed to help foods stay cold and frozen. 2. If the power will be out for more than 24 hours: a) Remove all frozen food and store it in a frozen food locker. OR b) Place 2 lbs. (1 ...
Page 19 - DOOR ALIGNMENT; OPERATION INSTRUCTIONS; NORMAL SOUNDS YOU MAY HEAR; Indicator Light
CARE AND CLEANING 6. Take out all removable parts, wrap them well and tape together so they don’t shift and rattle during the move. Refer to sections in Using your Refrigerator for removal instructions. 7. Depending on the model, raise the front of the refrigerator so it rolls more easily OR screw i...
Page 20 - CONNECTING THE WATER LINE; BEFORE YOU BEGIN; A cold water supply; .The water pressure must be; adapter; refrigerator water valve.; is; is
CONNECTING THE WATER LINE 20 BEFORE YOU BEGIN This water line installation is not warranted by therefrigerator or icemaker manufacturer. Follow theseinstructions carefully to minimize the risk of expensivewater damage. Water hammer (water banging in the pipes) in houseplumbing can cause damage to re...
Page 21 - DRILL THE HOLE FOR THE VALVE; The hookup line cannot be white, plastic; FASTEN THE SHUTOFF VALVE; TIGHTEN THE PIPE CLAMP; Do not overtighten or you may crush; CONNECT THE TUBING TO THE VALVE; Commonwealth of Massachusetts Plumbing; SHUTOFF THE MAIN WATER SUPPLY; INSTALLATION INSTRUCTIONS
CONNECTING THE WATER LINE 21 Drill a 1/4” (6.35 mm) hole in the waterpipe (even if using a self-piercing valve) using asharp bit. Remove any burrsresulting from drilling the hole in the pipe. Take carenot to allow water to draininto the drill. Failure to drill a 1/4” (6.35 mm) hole may result in red...
Page 22 - the end of the tubing.
CONNECTING THE WATER LINE 22 9. CONNECT THE TUBING TO THE REFRIGERATOR 2. Place the compression nut and ferrule (sleeve) onto the end of the tubing. 3. Insert the end of the tubing into the connection as far as possible. While holding the tubing, tighten the Fasten the tubing into the tubing Clamp a...
Page 23 - TROUBLESHOOTING GUIDE; REFRIGERATOR DOES NOT OPERATE; CONTROL PANEL FEATURES.; VIBRATION OR RATTLING NOISE; LAMPS DO NOT WORK
TROUBLESHOOTING GUIDE 23 REFRIGERATOR DOES NOT OPERATE Check if... Then... The power supply cord is unplugged. Firmly plug the cord into a live outlet with proper voltage. A household fuse has blown or circuit Replace the fuse or reset the circuit breaker. breaker tripped. The refrigerator control i...
Page 24 - COMPRESSOR MOTOR SEEMS TO RUN TOO MUCH
TROUBLESHOOTING GUIDE 24 Light bulb has burned out. Replace with an appliance bulb of the same wattage, size and shape available at your local hardware store. (See the LAMP REPLACEMENT Section.) Turn the temperature control to the OFF position and unplug the refrigerator prior to replacement. COMPRE...
Page 25 - CONTROL PANEL FEATURES; THE DOORS ARE DIFFICULT TO OPEN; TEMPERATURE IS TOO WARM OR THERE IS INTERIOR MOISTURE BUILDUP
TROUBLESHOOTING GUIDE 25 THE ICEMAKER IS NOT PRODUCING ICE OR ICE CUBES ARE FREEZING TOO SLOWLY The freezer temperature is cold enough to produce ice. Wait 24 hours after hook-up for ice production. See the CONTROL PANEL FEATURES section. Door left open. Check to see if something is holding the door...
Page 26 - The doors are not closing completely.; DOORS WILL NOT CLOSE COMPLETELY
TROUBLESHOOTING GUIDE 26 TEMPERATURE IS TOO WARM OR THERE IS INTERIOR MOISTURE BUILDUP Check if... Then... The control is not set correctly for the surrounding Refer to the SETTING THE CONTROLS section. Wait conditions. 24 hours for temperatures to stabilize or even out. If the temperature is too co...
Page 27 - ICE HAS OFF-TASTE OR ODOR; THERE IS WATER IN THE DEFROST DRAIN PAN; UNDERSTANDING SOUNDS YOU MAY
TROUBLESHOOTING GUIDE 27 ICE HAS OFF-TASTE OR ODOR The icemaker was recently installed. Discard first few batches of ice to avoid discolored or off-flavored ice. The ice has been stored for too long. Throw away old ice and make new supply. The food has not been wrapped tightly in Rewrap foods since ...
Page 28 - LG Refrigerator / Freezer Warranty Period; LIMITED WARRANTY; THE ABOVE WARRANTY DOES NOT APPLY TO:; CUSTOMER ASSISTANCE NUMBERS:; WARRANTY
Visit our web site/http://www.lgservice.com LG Electronics United States of America LG Electronics will repair or at its option replace, without charge, your product which proves to be defectivein material or workmanship under normal use during the warranty period listed below from the date oforigin...
Page 29 - TABLA DE CONTENIDO
29 TABLA DE CONTENIDO Cuidado y Limpieza Consejos Generales de Limpieza Exterior Paredes Internas Revestimiento de las Paredes Partes Plásticas Tapa Posterior Cambio de Lámpara Interrupciones de Electricidad Cuando se vaya de vacaciones Cuando se Mude Instrucciones de Operación Cuando debe Cambiar a...
Page 30 - GUARDE ESTAS INSTRUCCIONES; PELIGRO; NOTA
INSTRUCCIONES IMPORTANTES DE SEGURIDAD 30 ADVERTENCIAS GUARDE ESTAS INSTRUCCIONES Esta guía contiene muchos mensajes importantes de seguridad. Siempre lea y obedezca todos los mensajes de seguridad. Este es el símbolo de advertencia de seguridad. Le avisa de mensajes de seguridad que le informan sob...
Page 31 - LOS NIÑOS SE PUEDEN QUEDAR ENCERRADOS; ELIMINACIÓN DE CFC; Lea con atención lo siguiente.; PARA CONECTAR LA ELECTRICIDAD; Peligro de choque eléctrico; PARA SU SEGURIDAD PERSONAL; ADVERTENCIA; REEMPLAZO DE CABLE DE CORRIENTE; UTILIZANDO CABLES DE EXTENSIÓN; No se recomienda el uso de cable de extensión.; Sin
PELIGRO: LOS NIÑOS SE PUEDEN QUEDAR ENCERRADOS 31 El quedar atrapado y asfixia de niños no es un problema del pasado. Los refrigeradores tirados y abandonados son un peligro, aún si van a quedar ahí “por unos cuantos días”. Si Ud. está por deshacerse de su refrigerador viejo, por favor siga las inst...
Page 32 - PARTES Y FUNCIONES
Utilice esta sección para familiarizarse con las puertas y funciones. Se incluyen las referencias de páginas para suconveniencia. NOTA: Esta guía cubre varios modelos distintos. El refrigerador que se ha comprado puede contener algunos o todos los artículos mencionados abajo. La ubicación de las fun...
Page 33 - INSTALACIÓN DEL REFRIGERADOR; DESEMPAQUE DEL REFRIGERADOR; Peligro de Peso Excesivo; INSTALACIÓN DE LA CUBIERTA INFERIOR
INSTALACIÓN DEL REFRIGERADOR 33 DESEMPAQUE DEL REFRIGERADOR Cuando mueva su refrigerador: INSTALACIÓN ADVERTENCIA Peligro de Peso Excesivo Mueva o instale el refrigerador entre dos o máspersonas. ADVERTENCIA Remueva la cinta adhesiva y cualquier etiqueta temporal de su refrigerador antes de usarlo. ...
Page 34 - DESINSTALACION Y REEMPLAZO DE LAS; DESINSTALACION DE LA JALADERA; PUERTAS DEL REFRIGERADOR; Peligro de descarga eléctrica; INSTALACION
INSTALACIÓN DEL REFRIGERADOR 34 DESINSTALACION Y REEMPLAZO DE LAS DESINSTALACION DE LA JALADERA NOTA: Es recomendable remover las puertas del refrigerador solo cuando sea necesario moverlo a travésde un área estrecha. Es necesario, seguir las instrucciones para remover las jaladeras de las puertas. ...
Page 35 - Figura 1
INSTALACIÓN DEL REFRIGERADOR 35 Remueva la puerta izquierda (Congelador) con la línea de conexión de agua:• Desconecte el tubo de alimentación de agua presionando el extremo del tubo (Figura 1) como muestra la figura de abajo. de agua. Coloque un recipiente grande al extremo del tubo para prevenir u...
Page 36 - ALINEAMIENTO DE PUERTAS; INSTALACION DE LA CUBIERTA INFERIOR.; Herramientas que necesitas
REFRIGERATOR INSTALLATION INSTALACIÓN DEL REFRIGERADOR 36 ALINEAMIENTO DE PUERTAS Antes de ajustar las puertas , remueva la Cubierta Inferior. Para referencia vea la sección INSTALACION DE LA CUBIERTA INFERIOR. Si la puerta del compartimiento del congelador es inferior a la puerta del compartimiento...
Page 37 - ASEGURANDO EL FLUJO DE AIRE; No bloquee ninguno de estos conductos con; Si los conductos están; SIGUIENTE PASO; Limpie su refrigerador completamente y saque todo; ADECUADO; USO DEL REFRIGERADOR; PANEL DE CONTROL; Modo de apagado del panel de control
ASEGURANDO EL FLUJO DE AIRE • IMPORTANTE: No bloquee ninguno de estos conductos con paquetes de alimentos. Si los conductos están bloqueados, el flujo de aire será interrumpido y puede ocurrir problemas de temperatura y humedad. Porque el aire circula entre ambas secciones, cualquier olor formado en...
Page 38 - Condición de filtro
REFRIGERATOR INSTALLATION 38 USO DEL REFRIGERADOR Modo silencio El sonido de alarma estará APAGADO. Se activa el sonido mediante la identificación del sonido “Ding~” tras mantener presionado el botón “Ice Plus” durante más de 5 segundos. Se desactiva al reconfigurar el modo de energía. Selección del...
Page 39 - CONGELADOR; AJUSTE DE LOS CONTROLES; Vegetales con
REFRIGERATOR INSTALLATION 39 USO DEL REFRIGERADOR De tiempo a su refrigerador de enfriar completamente antes de hacer ajustes. Es mejor esperar 24 horas antes de hacer algún cambio. Las configuracionesrecomendadas en la sección de PANEL DE CONTROL deberán ser apropiadas para el uso normal de un refr...
Page 40 - DISPENSADOR DE AGUA; ALMACEN DE ALIMENTOS CONGELADOS; Empaque
REFRIGERATOR INSTALLATION • Incline la bandeja hacia abajo levemente e incerte a presión las costillas en las ranuras. ADVERTENCIA No introduzca sus manos por la abertura del dispensador de hielo y agua. Hacerlo puede causarle heridas en sus manos. DISPENSADOR DE AGUA Su refrigerador cuenta con un s...
Page 41 - ANAQUELES DE LA PUERTA; Después de utilizar el dispensador
REFRIGERATOR INSTALLATION 41 USO DEL REFRIGERADOR COMPARTIMIENTO Y TAPA PARA VERDURAS Su refrigerador cuenta con anaqueles donde usted fácilmente puede organizar productos envasados. • Levante el anaquel de la puerta sosteniéndolo de ambos lados y sáquelo ‚ . 3 GAVETA DE MERIENDAS “CHAROLA PARA CA...
Page 42 - ESTANTES DEL REFRIGERADOR; Estante fijo; CUBIERTA DE LA FABRICA PARA HIELO
REFRIGERATOR INSTALLATION 42 USO DEL REFRIGERADOR Car e an d Mai n t enance ESTANTES DEL REFRIGERADOR La bandeja del refrigerador es ajustable para que usted pueda colocarla a una altura adecuada de acuerdo a las necesidades de espacio de los alimentos. NOTA: Cerciórese de que la bandeja está en pos...
Page 43 - FILTRO PARA AGUA; Antes de remover o instalar el filtro de agua:
REFRIGERATOR INSTALLATION USO DEL REFRIGERADOR 43 FILTRO PARA AGUA Antes de remover o instalar el filtro de agua: 1. Extraiga el estante superior y coloque en el nivel más bajo.2. Remueva la cubierta de la lámpara presionando la costilla de debajo de la cubierta y jalando la cubierta hacia enfrente....
Page 44 - INTERRUPCIONES DE ELECTRICIDAD; CUANDO SE VAYA DE VACACIONES
REFRIGERATOR INSTALLATION CUIDADO Y LIMPIEZA 45 Para cambiar la lámpara del Refrigerador: Remueva la cubierta presionando hacia arriba y gire hacia abajo ‚ gire la lámpara en contra de las manecillas del reloj. Reemplace con una lámpara de 40 watt (máximo). Para cambiar la lámpara del Dispensador:...
Page 45 - INSTRUCCIONES DE OPERACION; Cuando el refrigerador no se utilizara por varios días.; SONIDOS NORMALES QUE PUEDE; ON; ESCUCHAR
REFRIGERATOR INSTALLATION CUIDADO Y LIMPIEZA 46 INSTRUCCIONES DE OPERACION Peligro de lesión personal ADVERTENCIA CUANDO DEBE CAMBIAR A MODO APAGADO (OFF) A LA FÁBRICA DE HIELO Cuando vayan a cortar el suministro de agua por Cuando se saca el recipiente de hielo por más deuno o dos minutos. Cuando e...
Page 46 - QUÉ NECESITARÁ; Destornillador de cabeza; válvula de agua del refrigerador.; Un suministro de agua fría.
REFRIGERATOR INSTALLATION CONEXIÓN DE LA TUBERÍA DE AGUA 47 QUÉ NECESITARÁ Para determinar la longitud de cuánta tubería va a necesitar: Mida la distancia desde la válvula de agua en la parte trasera del refrigerador hasta la tubería de agua. Agregue 8 pies (2,4 m). Asegúrese que haya suficiente tub...
Page 47 - INSTRUCCIONES DE INSTALACIÓN; Instale la válvula de cierre en la tubería más cercana
REFRIGERATOR INSTALLATION CONEXIÓN DE LA TUBERÍA DE AGUA 48 3 . PERFORE UN ORIFICIO PARA LA VÁLVULA Perfore un oricio de 1/4" (6,35 mm) en la Tubería de agua usando el taladro. elimine cualquier residuo resultado de taladrar en la tubería. Tenga cuidado de no dejar que caiga agua en el taladro. ...
Page 48 - • Antes de realizar la conexión al refrigerador, asegúrese
REFRIGERATOR INSTALLATION CONEXIÓN DE LA TUBERÍA DE AGUA 49 10. ABRA LA LLAVE DE AGUA EN LA 12. COMIENCE A USAR LA FÁBRICA DE HIELO 11. CONECTE EL REFRIGERADOR Ajuste cualquier conexión que tenga fuga. Vuelva a colocar Acomode los espirales de tubería para que no vibren con la parte de atrás del Col...
Page 49 - ENTENDIENDO LOS SONIDOS QUE ESCUCHA; siguiente describe los tipos de sonido y qué los crea.; REFRIGERADOR NO FUNCIONA; Espere como 30 minutos para que el ciclo de; SONIDOS DE VIBRACIÓN O RUIDOS; ALINEAMIENTO; descongelación termine.
REFRIGERATOR INSTALLATION GUÍA DE SOLUCIÓN DE PROBLEMAS 50 ENTENDIENDO LOS SONIDOS QUE ESCUCHA Su nuevo refrigerador puede que haga sonidos que su viejo refrigerador no hacía. Porque los sonidos son nuevos para usted, puede que se preocupe. La Mayoría de estos nuevos sonidos son normales. Superficie...
Page 50 - LAS LÁMPARAS NO FUNCIONAN; EL MOTOR DEL COMPRESOR PARECE QUE FUNCIONA EXCESIVAMENTE
REFRIGERATOR INSTALLATION GUÍA DE SOLUCIÓN DE PROBLEMAS 51 LAS LÁMPARAS NO FUNCIONAN El cable de electricidad está desconectado. Firmemente conecte el cable en un receptáculo con el El foco de luz está suelto. Revise si... Entonces... El foco de luz se ha fundido. EL MOTOR DEL COMPRESOR PARECE QUE F...
Page 51 - LAS PUERTAS NO CIERRAN COMPLETAMENTE; SE DIFICULTA ABRIR LAS PUERTAS; ALINEAMIENTO DE PUERTAS.
REFRIGERATOR INSTALLATION GUÍA DE SOLUCIÓN DE PROBLEMAS 52 LAS PUERTAS NO CIERRAN COMPLETAMENTE El refrigerador no esta nivelado. Paquetes de alimentos están bloqueando la puerta. El recipiente de hielo, la tapa del compartimiento de verduras, estantes, anaqueles de las puertas están Las juntas de l...
Page 52 - LA FÁBRICA DE HIELO NO FUNCIONA; CONEXIÓN DE LA TUBERÍA DE
REFRIGERATOR INSTALLATION GUÍA DE SOLUCIÓN DE PROBLEMAS 53 LA FÁBRICA DE HIELO NO FUNCIONA TEMPERATURA MUY CALIENTE O ACUMULACIÓN DE HUMEDAD EN EL INTERIOR Revise si... Entonces... El interruptor de la fábrica está en la posición El suministro de agua está apagado o no está conectado. El compartimie...
Page 53 - LIMPIEZA
REFRIGERATOR INSTALLATION GUÍA DE SOLUCIÓN DE PROBLEMAS 54 LAS PUERTAS NO CIERRAN COMPLETAMENTE Las puertas se sacaron durante la instalación del producto y no se colocaron correctamente de vuelta. El refrigerador se tambalea o parece inestable. Nivele el refrigerado Use de referencia la sección de ...
Page 54 - GARANTÍA LIMITADA; LG Electronics; LA GARANTIA ANTERIOR NO APLICA A :
Visite nuestro sitio web/http://www.lgservice.com GARANTÍA LIMITADA Estados Unidos de América Refrigerador / Congelador 1 año 1 año [Servicio a domicilio (Excepto Modelo GR-051)] Sistema Sellado 7 años 1 año [Servicio a domicilio (Excepto Modelo GR-051)] LG Electronics reparará o en su defecto reemp...