Page 2 - I N T R O D U C T I O N; Product Registration Information
I N T R O D U C T I O N 2 THANK YOU! Congratulations on your purchase and welcome to the LG family. Your new LG Gas Range combines precision cooking features with simple operation and stylish design. By following the operating and care instructions in this manual, your range will provide you with ma...
Page 3 - I M P O R T A N T S A F E T Y I N F O R M A T I O N; ENGLISH; READ ALL INSTRUCTIONS BEFORE USE; II; WARNING
I M P O R T A N T S A F E T Y I N F O R M A T I O N 3 ENGLISH READ ALL INSTRUCTIONS BEFORE USE WARNING • ALL RANGES CAN TIP • INJURY TO PERSONS COULD RESULT • INSTALL ANTI-TIP DEVICESPACKED WITH RANGE • SEE INSTALLATION ANTI-TIP DEVICE II II M M M M P P P P O O O O R R R R T T T T A A A A N N N N T ...
Page 4 - IMPORTANT SAFETY NOTICE
4 I M P O R T A N T S A F E T Y I N F O R M A T I O N READ ALL INSTRUCTIONS BEFORE USE IMPORTANT SAFETY NOTICE Enforcement Act requires the Governor of Californiato publish a list of substances known to the state tocause birth defects or other reproductive harm, andrequires businesses to warn custom...
Page 5 - SAFETY PRECAUTIONS
• Make sure your range is properly adjusted by aqualified service technician or installer for the type ofgas (natural or LP) that is to be used. Your rangecan be converted for use with either type of gas.See the installation instructions. • After using your range for a long time, high floortemperatu...
Page 6 - SURFACE BURNERS
6 I M P O R T A N T S A F E T Y I N F O R M A T I O N READ ALL INSTRUCTIONS BEFORE USE SURFACE BURNERS • NEVER leave the surface burners unattended at high flame settings. Boilovers cause smoking andgreasy spillovers that may catch on fire. • Always turn knob to the “LITE” position when igniting the...
Page 7 - ELECTRIC WARMING DRAWER
I M P O R T A N T S A F E T Y I N F O R M A T I O N 7 ENGLISH READ ALL INSTRUCTIONS BEFORE USE ELECTRIC WARMING DRAWER (on some models) • The purpose of the warming drawer is to hold hotcooked foods at serving temperature. Always startwith hot food; cold food cannot be heated or cookedin the warming...
Page 8 - OVEN; READ AND FOLLOW THIS SAFETY INFORMATION CAREFULLY.; SAVE THESE INSTRUCTIONS
8 I M P O R T A N T S A F E T Y I N F O R M A T I O N READ ALL INSTRUCTIONS BEFORE USE OVEN When opening the door of a hot oven, stand away from the range. The hot air and steam thatescape can cause burns to hands, face and eyes. READ AND FOLLOW THIS SAFETY INFORMATION CAREFULLY. SAVE THESE INSTRUCT...
Page 9 - O P E R A T I N G I N S T R U C T I O N S; PARTS AND FEATURES
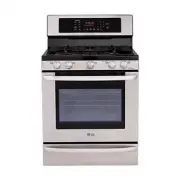
O P E R A T I N G I N S T R U C T I O N S 9 ENGLISH PARTS AND FEATURES Oval burner Medium burner Large burner Knobs (5 ea) Broiler pan & Grid Split rack Gasket Anti-tip bracket Model and serial number plate Warming /Storage door Oven door Oven vent Grates Small burnerExtra large burner Automatic...
Page 10 - USING THE GAS SURFACE BURNERS; HOW TO LIGHT A GAS SURFACE BURNER
10 O P E R A T I N G I N S T R U C T I O N S USING THE GAS SURFACE BURNERS Throughout this manual, features and appearance may vary from your model. • Make sure all grates on the range are properlyplaced before using any burner. • Be sure the burners and grates are cooled downbefore you place your h...
Page 11 - HOW TO SELECT FLAME SIZE; USING A WOK
O P E R A T I N G I N S T R U C T I O N S 11 ENGLISH USING THE GAS SURFACE BURNERS HOW TO SELECT FLAME SIZE NEVER let the flames extend up the sides of thecookware for safe handling of cookware. Watch the flame, not the knob, as you reduce heat.When fast heating is desired, the flame size on a gasbu...
Page 12 - USING THE GRIDDLE
12 O P E R A T I N G I N S T R U C T I O N S USING THE GRIDDLE Your non-stick coated griddle provides an extra-largecooking surface for meats, pancakes or other foodusually prepared in a frying pan or skillet. NOTE: Your griddle will discolor over time as it becomes seasoned with use. How to Place t...
Page 15 - USING THE OVEN
O P E R A T I N G I N S T R U C T I O N S 15 ENGLISH As your oven heats up, the temperature increase ofthe air in the oven may cause water droplets to formon the door glass. These droplets are harmless andwill evaporate as the oven continues to heat up. ALUMINUM FOIL NEVER cover the oven bottom with...
Page 16 - PREHEATING AND PAN PLACEMENT; BAKING TIP
16 O P E R A T I N G I N S T R U C T I O N S USING THE OVEN To avoid possible burns, place the racks in the desired position before you turn the oven on. PREHEATING AND PAN PLACEMENT Preheat the oven if the recipe calls for it. To preheat,set the oven at the correct temperature. Preheating isnecessa...
Page 17 - HOW TO SET THE OVEN FOR BROILING
O P E R A T I N G I N S T R U C T I O N S 17 ENGLISH Serve the food immediately, and place the pan outside the oven to cool during themeal for easiestcleaning. Use LO Broil to cook foods such as poultryor thick cuts of meatthoroughly withoutover-browning them. NOTE : • Some smoke may occur during br...
Page 18 - BROILING GUIDE
18 O P E R A T I N G I N S T R U C T I O N S A B C D E F G Your oven has 7 rack positions. USING THE OVEN BROILING GUIDE Broiling times will be affected by the size, weight, thickness,starting temperature and your preference of doneness. This guide is based on meats at refrigerated temperatures. Foo...
Page 19 - USING THE CLOCK AND TIMER; HOW TO SET THE CLOCK
O P E R A T I N G I N S T R U C T I O N S 19 ENGLISH USING THE CLOCK AND TIMER HOW TO SET THE CLOCK The clock should be set to the correct time of day forthe automatic oven timing functions to work properly.The time of day cannot be changed during cooking orself-clean mode. Touch the “CLOCK” pad onc...
Page 20 - USING THE TIMED BAKING & ROASTING FEATURES; HOW TO CANCEL THE TIMER
20 O P E R A T I N G I N S T R U C T I O N S USING THE TIMED BAKING & ROASTING FEATURES NOTE: DO NOT leave foods that spoil easily – such as milk, eggs, fish, stuffings, poultry and pork – more than 1hour before or after cooking. Room temperaturepromotes the growth of harmful bacteria. Be sure t...
Page 22 - Roasting Rack Instructions; USING THE CONVECTION OVEN; CONVECTION BAKE; use the roasting rack when
22 O P E R A T I N G I N S T R U C T I O N S • Good for large tender cutsof meat, uncovered. The convection fancirculates the heated airevenly around the food.Using the grid and broilerpan provided, heated airwill be circulated over andaround the food beingroasted. The heated airseals in juices quic...
Page 23 - AUTOMATIC RECIPE CONVERSION
O P E R A T I N G I N S T R U C T I O N S 23 ENGLISH USING THE CONVECTION OVEN (continued) AUTOMATIC RECIPE CONVERSION You can use your favorite recipes in the convectionoven. When using CONVECTION BAKE , the CONVECTION AUTO CONVERSION feature will automatically convert the temperature from regularb...
Page 24 - HOW TO SET THE OVEN FOR CONVECTION BAKING OR ROASTING
24 O P E R A T I N G I N S T R U C T I O N S USING THE CONVECTION OVEN (continued) You can bake foods with excellent results usingmultiple racks because heated air is circulated evenlythroughout the oven. Multi-rack baking may increase cook times slightly forsome foods but the overall result is time...
Page 25 - CONVECTION ROASTNG CHART
O P E R A T I N G I N S T R U C T I O N S 25 ENGLISH USING THE CONVECTION OVEN (continued) CONVECTION ROASTNG CHART Meats Minutes/Lb. Oven Temp. Beef Pork Ham Lamb Seafood Poultry Rib (3 to 5 lbs.) Rare † Medium Well Boneless Rib, Top Sirloin Rare † Medium Well Beef Tenderloin Rare † Medium Pot Roas...
Page 26 - HOW TO SET AN IMMEDIATE START AND AUTOMATIC STOP
26 O P E R A T I N G I N S T R U C T I O N S USING THE TIMED CONVECTION BAKING ORROASTING FEATURES HOW TO SET AN IMMEDIATE START AND AUTOMATIC STOP The oven will turn on immediately and cook for aselected length of time. At the end of the cookingtime, the oven will turn off automatically. Touch the ...
Page 28 - USING THE FAVORITE FEATURE; SETTING THE WARM FEATURE; HOW TO SET WARM
28 O P E R A T I N G I N S T R U C T I O N S USING THE FAVORITE FEATURE Touch the number pads to set the desired oven temperature within 25seconds. This temperature will bestored next times. Touch the “START” pad. A long beep will sound 3 times when the oven hasreached the selected temperature. NOTE...
Page 29 - SETTING THE PROOF FEATURE
O P E R A T I N G I N S T R U C T I O N S 29 ENGLISH SETTING THE PROOF FEATURE To avoid lowering the oven temperature andlengthening proofing time,do not open the oven doorunnecessarily. Check bread products early to avoidover-proofing. NOTES: • DO NOT use the proofing mode for warming food or keepi...
Page 30 - SPECIAL FEATURES OF YOUR OVEN CONTROL
30 O P E R A T I N G I N S T R U C T I O N S HOW TO SET CONVECTION AUTOCONVERSION FEATURE When using convection bake and roast, theConvection Auto Conversion feature will automaticallyconvert entered regular baking temperatures toconvection baking temperatures. This feature is activated so that the ...
Page 32 - HOW TO SELECT LANGUAGE
32 O P E R A T I N G I N S T R U C T I O N S HOW TO SELECT LANGUAGE Your oven control is set to display in English but youmay change this to display in Spanish or French. Touch and hold the “WARM” pad for 3 seconds. Then touch the “WARM” pad twice and “Lng” will display. Touch the number 1 pad for E...
Page 33 - USING THE ELECTRIC WARMING DRAWER; TO USE THE WARMING DRAWER
O P E R A T I N G I N S T R U C T I O N S 33 ENGLISH USING THE ELECTRIC WARMING DRAWER (on some models) The warming drawer will keep hot, cooked foods atserving temperature. Always start with hot food. TO USE THE WARMING DRAWER Touch the “WARM DRAWER SET/OFF” pad. “WARMER” begins to blink. On the nu...
Page 34 - TEMPERATURE SELECTION CHART; TO CRISP FOOD ITEMS
34 O P E R A T I N G I N S T R U C T I O N S USING THE ELECTRIC WARMING DRAWER (on some models) TEMPERATURE SELECTION CHART If you keep several different foods hot, set the controlto the food needing the highest setting. • The quality of the food will be affected by thetemperature, type and amount o...
Page 35 - USING THE SELF-CLEANING OVEN; BEFORE A CLEAN CYCLE
O P E R A T I N G I N S T R U C T I O N S 35 ENGLISH Touch the “SELF CLEAN” pad once for a 3 hour cycle, twice for a 2 hourcycle or three times for a 4 hour cycle.A 3-hour self-clean is recommended foruse when cleaning small, containedspills. A SELF CLEAN time of 4 hoursis recommended for heavily so...
Page 36 - HOW TO DELAY THE START OF CLEANING
36 O P E R A T I N G I N S T R U C T I O N S USING THE SELF-CLEANING OVEN The oven shuts off automatically when the clean cycleis complete. • When the DOOR LOCKED light is off, the door will unlock automatically. • The words DOOR LOCKED will flash and the oven control will signal if you set the clea...
Page 37 - C A R E A N D C L E A N I N G O F T H E R A N G E; CARE AND CLEANING; SEALED BURNER ASSEMBLIES
C A R E A N D C L E A N I N G O F T H E R A N G E 37 ENGLISH CARE AND CLEANING Make sure electrical power is off and all surfacesare cool before cleaning any part of the range. If your range is pulled away from the wallfor cleaning, servicing or any reason,ensure that the anti-tip device is re-engag...
Page 38 - BURNER CAPS AND HEADS; BURNER CAPS
38 C A R E A N D C L E A N I N G O F T H E R A N G E BURNER CAPS AND HEADS BURNER CAPS Lift off when cool. Wash burner caps in hot, soapywater and rinse with clean water. To remove burnedon food particles, you may scour with a plasticscouring pad. To place the dual extralarge burner outer capproperl...
Page 39 - BURNER GRATES; COOKTOP SURFACE; CLEANING
C A R E A N D C L E A N I N G O F T H E R A N G E 39 ENGLISH BURNER GRATES Your range has three professional-style grates. For maximum stability, these grates should only beused in their proper position; Two side grates can beinterchanged left to right and front to back. Centergrate can be also inte...
Page 40 - STAINLESS STEEL SURFACES; CONTROL PANEL
40 C A R E A N D C L E A N I N G O F T H E R A N G E STAINLESS STEEL SURFACES DO NOT use a steel wool pad; it will scratch thesurface. To clean the stainless steel surface, use warm sudsywater or a stainless steel cleaner or polish. Alwayswipe the surface in the direction of the grain. Followthe cle...
Page 41 - OVEN DOOR; TO CLEAN THE INSIDE OF THE DOOR; TO CLEAN THE OUTSIDE OF THE DOOR; TO REPLACE THE DOOR
C A R E A N D C L E A N I N G O F T H E R A N G E 41 ENGLISH OVEN DOOR TO REMOVE THE DOORStep. 1 Open the door fully. Step. 2 Pull the hinge locks downtoward the door frame tothe unlocked position. Step. 3 Firmly grasp both sides of the door at the top. Step. 4 Close door to the door removalposition...
Page 42 - BROILER PAN AND GRID
42 C A R E A N D C L E A N I N G O F T H E R A N G E After broiling, remove thebroiler pan from the oven.Remove the grid from thepan. Carefully pour outgrease from the pan into aproper container. Wash andrinse the broiler pan and gridin hot water with a soap-filledor plastic scouring pad.If food has...
Page 43 - OVEN RACKS AND DRAWER RACKS; TO REPLACE
C A R E A N D C L E A N I N G O F T H E R A N G E 43 ENGLISH OVEN RACKS AND DRAWER RACKS If your oven is equipped with nickel oven racks,remove them from the oven before beginning the self-clean cycle. To clean the oven racks, use an abrasive cleanser.After cleaning, rinse the racks with clean water...
Page 44 - REMOVABLE WARMING DRAWER; TO REMOVE THE DRAWER:; TO REPLACE THE DRAWER:
44 C A R E A N D C L E A N I N G O F T H E R A N G E REMOVABLE WARMING DRAWER NOTE: Before performing any adjustments, cleaning or service, unplug the range.Make sure the warming drawer heating element iscool. Most cleaning can be done with the drawer in place.However, the drawer may be removed if f...
Page 45 - T R O U B L E S H O O T I N G; BEFORE CALLING FOR SERVICE
T R O U B L E S H O O T I N G 45 ENGLISH BEFORE CALLING FOR SERVICE Before you call for service, review this list. It may save you time and expense. This list includes commonoccurrences that are not the result of a defect in workmanship or materials. Problem Possible Causes Solutions Top burners do ...
Page 49 - LG GAS RANGE LIMITED WARRANTY – USA
49 ENGLISH LG GAS RANGE LIMITED WARRANTY – USA LG Electronics Inc. will repair or replace your product, at LG’s option, if it proves to be defective in material orworkmanship under normal use, during the warranty period set forth below, effective from the date of original consumerpurchase of the pro...
Page 50 - M e m o