Page 2 - TABLE OF CONTENTS
TABLE OF CONTENTS 2 3 IMPORTANT SAFETY INSTRUCTIONS 3 READ ALL INSTRUCTIONS BEFORE USE 3 WARNING 6 CAUTION 7 PRODUCT OVERVIEW 7 Product Features 10 INSTALLATION 10 Before Installing 11 Choosing the Proper Location 13 Removing/Assembling Handles 14 Removing/Assembling Doors and Drawers 18 Connecting ...
Page 3 - IMPORTANT SAFETY INSTRUCTIONS; READ ALL INSTRUCTIONS BEFORE USE; Safety Messages; WARNING; Installation
3 IMPORTANT SAFETY INSTRUCTIONS ENGLISH IMPORTANT SAFETY INSTRUCTIONS READ ALL INSTRUCTIONS BEFORE USE Safety Messages Your safety and the safety of others are very important. We have provided many important safety messages in this manual and on your appliance. Always read and follow all safety mess...
Page 4 - Operation
4 IMPORTANT SAFETY INSTRUCTIONS • Do not bend or pinch the power cord excessively or place heavy objects on it.• When positioning the appliance, ensure the supply cord is not trapped or damaged.• Do not locate multiple portable socket-outlets or portable power supplies at the rear of the appliance. ...
Page 5 - Maintenance
5 IMPORTANT SAFETY INSTRUCTIONS ENGLISH • Do not use electrical appliances inside the food storage compartments of the appliance, unless they are of the type recommended by the manufacturer. • Do not store explosive substances such as aerosol cans with a flammable propellant in this appliance.• Do n...
Page 6 - SAVE THESE INSTRUCTIONS; Risk of Fire and Flammable Materials; CAUTION
6 IMPORTANT SAFETY INSTRUCTIONS SAVE THESE INSTRUCTIONS Risk of Fire and Flammable Materials CAUTION CAUTION • To reduce the risk of minor or moderate injury to persons, malfunction, or damage to the product or property when using this product, follow basic precautions, including the following: Inst...
Page 7 - PRODUCT OVERVIEW; Product Features; Exterior
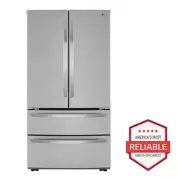
7 PRODUCT OVERVIEW ENGLISH PRODUCT OVERVIEW Product Features The images in this guide may be different from the actual components and accessories, which are subject to change by the manufacturer without prior notice for product improvement purposes. Exterior a Refrigerator Fresh food compartment b F...
Page 8 - Interior
8 PRODUCT OVERVIEW Interior LMWS27626* LMWC23626* a LED Interior Lighting Lights up the inside of the refrigerator. b Water Filter Purifies water. c Water Dispenser Dispenses purified water. d Door Mullion Prevents the cold air in the refrigerator from escaping when the doors are closed. CAUTION • T...
Page 9 - Product Specifications
9 PRODUCT OVERVIEW ENGLISH i Control Panel Sets the refrigerator and freezer temperatures. j Modular Door Bin Interchangeable bins can be arranged to suit storage needs. k Adjustable Refrigerator Shelf The refrigerator shelves are adjustable to meet individual storage needs. l Glide'N'Serve Stores f...
Page 10 - INSTALLATION; Before Installing; Installation Overview
10 INSTALLATION INSTALLATION Before Installing Installation Overview Please read the following installation instructions first after purchasing this product or transporting it to another location. a Unpacking the Refrigerator b Choosing the Proper Location c Disassembling/Assembling d Connecting the...
Page 11 - Unpacking the Refrigerator; Choosing the Proper; Water; Electricity; Flooring; Ambient Temperature
11 INSTALLATION ENGLISH Unpacking the Refrigerator WARNING • Use two or more people to move and install the refrigerator. Failure to do so can result in back injury or other injury. • The refrigerator is heavy. Protect the floor when moving the refrigerator for cleaning or service. Always pull the r...
Page 12 - Dimensions and Clearances
12 INSTALLATION Dimensions and Clearances • Check the dimensions of the appliance and the installation path to ensure there is sufficient room to move the refrigerator through doors or narrow openings. • If an opening is too narrow to fit the refrigerator through, remove the refrigerator doors. See ...
Page 13 - Handles; Removing Refrigerator Handles
13 INSTALLATION ENGLISH Removing/Assembling Handles These instructions are for models which ship with the handles assembled. For models shipped with the handles disassembled, follow the instructions included in the handle package.• Tools Needed - Units shipped with disassembled handles: 3/32" an...
Page 14 - Doors and Drawers; Removing the Left Refrigerator
14 INSTALLATION 2 Place the handle on the door by fitting the handle footprints over the mounting fasteners and tightening the set screws b with a 3/32 in. Allen wrench.• For models shipped with the handles assembled, use a 1/8 in. Allen wrench. Removing/Assembling Doors and Drawers If the entrance ...
Page 15 - Assembling the Left Refrigerator; Removing the Right Refrigerator
15 INSTALLATION ENGLISH CAUTION • Place the door, inside facing up, on a nonscratching surface. Assembling the Left Refrigerator Door CAUTION • Install the left refrigerator door after the right door is installed. NOTE • The number of wire harnesses may vary depending on the model. • Ground wire is ...
Page 16 - Assembling the Right Refrigerator
16 INSTALLATION 2 Detach all the wire harnesses c . 3 Rotate the hinge lever d clockwise. Lift the top hinge e free of the hinge lever latch f . CAUTION • When lifting the hinge free of the latch, be careful that the door does not fall forward. 4 Lift the door from the middle hinge pin and remove th...
Page 17 - Removing the Freezer Drawer; Assembling the Freezer Drawer
17 INSTALLATION ENGLISH 4 Place the cover e in its place. Insert and tighten the cover screw f . Removing the Freezer Drawer Removing the lower freezer drawer in the same way. WARNING • Use two or more people to remove and install the refrigerator doors and freezer drawer. • Be careful of sharp hing...
Page 18 - Connecting Refrigerator to; Before Beginning
18 INSTALLATION 1 Pull out both rails simultaneously, until they are fully extended. 2 Grasp the drawer on each side and hook the drawer supports into the rail tabs located on both sides. CAUTION • Do not hold the handle when removing or replacing the drawer. The handle may come off, causing persona...
Page 19 - Supplies Needed; Connecting Water Line to
19 INSTALLATION ENGLISH • Where reverse osmosis water filtration system is connected to a cold water supply: - 40 - 60 psi minimum to reverse osmosis system (2.8 kgf/cm 2 - 4.2 kgf/cm 2 , or less than 2 - 3 seconds to fill a cup of 7 oz capacity) If the water pressure from the reverse osmosis system...
Page 20 - Leveling and Door; Leveling; Door Alignment
20 INSTALLATION NOTE • Before making the connection to the refrigerator, be sure that the refrigerator power cord is not plugged into the wall outlet. 3 Remove the flexible plastic cap from the water valve on the refrigerator. 4 Place the compression nut and ferrule (sleeve) onto the end of the tubi...
Page 21 - Refrigerator Type A
21 INSTALLATION ENGLISH Refrigerator Type A Both the left and right refrigerator doors have an adjustable nut, located on the bottom hinge, to raise and lower them to align properly.If the space between the doors is uneven even after the door bins are filled, follow the instructions below to align t...
Page 22 - Turning on the Power; Position the Refrigerator
22 INSTALLATION Turning on the Power • After installing, plug the refrigerator’s power cord into a 3-prong grounded outlet and push the refrigerator into the final position. CAUTION • Connect to a rated power outlet.• Have a certified electrician check the wall outlet and wiring for proper grounding...
Page 23 - OPERATION; Before Use; Checklist
23 OPERATION ENGLISH OPERATION Before Use Checklist Clean the refrigerator. Clean the refrigerator thoroughly and wipe off all dust that accumulated during shipping. CAUTION • Do not scratch the refrigerator with a sharp object or use a detergent that contains alcohol, a flammable liquid or an abras...
Page 24 - Control Panel; Control Panel Features
24 OPERATION Control Panel Depending on the model, some of the following functions may not be available.The actual control panel may differ from model to model. Control Panel Features a Freezer Indicates the set temperature of the freezer compartment in Celsius (°C) or Fahrenheit (°F). The default f...
Page 25 - Sabbath Mode; Using the Sabbath Mode; Water Dispenser; Using the Water Dispenser; Cleaning the Dispenser; Automatic Icemaker
25 OPERATION ENGLISH NOTE • When the refrigerator is in the Power Saving Mode, the display remains off until a door is opened or a button is pressed. Once on, the display remains on for 20 seconds. Sabbath Mode This feature is only available on some models. Using the Sabbath Mode Sabbath mode is use...
Page 26 - Before Using the Freezer Icemaker; Turning the Icemaker On/Off; Storing Food
26 OPERATION Before Using the Freezer Icemaker This feature is only available on some models.The feature may vary depending on model purchased. NOTE • Throw away the first bin full of ice after installation. This is also necessary if the refrigerator has not been used for a long time. • The icemaker...
Page 27 - Food Storage Tips; How to Store Food; Storing Frozen Food; Freezing; Packaging
27 OPERATION ENGLISH Food Storage Tips Wrap or store food in the refrigerator in airtight and moisture-proof material unless otherwise noted. This prevents food odor and taste transfer throughout the refrigerator. For dated products, check date code to ensure freshness. CAUTION • Do not overfill or ...
Page 28 - Crisper Drawers; Using the Humidity Controlled; Removing/Assembling the
28 OPERATION have food odor and taste transfer throughout the refrigerator and could also dry out frozen food.Packaging Recommendations• Rigid plastic containers with tight-fitting lids• Straight-sided canning/freezing jars• Heavy-duty aluminum foil• Plastic-coated paper• Non-permeable plastic wraps...
Page 29 - Glide‘N’Serve; Using the Pantry Drawer; Detaching/Assembling the; Refrigerator Shelves; Detaching/Assembling Shelves
29 OPERATION ENGLISH 5 Slightly tilt up the front, insert the crisper into the frame and push it back into place. 6 Line up the tabs on the Door-in-Door case with the slots on the door and push down until it snaps into place. NOTE • The Door-in-Door feature is only available on some models. Glide‘N’...
Page 30 - Door Bins; Detaching/Assembling Door Bins; Using the Durabase
30 OPERATION 3 Support the shelf from the bottom and lift it straight up. 4 Pull the shelf out. 5 To assemble, tilt the front of the shelf up and guide the shelf hooks into the slots at a desired height. 6 Lower the front of the shelf so that the hooks drop into the slots. CAUTION • Make sure that s...
Page 32 - SMART FUNCTIONS; LG ThinQ Application; Installing the LG ThinQ Application; Smart Diagnosis; Feature; Using Audible Diagnosis to
32 SMART FUNCTIONS SMART FUNCTIONS LG ThinQ Application This feature is only available on models with the c or d logo. The LG ThinQ application allows you to communicate with the appliance using a smartphone. Installing the LG ThinQ Application Search for the LG ThinQ application from the Google Pla...
Page 33 - MAINTENANCE; Cleaning; Water Filter
33 MAINTENANCE ENGLISH MAINTENANCE Cleaning WARNING • Use non-flammable cleaner. Failure to do so can result in fire, explosion, or death. CAUTION • Do not use an abrasive cloth or sponge when cleaning the interior and exterior of the refrigerator. • Do not place your hand on the bottom surface of t...
Page 34 - Replacing the Water Filter
34 MAINTENANCE WARNING • To reduce the risk associated with choking, do not allow children under 3 years of age to have access to small parts during the installation of this product. • To reduce the risk associated with the ingestion of contaminants, do not use with water that is microbiologically u...
Page 36 - Performance Data Sheet
36 MAINTENANCE Performance Data Sheet Model: LT1000P, LT1000PC, LT1000PCSNSF System Trade Name Code: MDJ64844601The concentration of the indicated substances in water entering the system was reduced to a concentration less than or equal to the permissible limit for water leaving the system as specif...
Page 38 - TROUBLESHOOTING; FAQs; Frequently Asked Questions
38 TROUBLESHOOTING TROUBLESHOOTING FAQs Frequently Asked Questions Q: What are the best temperature settings for my refrigerator and freezer? A: The default setting for the refrigerator is 37° Fahrenheit (3° Celsius). The default setting for the freezer is 0° Fahrenheit (-18° Celsius). Adjust these ...
Page 39 - Before Calling for Service; Cooling
39 TROUBLESHOOTING ENGLISH Before Calling for Service Review this section before calling for service; doing so will save you both time and money. Cooling Problem Possible Cause & Solution Refrigerator is not cooling or has no power. The refrigerator control is set to OFF (some models). • Turn th...
Page 41 - Ice
41 TROUBLESHOOTING ENGLISH Ice Refrigerator or Freezer section is too warm. Unit is installed in a hot location. • The refrigerator should not be operated in temperatures above 110 °F (43 °C). A large amount of food or hot food was added to either compartment. • Adding food warms the compartment req...
Page 45 - Noises
45 TROUBLESHOOTING ENGLISH Noises Doors will not close correctly or pop open. Ice bin, crisper cover, pans, shelves, door bins, or baskets are out of position. • Push bins all the way in and put crisper cover, pans, shelves and baskets into their correct positions. See the Operation section for more...
Page 47 - LIMITED WARRANTY; USA; TERMS AND CONDITIONS; THIS LIMITED WARRANTY DOES NOT COVER:
47 LIMITED WARRANTY ENGLISH LIMITED WARRANTY USA TERMS AND CONDITIONS ARBITRATION NOTICE: THIS LIMITED WARRANTY CONTAINS AN ARBITRATION PROVISION THAT REQUIRES YOU AND LG ELECTRONICS (“LG”) TO RESOLVE DISPUTES BY BINDING ARBITRATION INSTEAD OF IN COURT, UNLESS YOU CHOOSE TO OPT OUT. IN ARBITRATION, ...
Page 48 - PROCEDURE FOR RESOLVING DISPUTES:
48 LIMITED WARRANTY • Damage or failure of the Product to perform during power failures and interrupted or inadequate electrical service. • Damage or failure of the Product caused by leaky or broken water pipes, frozen water pipes, restricted drain lines, inadequate or interrupted water supply or in...
Page 51 - Canada
51 LIMITED WARRANTY ENGLISH Canada TERMS AND CONDITIONS ARBITRATION NOTICE: THIS LIMITED WARRANTY CONTAINS AN ARBITRATION PROVISION THAT REQUIRES YOU AND LG TO RESOLVE DISPUTES BY BINDING ARBITRATION INSTEAD OF IN COURT, UNLESS THE LAWS OF YOUR PROVINCE OR TERRITORY DO NOT PERMIT THAT, OR, IN OTHER ...
Page 56 - For inquiries or comments,
LG Customer Information Center Register your product Online! www.lg.com For inquiries or comments, visit www.lg.com or call: 1-800-243-0000 U.S.A. 1-888-542-2623 CANADA