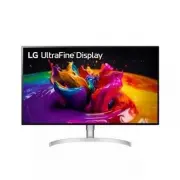
LG 32UL950-W - User Manual
LG 32UL950-W Monitor – User Manual, read for free online in PDF format. We hope this helps you resolve any issues you may have. If you have further questions, please contact us through the contact form.


Table of Contents:
- Page 2 – LICENSE; TABLE OF CONTENTS; OPEN SOURCE SOFTWARE NOTICE
- Page 3 – OPEN SOURCE SOFTWARE NOTICE INFORMA-; Supported Drivers and Software
- Page 4 – Product and Button Description; How to Use the Joystick Button; Moving and Lifting the Monitor
- Page 5 – Installing on a Table; Adjusting the Stand Height
- Page 6 – Using the Kensington Lock; Installing the Wall Mount Plate; Installing on the Wall
- Page 8 – USING THE MONITOR; Connecting to a PC; HDMI Connection; DisplayPort Connection; Thunderbolt
- Page 9 – Connecting AV Devices; Connecting Peripherals; USB Device connection
- Page 10 – Headphones Connection
- Page 11 – USER SETTINGS; Activating the Main Menu
- Page 12 – Main Menu Features; Menu Settings
- Page 13 – Quick Settings; Input
- Page 15 – Picture
- Page 20 – General
- Page 23 – TROUBLESHOOTING
- Page 25 – PRODUCT SPECIFICATION
* LG LED Monitor applies LCD screen with LED backlights.
Please read this manual carefully before operating your set and
retain it for future reference.
32UL950
32BL95U
OWNER’S MANUAL
LED LCD MONITOR
(LED Monitor*)
www.lg.com
Copyright © 2019 LG Electronics Inc. All Rights Reserved.
"Loading the manual" means you need to wait until the file loads and becomes available for online reading. Some manuals are very large, and the time they take to appear depends on your internet speed.
Was this manual helpful?
About this manual
- Brand
- LG
- Model
- 32UL950-W
- Document type
- User Manual
- Category
- Monitor
- Language(s)
- English
- Pages
- 29
- File size
- 2.9 MB
- Format
Summary
2 ENGLISH LICENSE Each model has different licenses. Visit www.lg.com for more information on the license. The terms HDMI and HDMI High-Definition Multimedia Interface, and the HDMI Logo are trademarks or registered trademarks of HDMI Licensing Administrator, Inc. in the United States and other coun...
3 ENGLISH OPEN SOURCE SOFTWARE NOTICE INFORMA- TION To obtain the source code under GPL, LGPL, MPL, and other open source licenses, that is contained in this product, please visit http://opensource.lge.com . In addition to the source code, all referred license terms, warranty disclaimers and copyrig...
4 ENGLISH Product and Button Description How to Use the Joystick Button You can easily control the functions of the monitor by pressing the joystick button or moving it left/right/up/down with your finger. Basic Functions Power on Press the joystick button once with your finger to turn on the monito...