Page 2 - ILVE ACCESSORIES ONLINE SHOP; For a wide range of coffee machines, pods, and other ILVE
OPEN 24 / 7 ILVE ACCESSORIES ONLINE SHOP For a wide range of coffee machines, pods, and other ILVE accessories at the click of a button shop.ilve.com.au
Page 3 - TABLE OF CONTENTS
SAFETY INSTRUCTIONS 2 INSTALLATION OF THE OVEN 4 Electricals 4 Respect for the environment 5 Connection to the electrical power mains 11 INSTRUCTIONS FOR USE 12 The first time you use the oven 12 Removable Guides (if present) 12 CONTROL PANEL 13 Keypad 13 GENERAL OVEN INFORMATION 14 Error codes 14 B...
Page 4 - IMPORTANT
GB 1 SOLVING BAKING PROBLEMS 51 SOLVING OPERATIONAL PROBLEMS 52 ASSISTANCE OR SERVICE 53 Service Data Record 53 IMPORTANT The oven’s data plate is accessible even with the oven fully installed. The plate is visible simply by opening the door. Always quote the details from it to identify the applianc...
Page 5 - SAFETY INSTRUCTIONS; Keep children under age 8 away, unless constantly supervised.; Children may not perform cleaning and maintenance unsupervised.; ATTENTION
GB 2 SAFETY INSTRUCTIONS - Do not disassemble any parts prior to having disconnected the oven from the mains. - Do not use the appliance if any part is broken (for example a glass). Disconnect it from the mains and call service. - Before using the oven, it is recommended to make it operate at noload...
Page 7 - INSTALLATION OF THE OVEN; WARNING; Electricals; Maximum absorbed power:
GB 4 INSTALLATION OF THE OVEN To install the oven into the kitchen a cutout should be made in accordance with the dimensions shown in the Cutout & Dimensions figure.The apparatus is to be fastened to the top by means of the two screws provided in the kit through the holes made on the oven uprigh...
Page 8 - Respect for the environment
GB 5 Respect for the environment The documentation for this appliance is printed on paper bleached without chlorine or recycled paper to contribute to protecting the environment. The packaging was designed to prevent damage to the environment; they are ecological products that can be recovered or re...
Page 14 - Connection to the electrical power mains
GB 11 Connection to the electrical power mains WARNING This apparatus must be earthed. The oven is only for domestic use. The feed voltage and the absorbed power are as indicated on the data plate attached to the left-hand side upright, which can be seen when the oven door is open. Connecting must b...
Page 15 - INSTRUCTIONS FOR USE; The first time you use the oven
GB 12 INSTRUCTIONS FOR USE The first time you use the oven Clean the oven thoroughly with soapy water and rinse well.Operate the oven for about 30 minutes at maximum temperature to burn off all traces ofgrease which might otherwise create unpleasant smells when cooking. WARNING Never use aluminum fo...
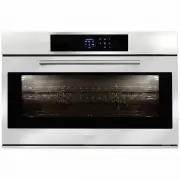
Page 16 - CONTROL PANEL; Keypad
GB 13 CONTROL PANEL Your appliance could vary slightly compared to the illustrations below. A - KeypadB - Display screen PM FRIDAY 11/20/2015 04:26 B A Keypad To operate the key, press gently. The keypad will not work if more than one key is pressed at the same time. - Movement arrows - To set the t...
Page 17 - GENERAL OVEN INFORMATION; Error codes
GB 14 GENERAL OVEN INFORMATION Before using your oven for the first time remove all packing and foreign materials from the oven(s). Any material of this sort left inside may melt or burn when the appliance is used. Error codes This code appears in the event of the electronic control indicating a fau...
Page 19 - GENERAL OVEN TIPS; Preheating the Oven
GB 16 GENERAL OVEN TIPS Preheating the Oven - Preheat the oven when using the Bake, Convection Bake and Convection Roast modes. - Use Fast Preheat mode when a shorter time is desired to preheat the oven. - Selecting a higher temperature does not shorten the preheat time. - Preheating is necessary fo...
Page 21 - GETTING STARTED; Instructions for initial switch-on
GB 18 GETTING STARTED Instructions for initial switch-on Once the oven has been connected to the power supply for the first time, the control automatically prepares for setting a number of user settings, which remain stored in case of any subsequent switch-on. - Language - Temperature - Time - Date ...
Page 22 - USER SETTINGS; NOTE; yk
GB 19 USER SETTINGS With the oven on, select the icon and confirm with the key to enter the SETTINGS menu. This menu permits personalizing the settings of your oven. To make access, no active cooking or any set time functions must be in progress. NOTE The Setting menù can never be set if any time fu...
Page 23 - Language
GB 20 Language Press the arrow key to select a language from among those available, and confirm with the key. Temperature & Weight Press the arrow key and to select one of the two temperature options “°C/°F” or weight options Kg/ib and confirm with the key. °F °C lb Kg
Page 24 - Time; Date
GB 21 Time Press the arrow key to select the time format between the options “12h AM/PM or 24h” and confirm with the key. Subsequently, set the time using the arrows and confirm with the key. Date Press the arrow key to select the date format from among the options “D.M.Y. – Y.M.D. – M.D.Y.” and con...
Page 26 - SYSTEM SETTING
GB 23 SYSTEM SETTING With the oven on, select the icon and confirm with the key to enter the SETTINGS menu. This menu permits setting a number of parameters or special functions. It also permits accessing the error events list. 1. Press the keys to select the sub menu and confirm with the key. 2. Us...
Page 28 - STARTING YOUR OVEN; Switching the oven on and off; Selecting the cooking mode
GB 25 STARTING YOUR OVEN Switching the oven on and off IMPORTANT - The key does not stop the function. - After switching off the oven, the cooling fan could continue to operate until the inner parts of the oven have cooled down. Press to switch the oven on and press again to switch it off. The oven ...
Page 30 - COOKING MODE TABLES
GB 27 COOKING MODE TABLES OVEN 45cm COOKING MODE ICON FAST PREHEAT MEAT PROBE TEMPERATURE Min. Preset Max. DEFROST 40°C 50°C 60°C BAKE 50°C 50°C 200°C ROAST 50°C 190°C 230°C ECO 50°C 165°C 230°C TRUE CONVECTION 50°C 165°C 230°C PIZZA 50°C 230°C 230°C CONVECTION ROAST 50°C 165°C 230°C CONVECTION GRIL...
Page 32 - Fast Preheat; To select FAST PREHEAT:
GB 29 Pre-heating phase While the oven is in pre-heating phase, the instantaneous temperature is displayed underneath the cooking mode icon. Just as soon as the set temperature is reached, an acoustic signal is heard and the instantaneous temperature indication disappears. Fast Preheat The FAST PREH...
Page 33 - Eco; Using Oven Lights
GB 30 325°F 11:00 am TRUE CONVECTION + + - - 3. Press the key again to run the function. The display page shows the icon of the active functions until the set temperature has been reached. Afterwards, the function switches to automatic in the selected cooking mode. Eco This mode is intended to save ...
Page 34 - TIME OVEN MODE OPERATION; CAUTION; Cook Time; To Set a Timed Mode
GB 31 TIME OVEN MODE OPERATION - Be sure that the time-of-day clock is displaying the correct time. - The timed mode turns off the oven at the end of the cook time. CAUTION Never leave food in the oven for more than one hour before and after cooking. This could deteriorate the properties of the food...
Page 35 - Stop Time; To Delay the Start of a Timed Mode
GB 32 To change the cooking time when the oven is already operating, simply press the e key and enter the new cooking time before pressing the key again. Stop Time Use the “Stop Time” function to delay the start of timed cooking. Enter the cooking stop time and the oven will automatically calculate ...
Page 39 - UNDERSTANDING THE VARIOUS OVEN MODES; Roast Tips and Techniques; General Guidelines; True Convection Tips and Techniques
GB 36 UNDERSTANDING THE VARIOUS OVEN MODES Roast Tips and Techniques Roasting is cooking with heated air. Both upper and lower elements in the oven are used to heat the air but no fan is used to circulate the heat.Follow the recipe or convenience food directions for baking temperature, time and rack...
Page 40 - Foods recommended for Convection Bake mode:
GB 37 and back of lower rack (See graphic at right). Allow 1” - 1 ½ ” (2,5 - 3cm).air space around pans. - Converting your own recipe can be easy. Choose a recipe that will work well in convection. - Reduce the temperature and cooking time if necessary. It may take some trial and error to achieve a ...
Page 42 - Broil Tips and Techniques; Dehydrate Tips and Techniques
GB 39 Broiling and convection broiling times are approximate and may vary slightly.Cooking times are indicative and also depend on the thickness and the starting temperature of the meat before cooking. Broil Tips and Techniques - Place rack in the required position needed before turning on the oven....
Page 44 - RECIPES
GB 41 RECIPES The Recipe function of your oven gives you the chance to cook food without having to set the oven manually every time. By selecting a “SET” recipe, the cooking mode, the temperature and the time are automatically set according to the recipe selected from the menu. Recipe List Type of F...
Page 45 - Saving a personalized recipe:
GB 42 6. When the recipe is selected, the following display page appears on the screen: 7. To start the recipe, confirm with the key. During a recipe, a number of acoustic and visual messages will ask you to perform the following operations. Simply follow the instructions on the screen.8. Upon termi...
Page 46 - Cancelling a Personalized recipe:
GB 43 4. At this point, the recipe can be saved in the list of “PERSONAL” recipes by selecting “SAVE” and confirming by means of the key. NOTE If the time and weight values are changed and not saved straight away, at the end of the recipe, a message appears which asks whether you want to save it. 5....
Page 47 - SABBATH MODE INSTRUCTIONS (On Some Models)
GB 44 SABBATH MODE INSTRUCTIONS (On Some Models) The Sabbath Mode function of your oven complied with Jewish laws. This function allows the oven to perform only the static function.When the Sabbath function is selected, the following functions are disabled: - Oven lights - All the keys except ON/OFF...
Page 48 - OVEN CARE AND CLEANING; Clean; Assisted cleaning
GB 45 OVEN CARE AND CLEANING Abrasive detergents and steam cleaning equipment should not be used for cleaning. WARNING Do not use harsh abrasive cleaners or sharp metal scrapers to clean the oven door glass since they can scratch the surface, which may result in shattering of the glass. Clean Assist...
Page 49 - Removing the door
GB 46 Removing the door WARNING Make sure that:• The oven is cool and power to the oven has been turned off before removing the door. Failure to do so could result in electrical shock or burns. • The oven door is heavy and fragile. Use both hands to remove the oven door. The door front is glass. Han...
Page 50 - Removing the slide oven door
GB 47 Removing the slide oven door 1 Decide whether you want the door to open to the left or right before positioning the appliance in the oven recess. 2 Fully open the door. 3 Remove the four fixing screws from the door hinge. 4 Remove the four plastic caps from the opposite side and unscrew the lo...
Page 53 - Replacement of the oven light
GB 50 Replacement of the oven light WARNING Make sure that: • The oven and lights are cool and power to the oven has been turned off before replacing the light bulb(s). Failure to do so could result in electrical shock or burns. • The lenses must be in place when using the oven. • The lenses serve t...
Page 54 - SOLVING BAKING PROBLEMS; BAKING PROBLEM
GB 51 SOLVING BAKING PROBLEMS With either Bake or Convection Bake, poor results can occur for many reasons other than a malfunction of the oven. Check the chart below for causes of the most common problems. Since the size, shape and material of baking utensils directly affect the baking results, the...
Page 55 - SOLVING OPERATIONAL PROBLEMS; OVEN PROBLEM
GB 52 SOLVING OPERATIONAL PROBLEMS Before contacting service, check the following to avoid unnecessary service charges. OVEN PROBLEM PROBLEM SOLVING STEPS Other F__ Error appears in the display window. Remove power and turn it back on again after a few seconds. If condition persists, note the code n...
Page 56 - ASSISTANCE OR SERVICE
GB 53 ASSISTANCE OR SERVICE Before contacting service, please check “Troubleshooting.” It may save you the cost of a service call.If you still need help, follow the instructions below. When calling, please know the purchase date and the complete model and serial number of your appliance. This inform...
Page 58 - Warranty Card; WARRANTY REGISTRATION
Warranty Card Eurolinx Pty Limited A.B.N. 50 001 473 347 trading as ILVE (“ILVE”) Office: 48-50 Moore Street, Leichhardt N.S.W 2040 Post: Locked Bag 3000, Annandale, N.S.W 2038 P: 1300 856 411 WARRANTY REGISTRATION Your ongoing satisfaction with your ILVE product is important to us. We ask that you ...
Page 59 - or; continued; Please complete and send to ILVE at: REPLY PAID 83617; MODEL NUMBER; Warranty Card tear off
3. Domestic UseEach ILVE product is made for domestic use. This Warranty may not extend to ILVE products used for commercial purposes; under those circumstances the warranty period is limited to 3 month.4. Time for Claim under the WarrantyYou must make any claim under this Warranty within twenty eig...