ILVE 600SPYKTI2 - Manuals
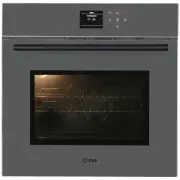
User Manual ILVE 600SPYKTI2


Summary
OPEN 24 / 7 ILVE ACCESSORIES ONLINE SHOP For a wide range of coffee machines, pods, and other ILVE accessories at the click of a button shop.ilve.com.au
GB 1 SAFETY INSTRUCTIONS 2 INSTALLATION OF THE OVEN 4 Electricals 4 Respect for the environment 5 Connection to the electrical power mains 7 INSTRUCTIONS FOR USE 8 The first time you use the oven 8 Oven Racks 8 Removable Guides 8 COOKING FUNCTIONS 9 ELECTRONIC CONTROL 11 Power-up 11 Programming time...
GB 2 SAFETY INSTRUCTIONS - Do not disassemble any parts prior to having disconnected the oven from the mains. - Do not use the appliance if any part is broken (for example a glass). Disconnect it from the mains and call service. - Before using the oven, it is recommended to make it operate at noload...
ILVE Ovens Manuals
-
 ILVE 200SPYKMPI
User Manual
ILVE 200SPYKMPI
User Manual
-
 ILVE 201WMPSS
User Manual
ILVE 201WMPSS
User Manual
-
 ILVE 600LVGLPG
User Manual
ILVE 600LVGLPG
User Manual
-
 ILVE 600LVGNG
User Manual
ILVE 600LVGNG
User Manual
-
 ILVE 600SKMI
User Manual
ILVE 600SKMI
User Manual
-
 ILVE 600SKMPI
User Manual
ILVE 600SKMPI
User Manual
-
 ILVE 600SPYKTI
User Manual
ILVE 600SPYKTI
User Manual
-
 ILVE 600SPYTCBV
User Manual
ILVE 600SPYTCBV
User Manual
-
 ILVE 600SPYTCGV
User Manual
ILVE 600SPYTCGV
User Manual
-
 ILVE 600SPYTCI
User Manual
ILVE 600SPYTCI
User Manual
-
 ILVE 600SVGI
User Manual
ILVE 600SVGI
User Manual
-
 ILVE 600SXMPSS
User Manual
ILVE 600SXMPSS
User Manual
-
 ILVE 600TCBV
User Manual
ILVE 600TCBV
User Manual
-
 ILVE 600TCGV
User Manual
ILVE 600TCGV
User Manual
-
 ILVE 600TCI
User Manual
ILVE 600TCI
User Manual
-
 ILVE 645LTKST
User Manual
ILVE 645LTKST
User Manual
-
 ILVE 700WMPSS
User Manual
ILVE 700WMPSS
User Manual
-
 ILVE 750SKMPI
User Manual
ILVE 750SKMPI
User Manual
-
 ILVE 750SPYKTI
User Manual
ILVE 750SPYKTI
User Manual
-
 ILVE 750SPYTCI
User Manual
ILVE 750SPYTCI
User Manual