iLIVING ILG8SF301 - User Manual
iLIVING ILG8SF301 Fan – User Manual, read for free online in PDF format. We hope this helps you resolve any issues you may have. If you have further questions, please contact us through the contact form.


Table of Contents:
- Page 2 – IMPORTANT; Product Specifications; Voltage Rating; P a g e
- Page 4 – Installation and Mounting Instruction; Steps Installation Instruction; Step 1 - Ventilation Clearance
- Page 5 – – 24 inches from top of the roof peak
- Page 6 – the circle, so that they do not fall into the attic space.
- Page 7 – Step 6
- Page 8 – shingles or the nail heads that have been added.; Step 7; (for those solar panel adjustable models only); – Installing the Angel Adjustment Bracket; The fan also has a horizontal adjustment platform design for the
- Page 9 – Step 8; – Adjusting the Solar Panel
- Page 10 – How long is the warranty?; Warranty Information; Register your product at our website:
- Page 11 – Feedback; Love it? Help us make the product more for you.; At iLiving USA, we are committed to bringing top; iLIVING USA; P a g
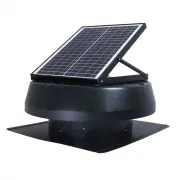
Hybrid Solar and AC Powered
Roof Exhaust Fan/Ventilator
Running Day and Night
SOLAR ONLY
SOLAR & AC
Model: ILG8SF301
Model: ILG8SF301A
Owner’s Manual
PLEASE READ AND
SAVE THESE INSTRUCTIONS
1 |
P a g e
"Loading the manual" means you need to wait until the file loads and becomes available for online reading. Some manuals are very large, and the time they take to appear depends on your internet speed.
Summary
CONGRATULATIONS! T he iLIVING ventilation exhaust fans are the NO.1 selling fan on Amazon. This smart solar attic fan is your best choice for cooling off your home. while helping you to save big on your cooling bills. Equipped with a powerful 3 0W adjustable Polycrystalline solar panel, this fan is ...
Installation and Mounting Instruction Before beginning the installation of your new Solar Powered Roof Exhaust Fan, please read through the entire installation instructions and contact us if you have any questions. Tools Required: • Ladder • Reciprocating saw (or jig saw) • Power drill with a 1/2” –...
Fig. 1 Step 2 – Positioning the Solar Fan For optimum performance, position the solar fan due south or southwest, and position it on an area of roof where the sun is not shaded or blocked, so as to capture direct sunlight and extended sunlight periods throughout the day. (Fig. 2) Then pitch upon the...