Hyundai H-MW1031- User Manual
Hyundai H-MW1031– User Manual, read for free online in PDF format. We hope this helps you resolve any issues you may have. If you have further questions, please contact us through the contact form.
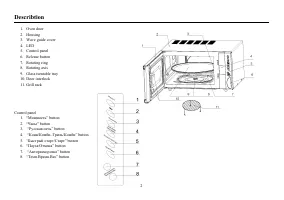


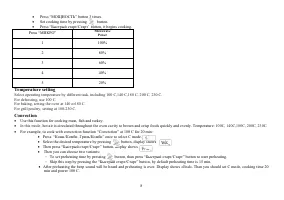


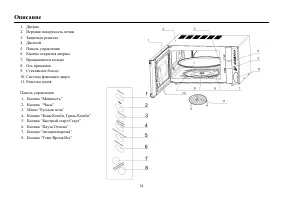
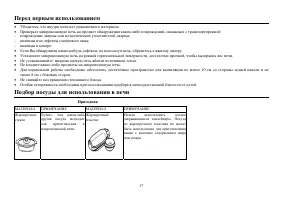

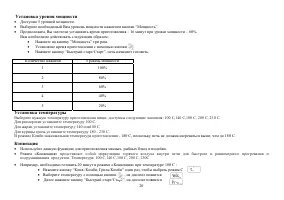

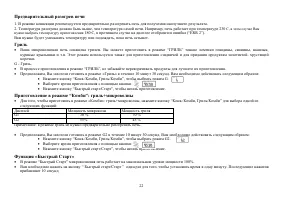
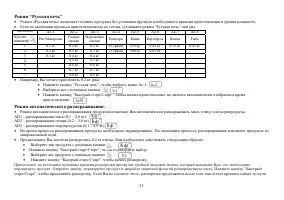

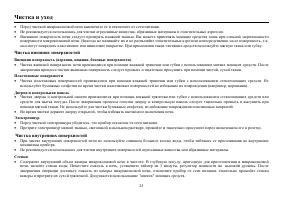
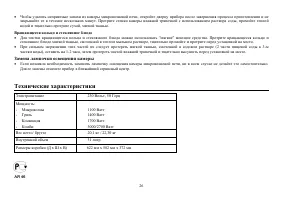
Table of Contents:
- Page 2 – Describtion
- Page 3 – Important safeguards
- Page 4 – Before you call for service
- Page 5 – Radio interference; Installation; How to choose your microwave cookware
- Page 6 – Inapplicable
- Page 7 – Advantages; Auto reminder; Operation; Adjust clock
- Page 8 – Temperature setting
- Page 9 – Preheating
- Page 11 – Automatic defrosting; Automatic start
- Page 12 – Multi-sequence cooking; Sequence 1:100Pmicrowave for 3min; Cleaning and care; Outside surfaces; Cover
- Page 13 – Interior surfaces; Oven walls; Specification
- Page 14 – Описание
- Page 17 – Пригодная
- Page 18 – Непригодная
- Page 21 – Приготовление
- Page 26 – Замена; Технические
H-MW1031
MICROWAVE OVEN
Instruction manual
МИКРОВОЛНОВАЯ
ПЕЧЬ
Руководство
по
эксплуатации
"Loading the manual" means you need to wait until the file loads and becomes available for online reading. Some manuals are very large, and the time they take to appear depends on your internet speed.
Summary
2 Describtion 1. Oven door 2. Housing 3. Wave guide cover 4. LED 5. Control panel 6. Release button 7. Rotating ring 8. Rotating axis 9. Glass turntable tray 10. Door interlock 11. Grill rack Control panel 1. “ Мощность ” button 2. “ Часы ” button 3. “ Русская печь ” button 4. “ Конв / Комби , Гриль...
3 Important safeguards WARNING: To reduce the risk of burns, electric shock, fire, injury to persons or excessive microwave energy: • Read all instructions before using microwave oven. • The microwave oven is for household use only. • Some products such as whole eggs and sealed containers (for examp...
4 - Do not cook in a container with a restricted opening, such as a soft drink bottle or salad oil bottle, as they may explode if heating in a microwave oven. - Do not use conventional meat or candy thermometers. These are thermometers available specifically for microwave cooking. These may be used....