Husqvarna ST 230P - User Manual
Husqvarna ST 230P – User Manual, read for free online in PDF format. We hope this helps you resolve any issues you may have. If you have further questions, please contact us through the contact form.


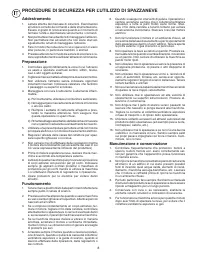

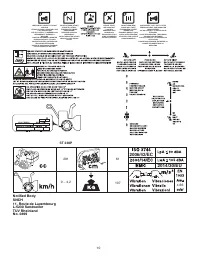
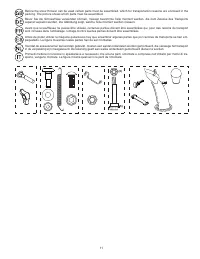
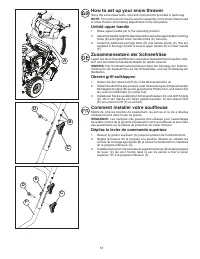


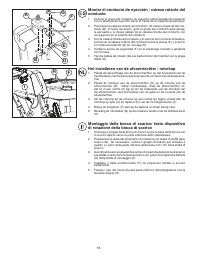
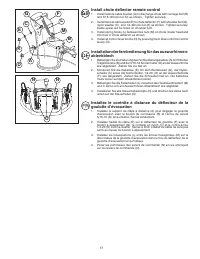
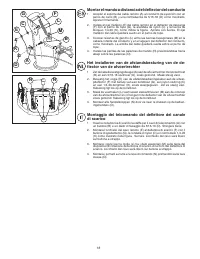

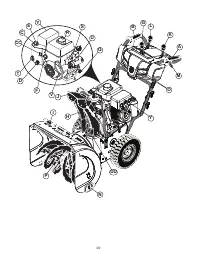

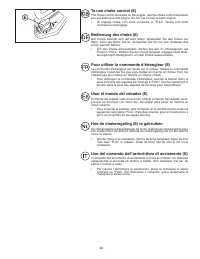
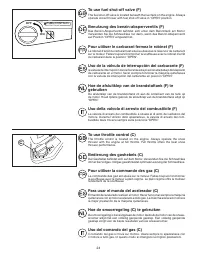
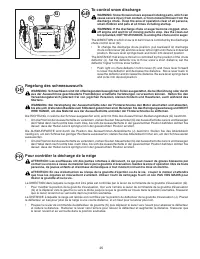
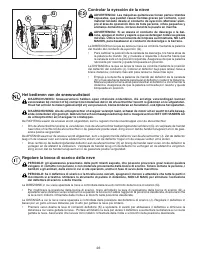
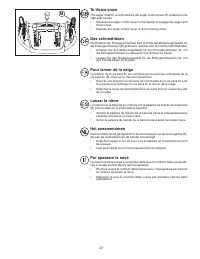
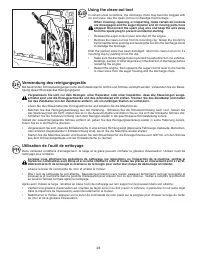

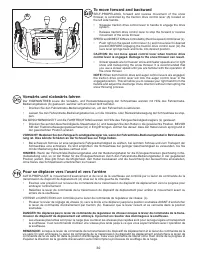
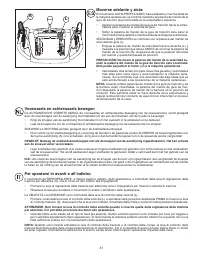
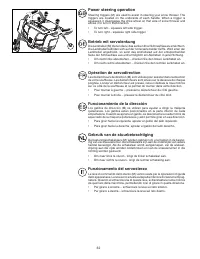
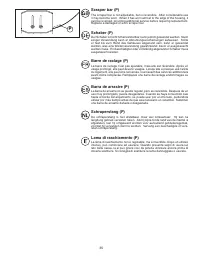
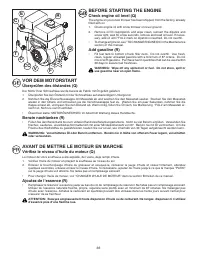
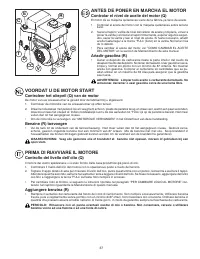


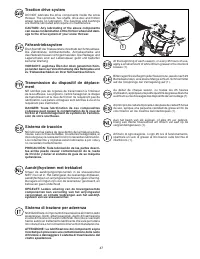
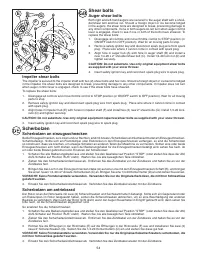
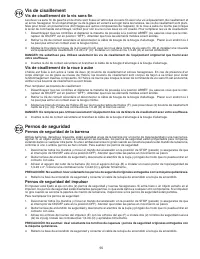
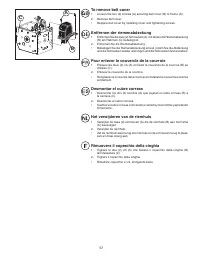


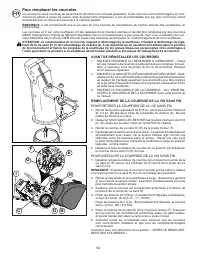


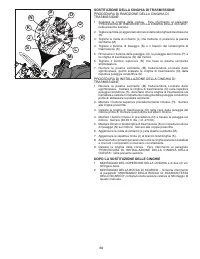

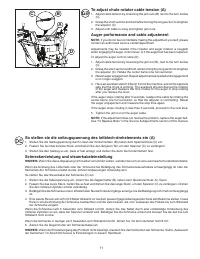
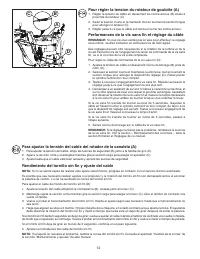
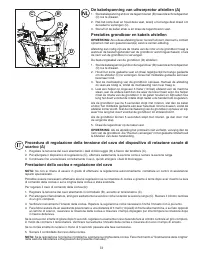


Table of Contents:
- Page 3 – SAFE OPERATION PRACTICES FOR SNOW THROWERS; Training
- Page 4 – SICHERE BEDIENUNG EINER SCHNEEFRÄSE; Vorkenntnisse
- Page 5 – Instructions
- Page 6 – TÉCNICAS DE FUNCIONAMIENTO SEGURO PARA MÁQUINAS QUITANIEVES; Formación
- Page 7 – Instructies
- Page 8 – PROCEDURE DI SICUREZZA PER L’UTILIZZO DI SPAZZANEVE; Addestramento
- Page 13 – How to set up your snow thrower; Unfold upper handle; Zusammensetzen der Schneefräse; Oberen griff aufklappen; Comment installer votre souffleuse; Dépliez le levier de commande supérieur
- Page 14 – Como preparar su máquina quitanieves; Abrir la empuñadura superior; Hoe uw sneeuwruimer te monteren; Het uitpakken van de bovenste hendel; Come preparare lo spazzaneve; Impugnatura superiore aperta
- Page 15 – Install discharge chute / chute rotator head; Installation der auswurfrinne / der drehvorrichtung; Installez la goulotte d’évacuation / tête rotative de la
- Page 16 – Het installeren van de afvoertrechter / rotorkop; Montaggio della bocca di scarico/ testa dispositivo
- Page 18 – Montar el mando a distancia del de flec tor del conducto; Het installeren van de afstandsbesturing van de de-; Montaggio del telcomando del deflettore del canale
- Page 20 – DD; CC
- Page 23 – Pour utiliser la commande d’étrangleur (E)
- Page 25 – To control snow discharge
- Page 26 – Het bedienen van de sneeuwuitstoot; Regolare la bocca di scarico della neve
- Page 28 – Using the clean-out tool; Verwendung des reinigungsgeräts
- Page 29 – Usar la herramienta para la limpieza; De ontstopper gebruiken; Utilizzo dello strumento di pulitura
- Page 30 – To move forward and backward; Vorwärts und rückwärts fahren; Pour se déplacer vers l’avant et vers l’arrière
- Page 31 – Moverse adelante y atrás; Voorwaarts en achterwaarts bewegen; Per spostarsi in avanti o all’indietro
- Page 33 – Pour ajuster les plaques de protection du carter inférieur (N)
- Page 34 – Per regoalre la piastra di slittamento (N)
- Page 36 – BEFORE STARTING THE ENGINE
- Page 37 – ANTES DE PONER EN MARCHA EL MOTOR; Controlar el nivel de aceite del motor (Q); VOORDAT U DE MOTOR START
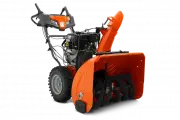
- Page 52 – Snow thrower; Schneefräse; Souffleuse
- Page 53 – Máquina quitanieves; Sneeuwruimer; Spazzaneve
- Page 54 – Impeller shear bolts; Scherbolzen; Scherbolzen an einzugsschnecken; Shear bolts; Auger shear bolts
- Page 55 – Vis de cisaillement; Vis de cisaillement de la vis sans fin; Vis de cisaillement de la roue à aube; Pernos de seguridad; Pernos de seguridad de la barrena
- Page 56 – Schuifbouten; Boorschuifbouten; Rotorschuifbouten; Perni di sicurezza; Perni di sicurezza della coclea; Perni di sicurezza del ventilatore espulsore
- Page 58 – To replace belts; BEFORE REPLACING BELTS; TO REMOVE AUGER BELT
- Page 59 – DRIVE BELT REPLACEMENT; TO REMOVE DRIVE BELT
- Page 60 – Erneuern der riemen; VOR DEM AUSTAUSCH DER RIEMEN; SO BAUEN SIE DEN AUGER-RIEMEN AUS
- Page 61 – AUSTAUSCH DES ANTRIEBSRIEMENS
- Page 62 – Pour remplacer les courroies; AVANT DE RÉINSTALLER LES COURROIES; POUR RETIRER LA COURROIE DE LA VIS SANS FIN
- Page 63 – REMPLACEMENT DE LA COURROIE D'ENTRAÎNEMENT; POUR RETIRER LA COURROIE D'ENTRAÎNEMENT
- Page 64 – Sustituir las correas; ANTES DE REEMPLAZAR LAS CORREAS; PARA EXTRAER LA CORREA DE LA BARRENA
- Page 65 – REEMPLAZO DE LA CORREA DE TRANSMISIÓN; PARA EXTRAER LA CORREA DE TRANSMISIÓN; DESPUÉS DE REEMPLAZAR LAS CORREAS
- Page 66 – Het vervangen van de riemen; VOOR HET VERVANGEN VAN RIEMEN; AVEGAARRIEM VERWIJDEREN
- Page 67 – AANDRIJFRIEM VERVANGEN; AANDRIJFRIEM VERWIJDEREN; AANDRIJFRIEM MONTEREN
- Page 68 – Sostituire le cinghie; PRIMA DI SOSTITUIRE CINGHIE; PROCEDURA DI RIMOZIONE DELLA CINGHIA DELLA COCLEA
- Page 69 – SOSTITUZIONE DELLA CINGHIA DI TRASMISSIONE; PROCEDURA DI RIMOZIONE DELLA CINGHIA DI; DOPO LA SOSTITUZIONE DELLE CINGHIE
- Page 71 – To adjust chute rotator cable tension (A); Auger performance and cable adjustment; Schneckenleistung und steuerkabeleinstellung
- Page 75 – Storage; Lagerung; Entreposage; Almacenaje
Euro
115 82 75-20 Rev. 3
ST 230P
Instruction manual
Please read these in struc tions care-
ful ly and make sure you un der stand
them before using this ma chine.
Manuel d’instructions
Merci de lire trés attentivement le
manuel d'instructions. Assurez-vous
d'avoir tout compris avant d'utiliser
ce tracteur.
Manuale di istruzioni
Prima di utilizzare la macchina
leggete queste istruzioni con at-
tenzione ed accertatevi di averle
comprese bene.
Instructieboekje
Lees deze instructies aandachtig en
zorg dat u ze begrijpt voordat u deze
ma chine gebruikt.
Manual de las instrucciones
Por favor lea cuidadosamente y
comp-renda estas intrucciones an tes
de usar esta maquina.
Bedienungsanleitung
Lesen Sie diese Anweisungen
sorgfältig durch und machen Sie sich
mit dem Inhalt vertraut, bevor Sie
diese Maschine benutzen.
"Loading the manual" means you need to wait until the file loads and becomes available for online reading. Some manuals are very large, and the time they take to appear depends on your internet speed.
Was this manual helpful?
About this manual
- Brand
- Husqvarna
- Model
- ST 230P
- Document type
- User Manual
- Language(s)
- German, English, Spanish, French, Italian, Dutch
- Pages
- 84
- File size
- 9.5 MB
- Format
Summary
3 SAFE OPERATION PRACTICES FOR SNOW THROWERS Training 1. Read the operating and service instruction manual carefully. Be thoroughly familiar with the controls and the proper use of the equipment. Know how to stop the unit and disengage the controls quickly. 2. Never allow children to operate the equ...
4 SICHERE BEDIENUNG EINER SCHNEEFRÄSE Vorkenntnisse 1. Lesen Sie die Bedienungs- und Wartungsanleitung sorgfältig. Machen Sie sich sorgfältigst mit den Steuerelementen und dem sachgemäßen Gebrauch des Gerätes vertraut. Eignen Sie sich die Fähigkeit an, das Gerät schnell stoppen und die Steuerelement...
5 MÉTHODES DE FONCTIONNEMENT DANS DES CONDITIONS DE SÉCURITÉ POUR SOUFFLEUSES Instructions 1. Lisez attentivement le manuel des notices techniques d’utilisation et de service d’instruction. Soyez parfaite- ment familier avec les commandes et l’utilisation ap- propriée de l’équipement. Apprenez à arr...
Ask a question
Related manuals
Popular Husqvarna Other
More Husqvarna Other models
 Husqvarna SRD17530 (280020) Manual
 Husqvarna ST124 User Manual
 Husqvarna ST 151 Manual
 Husqvarna ST 224 Manual
 Husqvarna ST 224P User Manual
 Husqvarna ST 227P User Manual
 Husqvarna ST261E Manual
 Husqvarna ST 268EP Manual
 Husqvarna ST 276EP Manual
 Husqvarna ST 324 User Manual
 Husqvarna ST 324P Manual
- Husqvarna ST 327 User Manual