Hoover Wind Tunnel - Manual

Hoover Wind Tunnel – Manual, read for free online in PDF format. We hope this helps you resolve any issues you may have. If you have further questions, please contact us through the contact form.


Table of Contents:
- Page 2 – STEP 1 Unpack carton; STEP II Attach handle
- Page 4 – DANGER –
- Page 5 – Edge cleaning; Tr a n s p o rting cleaner; Carpet height adjustment
- Page 6 – Select proper tool; Cleaning tools; Stair cleaning; When to empty; Maintenance
- Page 7 – How to empty
- Page 8 – How to clean; How to install
- Page 9 – What to buy; The headlight; When to replace; How to replace
- Page 10 – The agitator brush roll; The edge groomers; How to re p l a c e
- Page 11 – If you have a pro b l e m; Thermal Protector
- Page 13 – por Hoover; ¡Guarde estas instrucciones!; Lea estas; Indice; ¡Salvaguardias importantes!; INSTRUCCIONES DE; ENGLISH; ESPAÑOL; FRANÇAIS
- Page 14 – Descripción de la aspiradora; Cómo usar; PELIGRO
- Page 15 – Posiciones del mango; Limpieza de escaleras; Mantenimiento; Bolsa de filtro de; Cuándo reemplazarla
- Page 16 – La luz delantera; La correa
- Page 18 – Lubricación; Servicio
- Page 19 – de Hoover; Conseils de sécurité!; Conservez ce mode d’emploi; Index; MODE D’EMPLOI
- Page 20 – Description de l’appare i l; Utilisation; DANGER; Positions du manche; ÉTAPE I Déballage
- Page 21 – Entretien; Fréquence de empty; Pour vider le sac
- Page 22 – Éclairage
- Page 23 – En cas de pro b l è m e
- Page 24 – Graissage; Réparations
Model Number
______________________________
Serial Number
______________________________
(Located on bottom of cleaner as shown)
C o m m e rc i a l
Wi n d Tu n n e l
™
by
H o o v e r
Review these
i n s t ructions before
operating cleaner
Important Safeguards!
When using an electrical appliance, always follow basic precautions, including the following:
READ ALL INSTRUCTIONS BEFORE USING THIS APPLIANCE
Warning:
To reduce the risk of fire, electric shock, or injury:
• Do not use outdoors or on wet surfaces.
•
Connect to a properly grounded outlet only. See “Grounding Instructions”.
• Close supervision is necessary when any appliance is used by or near children. Do
not allow vacuum cleaner to be used as a toy or to run unattended at any time.
• Keep hair, loose clothing, fingers, feet and all parts of body away from openings,
rotating agitator and other moving parts. Do not operate cleaner in bare feet or
when wearing open toe shoes or sandals.
• Do not pick up anything that is burning or smoking, such as cigarettes, matches,
or hot ashes.
• Do not use to pick up flammable or combustible liquids such as gasoline or fine
wood sandings or use in areas where they may be present.
• Avoid picking up hard, sharp objects with the cleaner. They may damage the
cleaner and the bag.
• Always turn off this appliance before connecting or disconnecting hose.
• Do not use without dust bag or filters in place. Change bag frequently when
picking up very fine materials such as powder.
• Use extra care when cleaning on stairs.
• Do not put any object into openings. Do not use with any opening blocked; keep
free of dust, lint, hair, or anything that may reduce air flow.
• Do not pull or carry by cord, use cord as a handle, close door on cord or pull
cord around sharp edges or corners. Do not run appliance over cord. Keep cord
away from heated surfaces.
• Always disconnect cord from electrical outlet before servicing the cleaner.
• Unplug cleaner when not in use. Turn off all controls before unplugging.
• Do not unplug by pulling on cord. To unplug, grasp the plug, not
the
cord. Never handle plug or appliance with wet hands.
• The use of an extension cord is not recommended.
• Do not use with damaged cord or plug. If appliance is not working as it should,
has been dropped, damaged, left outdoors, or dropped into water, take it to a
Hoover Factory Service Center or Authorized Hoover Warranty Service Dealer
( D e p o t ) .
• Use vacuum cleaner only for its intended use as described in the instructions.
Use only attachments recommended by The Hoover Company; others may cause
h a z a r d s .
Save these instructions!
Index
Assembling Cleaner ..........................2-3
Cleaner Descriptions............................4
How To Use
Cleaning Tools ..................................6
Upright Cleaner ..............................5-6
If You Have a Problem ........................11
Important Safeguards ..........................1
Lubrication ..........................................12
Maintenance
Authorized Service..........................12
Cleaning Filters..................................8
Clearing Blockages ........................11
Emptying Cloth Bag ......................6-7
Replacing Agitator ..........................10
Replacing Belt ..............................9-10
Replacing Edge Groomers ............10
Replacing Headlight..........................9
Replacing Paper Bag ........................8
Thermal Protector ..............................11
Unpacking Cleaner................................4
Warranty ..............................................12
© 1997 The Hoover Company
OPERATING INSTRUCTIONS
ENGLISH
➜
pp. 1-12
ESPAÑOL
➜
pp. 13-18
FRANÇAIS
➜
pp. 19-24
"Loading the manual" means you need to wait until the file loads and becomes available for online reading. Some manuals are very large, and the time they take to appear depends on your internet speed.
Was this manual helpful?
About this manual
- Brand
- Hoover
- Model
- Wind Tunnel
- Document type
- Manual
- Language(s)
- English
- Pages
- 24
- Format
Other Manuals for Hoover Wind Tunnel
Summary
Push bolts into holes on backof handle. 4 Slide handle onto cleaner body. Remove bag door on cleanerbody by pushing down at top of door and pulling door outward. Switch (A) above bag door shouldbe in OFF position. 2 STEP 1 Unpack carton Remove all parts from cartonand identify each item shown. Make ...
should be used only until a pro p e r l yg rounded outlet (B) can be installed by aqualified electrician. The green colore drigid ear, lug, or the like (F) extending fro mthe adapter must be connected to a per-manent ground (G) such as a pro p e r l yg rounded outlet box cover. Whenever theadapter i...
For maximum cleaning perfor-mance, the following carpet height settings are re c o m m e n d e d . • Lowest setting: for all types of carpet • Higher settings: for very deep pile carpet where easier pushing effort is desired, while maintaining goodcleaning performance. Edge cleaning Special edge gro...
Ask a question
Related manuals
Popular Hoover Other
More Hoover Other models
 Hoover washing machine Manual
 Hoover WDYN D Manual
 Hoover WDYN D8P Manual
 Hoover Wh20420pc User Manual
 Hoover Wh20440pc User Manual
 Hoover Widepath Manual
 Hoover WindTunnel Manual
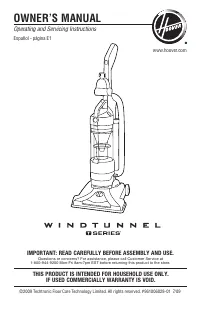 Hoover Windtunnel UH70120 User Manual
 Hoover Wind Tunnel vacuum cleaner Manual
 Hoover WindTunnel vacuum cleaner Manual
 Hoover 2 Manual
 Hoover 120 V 60 HZ Manual