Page 2 - ENGLISH; Review this manual before; Important Safeguards!; READ ALL INSTRUCTIONS BEFORE USING THIS APPLIANCE; Save these instructions!; Index
Fill in and retain The model and serial number are located on the back of the handle as shown. For your personal records, please enter the COMPLETE model and serial numberin the spaces provided and retain this information. Your cleaner is model___________________________________ and has serial numbe...
Page 3 - Assembling cleaner; Carton contents; Continued; Accessories
3 1. Assembling cleaner Carton contents Remove all parts from carton andidentify each item shown. Makesure all parts are located beforedisposing of packing.A. Handle sectionB. Cleaner bodyC. Handle screw packet (in bag with owner’s manual) Note: The white switch lock above the ON/OFF switch aids in ...
Page 4 - NOTE: Hose must be co; Polarized plug; Cleaner description; Transporting cleaner
16. Nozzle control knob: slide knob to correct setting for height of car- pet being cleaned. 17. Brush roll control18. Furniture guard19. Headlight20. Edge groomers21. Hose22. Hose rack23. ‘Dirt FINDER’ display * 24. Embedded ‘Dirt FINDER’ sensitivity switch * 25. Cord hooks: wrap cord around hooks ...
Page 5 - Brush roll control; Handle positions
FLOOR CARPET HARD 2-9 Brush roll control Note: When handle is in uprightposition, brush roll is automaticallyOFF. Move the brush roll control only whenthe handle is in the upright position. Slide control to “Carpet” to turn brushroll ON for cleaning carpet or rugs. Slide control to “Hard” to turn br...
Page 6 - AUTOMATIC; ON
6 Cleaning lightweightflexible rugs Stand on one end of rug and movecleaner toward other end or edge.Before reaching edge, push down onhandle. This will lift up the nozzle (frontof cleaner) as shown and will prevent rugfrom clinging to cleaner. Continue to lift up nozzle so that whenyou have reached...
Page 8 - Filter assembly; How to clean filter
8 3-4 3-5 3-7 3-6 Press down on area indicated (H) toopen dirt cup lid. Empty cup. Note: It is not necessary to remove the HEPA cartridge filter to empty the dirtcup. Filter assembly The HEPA cartridge filter and pre-filterare essentially self-shedding. Turning the knob on the lid as describedin “Ho...
Page 9 - Headlight replacement; What to buy; Final filter; Replacing final filter; Removing lens; Installing bulb; Replacing lens
9 3-14 3-15 3-16 Headlight replacement What to buy This cleaner uses a 12 volt, wedge basetype 912 bulb, Hoover part No. 27313101. Reattaching filter door The filter door is designed with a“break-away” feature which allows it tosnap free if it is pushed open too far. To reattach, align hinges (O) of...
Page 10 - Positioning front of belt; Positioning back of belt; The agitator brush roll; Belt replacement; When to replace; Removing bottom plate
D C A B C Positioning front of belt Place other end of belt over large pulley(C) while rolling the pulley in directionshown. Extra effort may be required to stretch belt onto pulley. Positioning back of belt With lettering on outside of belt, slidenew belt over motor shaft (D). 10 3-20 Replacing bot...
Page 11 - Replacing brush roll; Removing brush roll; Installing brush roll; Powered hand tool; Agitator brush roll; How to replace
11 Inspecting V-belt The V-belt is designed to last for a longtime and is not normally replaced.However, if V-belt is cracked, gouged orbroken, now is a good time to replace itas follows.Slide flat belt off large pulley as shownin Fig. 3-19.To remove V-belt, slide back of belt over pulley (C). Then ...
Page 12 - Replacing belt
Replacing belt When replacing belt, ask for HOOVER part No. 38528037. 1. Remove bottom plate, belt guard andbrush roll as described in Figs. 3-28through 3-30. 3-36 3-35 F E 2. Grasp turbine (E) and pull firmly toremove. 3. Remove belt from turbine pulley (F).Replace with new belt. 4. With flat sides...
Page 13 - Installing groomers; Lubrication; Service
3-37 13 Edge groomer replacement When to replace The edge groomers, located on bothsides of the nozzle, should be replacedwhen they are worn. What to buy When purchasing edge groomers, askfor HOOVER part No. 39511004. How to replace Disconnect cleaner from electrical outlet. Remove bottom plate as d...
Page 14 - Clearing blockages; Disconnect cleaner from electrical
B. If a blockage occurs duringtool use: Turn cleaner OFF and disconnect fromelectrical outlet.1. Look into hose end and remove anyblockage. Note: Electrical parts are enclosed in the cleaner. Do not remove any screws.If blockage cannot be removed throughexisting openings, take the cleaner to aHoover...
Page 17 - Índice; Rellene y guarde; ¡Salvaguardias importantes!; ¡Guarde estas instrucciones!
Manual delpropietario ESPAÑOL ➜ pp 17-26 HOOVER AspiradoraautopropulsadaWindTunnel™ sinbolsa con accesorio demano turboaccionadode HOOVER Este producto ha sido diseñado para ensamblarse con facilidad (Véase la página 18) Lea este manual antes de hacer funcionar la aspiradora. Índice Ensamblado de la...
Page 18 - Contenido de la caja; Accesorios; *En algunos modelos solamente; Enchufe polarizado
18 Use estas instrucciones en españoljunto con las figuras provistas en elmanual de inglés. 1. Ensambladode la aspiradora Esta aspiradora ha sido inspeccionada yempacada con cuidado antes de serenviada de la fábrica. Si necesita ayudadurante el ensamblado o la operación,llame al 1-800-944-9200 para ...
Page 19 - Posiciones del mango
19 2-6 Posiciones del mango El mango de su aspiradora tiene tresposiciones: vertical para almacenamiento y para usar losaccesorios de limpieza; de funcionamiento para uso general sobre alfombras y pisos; y baja para aspirar debajo de muebles de poca altura. Pise la palanca para destrabar el mangopar...
Page 20 - Depósito para el polvo
20 de mano en agua. Los accesorios delimpieza se pueden lavar en agua tibiacon un detergente. Enjuáguelos y dejeque se sequen al aire antes de usarlos. Manguera de alcancesuplementario (Se puede obtener a un cost adicional si no se incluye con su modelo) 2-18 Le proporciona un alcance de 20 pies.Fac...
Page 21 - Conjunto del filtro; Cuándo vaciar; Cómo vaciar; Filtro final; Limpieza del filtro final
21 3-6 La tapa del depósito para el polvo hasido diseñada con una característica de“separación” que permite que sedesprenda si se presiona demasiado. Para volver a colocarla, alinee lasbisagras de la tapa con las ranuras dela parte del mango del depósito para elpolvo. Oprima la tapa para trabarla en...
Page 22 - Para sacar la lente; Reemplazo de la lente; Cuándo reemplazarla; Cuándo reemplazarlo; Qué comprar
22 3-14 Colocación de la puerta del filtro La puerta del filtro ha sido diseñada conuna característica de “separación” quepermite que se desprenda si sepresiona demasiado. Para volver a colocarla, alinee lasbisagras (O) de la cubierta con lasranuras a los lados de la zona del filtro. Presione la pue...
Page 24 - Cuándo reemplazarlos; Cómo reemplazarlos; Lubricación; Protector térmico; Servicio
Reemplazo de los limpiadores de bordes Cuándo reemplazarlos Los limpiadores de bordes, situados aambos lados de la boquilla, se deberánreemplazar cuando estén desgastados. Qué comprar Al comprar limpiadores de bordes, pidala pieza número 39511004 de HOOVER. Cómo reemplazarlos Desenchufe la aspirador...
Page 27 - FRANÇAIS; Remplir et conserver; Consignes de sécurité importantes !; Rangez et conservez ces instructions !
Guide del’utilisateur FRANÇAIS ➜ pp 27-36 HOOVER Aspirateurautopropulsé sanssac WindTunnel MC avec accessoireportatif à turbine deHOOVER Ce produit a été conçu pour un assemblage facile (voir page 28) Lire attentivement ces instructions avant d’utiliser l’appareil Index Assemblage de l’aspirateur .....
Page 28 - Contenu de l’emballage; Accessoires; * certains modèles seulement; Fiche polarisée
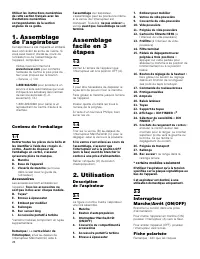
28 Utiliser les instructions numérotéesde cette section français avec lesillustrations numérotéescorrespondantes de la sectionanglaise de ce guide. 1. Assemblagede l’aspirateur Cet aspirateur a été inspecté et emballéavec soin avant sa sortie de l’usine. Sivous avez besoin d’aide au cours del’utilis...
Page 29 - intégrée
29 normale sur les planchers et tapis; etposition basse pour nettoyer sous les meubles. Appuyer avec le pied sur le levier dedégagement du manche pour abaissercelui-ci. 2-7 Réglage selon lahauteur du tapis Lorsqu’il est nécessaire de monter oud’abaisser l’avant de l’appareil enfonction des différent...
Page 31 - Ensemble du filtre; Filtre terminal
31 de façon exagérée. Pour le replacer, il suffit d’aligner sescharnières avec les rainures situéesprès de la poignée du vide-poussière.Appuyer sur le couvercle pour leverrouiller en place. Ensemble du filtre La cartouche filtrante HEPA et le préfiltresont pratiquement autonettoyants. Tapoter le côt...
Page 32 - Pose de l’ampoule
32 Remettre la porte en place. Vérifications desrainures du rouleau-brosse Étant donné la grande efficacité de votreaspirateur, nous vous recommandonsfortement de vérifier à chaque vérification des filtres l’accumulation de débris dans les rainures à côté durouleau-brosse. Enlever ces débris pourvou...
Page 33 - Comment le remplacer ?; Quand les remplacer ?; Comment les remplacer ?
lorsque les brosses sont usées.Demander la pièce n o 48414088 de HOOVER. 3-28 Comment le remplacer ? 1. Retirer l’accessoire du tuyau puisretourner l’aspirateur. Enfoncer lesloquets de chaque côté de l’accessoirepuis retirer la plaque inférieure (A). 3-29 2. Retirer les deux vis Phillips puisenlever...
Page 34 - Lubrification; Protecteur thermique
position, tel qu’illustré. Replacer la plaque inférieure et fixer àl’aide de quatre (4) vis Phillips. Lubrification Le moteur est pourvu de deux palierssuffisamment lubrifiés pour toute ladurée de vie du moteur. Toutelubrification supplémentaire pourraitcauser des dommages. Ne pas ajouter de lubrifi...