Honeywell HYF500 - User Manual
Honeywell HYF500 – User Manual, read for free online in PDF format. We hope this helps you resolve any issues you may have. If you have further questions, please contact us through the contact form.


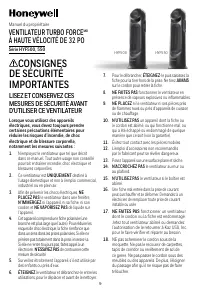
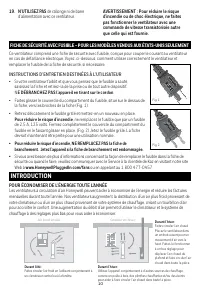
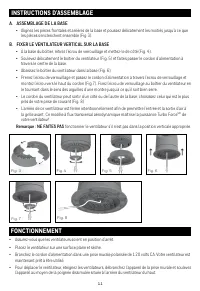
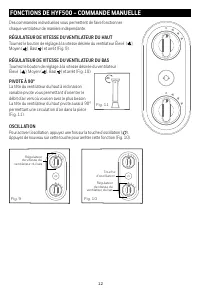
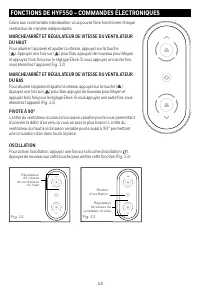

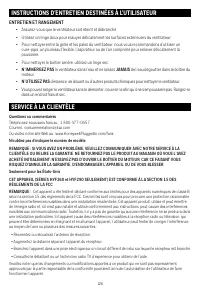


Table of Contents:
- Page 2 – USER SERVICING INSTRUCTIONS; DO NOT; To Reduce the; To Reduce the Risk of Fire, DO NOT replace attached plug.; FOR ENERGY SAVINGS ALL YEAR
- Page 3 – B. SECURING THE TOWER FAN TO THE BASE; operate the tower fan unless it is in its proper, upright position.; ASSEMBLY INSTRUCTIONS
- Page 4 – Individual controls allow you to operate each fan independently.; TOP FAN SPEED CONTROL; The adjustable pivot of the top fan head allows; OSCILLATION; To activate the oscillation feature, press the; HYF500 FEATURES - MANUAL CONTROL
- Page 5 – HYF550 FEATURES - ELECTRONIC CONTROLS; ON/OFF AND TOP FAN SPEED CONTROL; room air circulation.
- Page 6 – HYF550 REMOTE CONTROL OPERATION; ON/OFF AND SPEED CONTROL; fan button; oscillation button; Remote Control Storage
- Page 7 – CLEANING AND STORAGE; immerse the fan in water and; NEVER; allow water to drip into the motor housing.; use gasoline, paint thinner, or other chemicals to clean the fan.; CUSTOMER SERVICE; Questions or comments; the receiver is connected.
- Page 8 – YEAR LIMITED WARRANTY; Please go to; Operation is subject to the following 2 conditions:
- Page 9 – LISEZ ET CONSERVEZ CES; VENTILATEUR TURBO FORCE; À HAUTE VÉLOCITÉ DE 32 PO
- Page 10 – INSTRUCTIONS D’ENTRETIEN DESTINÉES À L’UTILISATEUR; E DÉBRANCHEZ PAS l’appareil en tirant sur le cordon; , ne remplacez le fusible que par un fusible; • Pour réduire le risque d’incendie, NE REMPLACEZ PAS la fiche de; Web à; INTRODUCTION; chauffage à des réglages plus bas pour vous aider à économiser.; de rallonge ni de barre
- Page 11 – travers le centre de la base.; de; Remarque : NE FAITES PAS; maintenant prêt à être utilisé.; INSTRUCTIONS D’ASSEMBLAGE
- Page 12 – FONCTIONS DE HYF500 – COMMANDE MANUELLE
- Page 13 – MARCHE/ARRÊT ET RÉGULATEUR DE VITESSE DU VENTILATEUR; Appuyez une fois sur ( ) pour Bas, appuyez de nouveau pour Moyen et; FONCTIONS DE HYF550 – COMMANDES ÉLECTRONIQUES
- Page 14 – FONCTIONNEMENT DE LA TÉLÉCOMMANDE DE HYF550; MARCHE/ARRÊT ET RÉGULATEUR DE VITESSE; Pour allumer l’appareil et ajuster la vitesse, appuyez sur la; touche; Arrêt. Chaque ventilateur fonctionnant de manière indépendante,; Pour activer l’oscillation, appuyez une fois sur la; touche d’oscillation; Rangement de la télécommande; Lorsque vous ne vous servez pas de la télécommande, vous pouvez la
- Page 15 – ENTRETIEN ET RANGEMENT; N’IMMERGEZ PAS; le ventilateur dans l’eau et ne laissez; JAMAIS; de l’eau dégoutter dans le boîtier du; N’UTILISEZ PAS; dans un endroit frais et sec.; SERVICE À LA CLIENTÈLE; au moyen de l’une ou plusieurs des mesures suivantes :; Questions ou commentaires
- Page 16 – Seulement pour le
- Page 17 – LEA Y GUARDE ESTAS INSTRUCCIONES; VENTILADOR DE TORRE TUBO FORCE® CIRCULADOR
- Page 18 – ENCHUFE CON FUSIBLE DE SEGURIDAD - SÓLO PARA MODELOS DE EE.UU; INSTRUCCIONES DE MANTENIMIENTO PARA EL USUARIO; Para Reducir el Riesgo de Incendio, r; Deseche el producto si el enchufe proporcionado está dañado.; INTRODUCCIÓN; PARA AHORRAR ENERGÍA TODO EL AÑO
- Page 19 – A. MONTAJE DE LA BASE
- Page 20 – El pivote ajustable de la cabeza del ventilador; OSCILACIÓN; Para activar la característica de oscilación,; CARACTERÍSTICAS DEL HYF500 - CONTROL MANUAL
- Page 21 – CARACTERÍSTICAS DEL HYF550 – CONTROLES ELECTRÓNICOS
- Page 22 – botón de Oscilación; Almacenaje del Control Remoto; OPERACIÓN DEL CONTROL REMOTO DEL HYF550
- Page 23 – LIMPIEZA Y ALMACENAJE; sumerja el ventilador en agua y; NUNCA; permita que gotee agua dentro de la cubierta del motor.; NO; el ventilador en un lugar fresco y seco.; no deseado del dispositivo.; Preguntas o comentarios
- Page 24 – AÑO DE GARANTIA LIMITADA; y registre su producto bajo Centro de Atención al
1
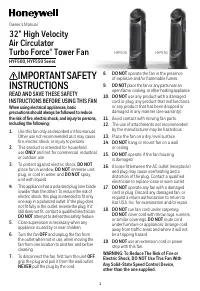
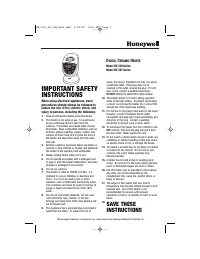
IMPORTANT SAFETY
INSTRUCTIONS
READ AND SAVE THESE SAFETY
INSTRUCTIONS BEFORE USING THIS FAN
When using electrical appliances, basic
precautions should always be followed to reduce
the risk of fire, electric shock, and injury to persons,
including the following:
1.
Use this fan only as described in this manual.
Other use not recommended as it may cause
fire, electric shock, or injury to persons.
2.
This product is intended for household
use
ONLY
and not for commercial, industrial
or outdoor use.
3.
To protect against electric shock,
DO NOT
place fan in window,
DO NOT
immerse unit,
plug, or cord in water, and
DO NOT
spray
unit with liquids.
4.
This appliance has a polarized plug (one blade
is wider than the other). To reduce the risk of
electric shock, this plug is intended to fit only
one way in a polarized outlet. If the plug does
not fit fully in the outlet, reverse the plug. If it
still does not fit, contact a qualified electrician.
DO NOT
attempt to defeat this safety feature.
5.
Close supervision is necessary when any
appliance is used by or near children.
6.
Turn the fan
OFF
and unplug the fan from
the outlet when not in use, when moving the
fan from one location to another, and before
cleaning.
7.
To disconnect the fan, first turn the unit
OFF
,
grip the plug and pull it from the wall outlet.
NEVER
pull the plug by the cord.
8.
DO NOT
operate the fan in the presence
of explosive and/or flammable fumes.
9.
DO NOT
place the fan or any parts near an
open flame, cooking, or other heating appliance.
10.
DO NOT
use any product with a damaged
cord or plug, any product that malfunctions,
or any product that has been dropped or
damaged in any manner (see warranty).
11.
Avoid contact with moving fan parts.
12.
The use of attachments not recommended
by the manufacturer may be hazardous.
13.
Place the fan on a dry, level surface.
14.
DO NOT
hang or mount fan on a wall
or ceiling.
15.
DO NOT
operate if the fan housing
is damaged.
16.
A loose fit between the AC outlet (receptacle)
and plug may cause overheating and a
distortion of the plug. Contact a qualified
electrician to replace loose or worn outlet.
17.
DO NOT
operate any fan with a damaged
cord or plug. Discard any damaged fan, or
request a return authorization to return to
Kaz USA, Inc. for examination and/or repair.
18.
DO NOT
run fan cord under carpeting.
DO NOT
cover cord with throw rugs, runners,
or similar coverings.
DO NOT
route cord
under furniture or appliances. Arrange cord
away from traffic areas and where it will not
be a tripping hazard.
19.
DO NOT
use an extension cord or power
strip with this fan.
WARNING: To Reduce The Risk of Fire or
Electric Shock, DO NOT Use This Fan With
Any Solid-State Speed Control Device,
other than the one supplied.
32" High Velocity
Air Circulator
Turbo Force
®
Tower Fan
HYF500, HYF550 Series
Owner’s Manual
HYF500
HYF550
"Loading the manual" means you need to wait until the file loads and becomes available for online reading. Some manuals are very large, and the time they take to appear depends on your internet speed.
Was this manual helpful?
About this manual
- Brand
- Honeywell
- Model
- HYF500
- Document type
- User Manual
- Language(s)
- English, Spanish, French
- Pages
- 25
- File size
- 4.2 MB
- Format
Other Manuals for Honeywell HYF500
Summary
2 This fan features a fused safety plug which is designed to cut off electric current to the fan if an electrical fault occurs. Please see below for more information on how to properly use your fan and replace the safety plug fuse, if needed. FUSED SAFETY PLUG - FOR US MODELS ONLY INTRODUCTION USER ...
3 A. BASE ASSEMBLY • Align the front and back base pieces and gently push the halves until the pieces snap securely together. (Fig 3). B. SECURING THE TOWER FAN TO THE BASE • At the base of the housing, remove the locking nut and set aside (Fig. 4)• Carefully lift the fan housing (Fig. 5) and place ...
4 Individual controls allow you to operate each fan independently. TOP FAN SPEED CONTROL Turn the control knob to the desired fan speed High ( ), Medium ( ), Low ( ) and off (Fig. 9). BOTTOM FAN SPEED CONTROL Turn the control knob to the desired fan speed: High ( ), Medium ( ), Low ( ) and off (Fig....
Ask a question
Related manuals
Popular Honeywell Other
More Honeywell Other models
 Honeywell HW1000i User Manual
 Honeywell HW3000 User Manual
 Honeywell HWM-330 Manual
 Honeywell HWM-705B Manual
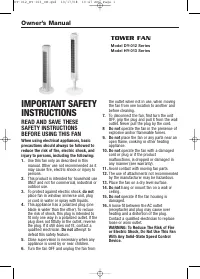 Honeywell HY013 User Manual
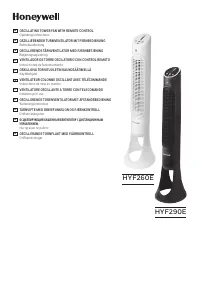 Honeywell HYF260 User Manual
 Honeywell HZ-315 Manual
- Honeywell HZ-315C Manual
- Honeywell HZ-316 Manual
 Honeywell HZ-341 User Manual
 Honeywell HZ-510 Manual
 Honeywell HZ-615 Manual