Page 2 - English; QUICK SETUP GUIDE; Before using the TV, please read this guide thoroughly
English 1280750 ES-A22072L-1 A QUICK SETUP GUIDE Before using the TV, please read this guide thoroughly and retain it for future reference. For more detailed instructions, please see the User Manual or the E-Manual. 50A6HAU 58A6HAU
Page 3 - Declaration
Page 4 - Important Safety Precautions; Disposal of Used Electrical & Electronic Equipment; ATTENTION; equipment waste. By ensuring the correct disposal of this product,
B Important Safety Precautions This symbol alerts user about the presence of a dangerous voltage not isolated inside the product which can be sufficiently powerful to constitute a risk of electrocution.This symbol alerts user about the p r e s e n c e o f i m p o r t a n t o p e r a t i n g instruct...
Page 5 - Warning; as above should be applied.
C Important Safety Precautions Warning A television set may fall, causing serious personal injury or death. Many injuries, particularly to children, can be avoided by taking simple precautions such as: ALWAYS use cabinets or stands or mounting methods recommended by the manufacturer of the televisio...
Page 6 - Safeguards; supplied with this product, you can buy it at the local market.
D Important Safety Precautions Safeguards Please read the following safeguards for your TV and retain for future reference. Always follow all warnings and instructions marked on the television. 1. A note about safety and operating instructions Read and follow all safety and operating instructions, a...
Page 7 - under the following conditions:
E Important Safety Precautions 9. Power-Cord Protection Power- supply cords should be routed so that they are not likely to be walked on or pinched by items placed upon or against them, paying particular attention to cords at plug, wall outlets, and the point where they exit from the TV. MAIN plug o...
Page 8 - (e) If the TV has been dropped or the cabinet has been damaged.
F Important Safety Precautions (c) If the TV has been exposed to rain or water. (d) If the TV does not operate normally by following the operating instructions. Adjust only those controls that are covered by the operating instructions as an improper adjustment of other controls may result in damage ...
Page 9 - Contents; The following accessories are included with TV:; Actual product may vary in appearance.
1 Contents Contents Figures and illustrations in this manual are provided for reference only and may differ from actual product appearance. Parts of the software function changes with the system upgrade. Accessories List...................................................................................
Page 10 - Installing the Stand; Installing the Stand or Wall Mount Bracket; TV or scratching to the screen.; CAUTION; Base Stand
2 Follow the illustrations and textual instructions below to complete the installation steps: Installing the Stand Installing the Stand or Wall Mount Bracket 1. Carefully place your TV facedown on a soft, flat surface to prevent damage to the TV or scratching to the screen. 2. Take out the 2 stands ...
Page 11 - Installing the Wall Mount Bracket
3 Installing the Stand or Wall Mount Bracket Installing the Wall Mount Bracket Wall mount hole pattern (mm) 200 × 300 Wall mount screw size M6 Wall Mount Bracket Wall Mount Screw Wall Mount Spacer Rear cover of the TV 8.0-10.0 mm CAUTION When mounting the TV on a wall, follow instructions provided w...
Page 12 - TV Front; NOTES; Item; Remote sensor
4 TV Front TV Front NOTES The Picture is Only for Reference. Powering on the TV requires several seconds to load programs. Do not rapidly turn the TV off as it may cause the TV work abnormally. Item Description Remote sensor Receive remote signals from the remote control. Do not put anything near th...
Page 13 - C h e c k t h e j a c k s f o r p o s i t i o n a n d t y p e b e f o r e m a k i n g a n y; TV Rear; AC INPUT
5 TV Rear NOTES C h e c k t h e j a c k s f o r p o s i t i o n a n d t y p e b e f o r e m a k i n g a n y connections. Loose connections can result in image or color problems. Make sure that all connections are tight and secure.The TV may not be compatible with all external devices. To check compa...
Page 14 - Making Connections; ANT; Connect an outdoor VHF/UHF antenna or cable.; Please consult your device user manual for instruction.; INPUT; buttons to select the source; HDMI
6 Making Connections ANT Connect an outdoor VHF/UHF antenna or cable. TV JACK Outdoor Antenna Antenna Cable (75Ω) or ANT OUT Cable VHF/UHF Antenna ANT (not included) HDMI / AV Connect a HDMI / AV cable from an external AV equipment. No sound connection is needed for HDMI to HDMI connection. If the s...
Page 15 - DIGITAL AUDIO OUT; HEADPHONE
7 Making Connections DIGITAL AUDIO OUT Connect to an external digital audio system. Before connecting a digital audio system to the DIGITAL AUDIO OUT jack, you should decrease the volume of both the TV and the system to avoid that the volume suddenly becomes bigger. TV JACK DIGITAL AUDIO cable (not ...
Page 16 - and USB2.0 devices such as hard drives, USB sticks and
8 Making Connections LAN (Wired setup) Connect your TV to your network by connecting the LAN port on the back of your TV to an external modem or router using a LAN (Ethernet/Cat 5) cable. See the illustration below. · We recommend you to use a modem or router that supports Dynamic Host Configuration...
Page 17 - Wireless setup; See the illustration below.
9 Making Connections Wireless setup Connect your TV to your wireless network, you need a wireless router or modem. See the illustration below. · The TV’s built-in Wireless LAN Adapter supports the IEEE 802.11 a/b/g/n/ac communication protocols. Wireless router with DHCP LAN Cable Wireless LAN Adapte...
Page 18 - Remote Control; NOTE; Turn on/off the teletext; Display the Electronic
10 Remote Control NOTE The included remote control will vary depending on model, country/region. Check information according to the actual remote control in the accessory bag. Power on/ Standby Display subtitles in the Live TV Turn on/off the teletext function Select input sources Select a channel o...
Page 20 - Installing Batteries in the Remote Control; Pairing the Remote Control (only for Bluetooth remote control)
12 Remote Control Installing Batteries in the Remote Control NOTES Product image is only for reference, actual product may vary in appearance.Dispose of your batteries in a designated disposal area. Do not throw the batteries into fire.Do not mix battery types or combine used batteries with new ones...
Page 21 - Remote Control Operation Range; Disposal of this unit
13 Remote Control Operation Range Disposal of this unit Product should not be damaged, dismantled or thrown in municipal waste. It should be packed and handed over to authorised re-cycler. 1. The remote control can work at a distance of up to 8 meters in front of the TV set. 2. The remote control an...
Page 22 - Turning the TV on for the First Time
14 Turning the TV on for the First Time Turning the TV on for the First Time 1. Connect the mains cable to the mains socket after you have completed all the connections. 2. The first time you turn the TV on, it will go straight into the Installation Guide.3. Press the [ / / < / > ] buttons to ...
Page 23 - Specifications; troubleshooting tips in the User Manual or the E-Manual.; Please refer to the rating label.
15 Specifications Features, appearance and specifications are subject to change without notice.If you encountered difficulty when setting up your TV, we suggest you refer to the troubleshooting tips in the User Manual or the E-Manual. Item 50" 58" Dimension (mm) Without Stand (W × H × D) 111...
Page 24 - Other Information; What is Freeview Plus?; Freeview Plus service only available in Australia territories.
16 Other Information The terms HDMI and HDMI High-Definition Multimedia Interface, and the HDMI Logo are trademarks or registered trademarks of HDMI Licensing Administrator, Inc. in the United States and other countries. Dolby, Dolby Vision, Dolby Audio, and the double-D symbol are trademarks of Dol...


 Hisense 43E79HQ User Manual
 Hisense 43H5500G User Manual
 Hisense 43N3000UW User Manual
 Hisense 43R6G User Manual
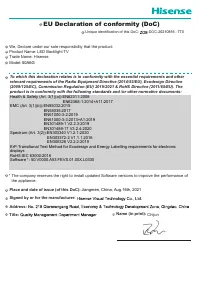 Hisense 50A6G Installation Manual
 Hisense 50A6GV User Manual
 Hisense 50A7N Manual
 Hisense 50H8G User Manual
 Hisense 50R6G Manual
 Hisense 50U6G User Manual
 Hisense 50U6H User Manual