Page 2 - We thank you
2 413758 We thank you for the confidence you have shown by purchasing our appliance. We wish you find a lot of pleasure in its use. The appliance is intended solely for household use. Refrigerator freezer (hereinafter: the appliance) consists of two parts: the upper part is the refrigerator and the ...
Page 3 - TABLE OF CONTENTS
3 TABLE OF CONTENTS 413758 INTRODUCTION APPLIANCE DESCRIPTION DEFROSTING AND CLEANING THE APPLIANCE 4 IMPORTANT NOTES AND WARNINGS 8 ADVICE FOR SAVING POWER WITH REFRIGERATION APPLIANCES 9 APPLIANCE DESCRIPTION 10 INSTALLATION AND CONNECTION 12 CHANGING THE DIRECTION OF DOOR OPENING 16 OPERATING THE...
Page 6 - WARNING! Do not damage the refrigerant circuit.
6 413758 To protect the environment, take the obsolete appliance to an authorized home appliance collection center. Packaging is made of environmentally friendly materials that can be recycled, disposed of, or destroyed without any hazard to the environment. Rating plate can be found in the applianc...
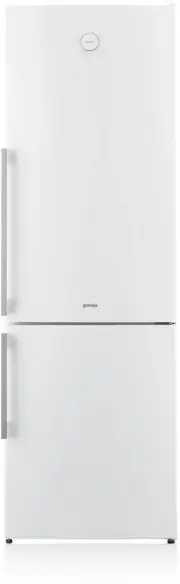
Page 9 - APPLIANCE DESCRIPTION
9 APPLIANCE DESCRIPTION 413758 • The drawers are protected against pulling out. To remove a drawer from the appliance, pull it out as far as it will go, then lift at the front and pull out completely. • Some models also feature a control unit on the door. A B 1 2 3 4 5 6 7 8 A Refrigerator 1 Control...
Page 10 - INSTALLATION AND CONNECTION; SELECTING THE ROOM; INSTALLING THE APPLIANCE
10 INSTALLATION AND CONNECTION 413758 SELECTING THE ROOM • Install the appliance in a dry and well ventilated room. The appliance will operate correctly if the environment temperature is in the interval specifi ed in the table. The appliance class is indicated on the rating plate / label with the bas...
Page 11 - CONNECTING THE APPLIANCE
11 413758 CONNECTING THE APPLIANCE • Connect the appliance to the power mains using a connection cable. The wall outlet should be fi tted with a ground contact (safety socket). Nominal voltage and frequency are indicated on the rating plate/label with basic information on the appliance. • The applian...
Page 12 - VERSION I – CONTROLS IN THE APPLIANCE INTERIOR
12 CHANGING THE DIRECTION OF DOOR OPENING 413758 VERSION I – CONTROLS IN THE APPLIANCE INTERIOR Tools required: socket wrench No. 8, Phillips screwdriver, torx 25, flat screwdriver The procedure to change the direction of door opening should be carried out by at least two persons. 1. Remove the uppe...
Page 14 - VERSION II – CONTROLS ON THE DOOR
14 413758 VERSION II – CONTROLS ON THE DOOR Tools required: socket wrench No. 8, Phillips screwdriver, torx 25, flat screwdriver The procedure to change the direction of door opening should be carried out by at least two persons. 1. Remove the upper hinge cover (A) and the cover from the connector (...
Page 16 - SWITCHING THE APPLIANCE ON/OFF; CONTROL UNIT 1
16 OPERATING THE APPLIANCE WITH MECHANIC CONTROLS 413758 SWITCHING THE APPLIANCE ON/OFF CONTROL UNIT 1 A B A Temperature setting and on/off knob B Lighting on/off key To switch on: rotate the A dial clockwise. Switching off: Rotate the A knob back to the position in which the arrow is aligned with t...
Page 17 - ADJUSTING THE TEMPERATURE
17 413758 ADJUSTING THE TEMPERATURE • To set the desired temperature, rotate the A dial in clockwise direction, i.e. to the right. • A change in the environment temperature will aff ect the temperature in the appliance. Adjust the setting with the A dial accordingly. Positions towards the thicker pa...
Page 18 - CONTROL UNIT 2
18 APPLIANCE WITH ELECTRONIC CONTROL 413758 CONTROL UNIT 2 A Temperature setting and on/off knob To switch on: rotate the A dial clockwise. To switch off: rotate the A dial so that the arrow is aligned with the sign (caution: appliance will remain powered, i.e. there will still be electric current i...
Page 21 - CONTROL UNIT 3; OPERATING THE CONVENTIONAL APPLIANCE
21 413758 CONTROL UNIT 3 OPERATING THE CONVENTIONAL APPLIANCE OPERATING THE NOFROST APPLIANCE A On/off switch B Temperature adjustment and freezer boost key C1 Refrigerator compartment temperature display C2 Freezer compartment temperature display D Freezer boost function display
Page 24 - CONTROL UNIT 4; CONTROLS ON THE DOOR
24 413758 CONTROL UNIT 4 CONTROLS ON THE DOOR A Appliance on key and refrigerator compartment off key B Acoustic alarm off key C Super cool on/off key D Refrigerator compartment temperature keys E Refrigerator temperature display F Freezer compartment on key and appliance off key G ECO function on/o...
Page 26 - EXTREME FREEZING (UPPER DRAWER OF THE FREEZER
26 413758 • To set the temperature in the freezer compartment use the keys I: lower temperature ; higher temperature. • Temperature in the freezer compartment can be set from -24°C to -16°C. • After one of the I keys is pressed, the most recent temperature setting will fl ash on the display J. Use th...
Page 27 - HIGH TEMPERATURE ALARM
27 413758 • With this setting, the compressor will operate continuously and the temperature in the freezer compartment will drop considerably. • If the setting is not deactivated manually (by pressing the »H« key), it will be deactivated automatically after approximately one day. Freezer compartment...
Page 28 - ECO FUNCTION
28 413758 ECO FUNCTION To activate the Eco function, press the G key. With this function activated, appliance will operate with optimum settings. SAFETY BLOCK (CHILD SAFETY LOCK) Use this function if you do not wish to manually adjust the appliance settings. To activate, press and hold the B key (fo...
Page 29 - APPLIANCE INTERIOR EQUIPMENT; SHELF
29 APPLIANCE INTERIOR EQUIPMENT 413758 SHELF WIRE BOTTLE RACK* ELASTIC BOTTLE MAT* • For easier access to food and clarity, the shelves can be partly pulled out. • The shelves may be adjusted tu suit your preferences using the guides in the refrigerator interior. To remove a shelf from the refrigera...
Page 30 - CRISPZONE – FRUIT AND VEGETABLE BIN WITH
30 413758 Smaller amounts of food - push the control slider to the right; Larger amounts of food - push the control slider to the left; • Pulling out the bin: - Pull out the bin as far as it will go. Then, lift the front part and pull it out completely. CRISPZONE – FRUIT AND VEGETABLE BIN WITH HUMID...
Page 33 - ADAPTIVE INTELLIGENT TECHNOLOGY
33 413758 NO FROST APPLIANCES Control unit 2,3 and 4 (only with control units 3 and 4) Innovative sensor technology allows adjusting appliance operation to the user's habits or behaviour. Adaptive intelligent system monitors, analyzes, and records on a daily and weekly basis the use of appliance and...
Page 38 - APPROXIMATE STORAGE TIME IN THE ZEROZONE
38 413758 APPROXIMATE STORAGE TIME IN THE ZEROZONE DRAWER* Type of food Time sausages, cold cuts, beef, pork, venison, raw meat up to 7 days Poultry up to 5 days fish up to 4 days seafood up to 3 days Vegetables: cabbage, garlic, carrots up to 180 days celery, herbs up to 30 days Green lettuce, caul...
Page 39 - FREEZING PROCESS
39 FREEZING AND STORING FROZEN FOOD 413758 Maximum amount of fresh food that may be inserted at once is specified on the appliance rating plate. If the amount of food to be frozen exceeds the indicated amount, the quality of freezing will be inferior; in addition, the quality of the food already fro...
Page 40 - IMPORTANT WARNINGS ON FREEZING
40 413758 Only freeze the food that is suitable for freezing in the freezer. Make sure the food you freeze is of high quality and fresh. Choose appropriate packaging and use the packaging correctly. Packaging should not be permeable to humidity; it should be airtight to prevent the food from drying ...
Page 41 - FROZEN FOOD STORAGE TIME; DEFROSTING FROZEN FOOD
41 413758 FROZEN FOOD STORAGE TIME Recommended storage time in the freezer Type of food Time fruit, beef from 10 to 12 months vegetables, veal, poultry from 8 to 10 months Venison from 6 to 8 months Pork from 4 to 6 months minced meat 4 months bread, pastry, ready-to-eat meals, lean 3 months entrail...
Page 42 - DEFROSTING THE APPLIANCE; AUTOMATIC REFRIGERATOR DEFROSTING
42 DEFROSTING THE APPLIANCE 413758 Refrigerator does not need defrosting because the ice on the back interior wall is thawed automatically. Any accumulated ice will melt when the compressor unit is inactive. Drops will flow through an opening in the refrigerator rear wall into a tray fitted above th...
Page 43 - CLEANING THE APPLIANCE
43 CLEANING THE APPLIANCE 413758 Before cleaning, unplug the appliance from the power mains – switch off the appliance (see chapter Switching the Appliance On/Off) and unplug the power cord from the wall outlet. • Use a soft cloth to clean all surfaces. Cleaners that contain abrasive substances, aci...
Page 44 - TROUBLESHOOTING
44 TROUBLESHOOTING Problem: Cause or remedy: Appliance is connected to the power mains but it does not work. • Make sure there is voltage in the power outlet and that the appliance is switched on. Cooling system operates continuously for a long period of time: A B • Too high environment temperature....