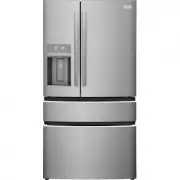
Frigidaire GRMC2273CF - User Manual
Frigidaire GRMC2273CF Refrigerator – User Manual, read for free online in PDF format. We hope this helps you resolve any issues you may have. If you have further questions, please contact us through the contact form.


Table of Contents:
- Page 2 – INTRODUCTION; Doors; Installation Checklist; family
- Page 3 – IMPORTANT SAFETY INFORMATION
- Page 5 – Electrical information
- Page 6 – IMPORTANT; FEATURES
- Page 7 – INSTALLATION
- Page 8 – Cabinet Leveling & Refrigerator; Flipper Mullion
- Page 9 – CAUTION; DOOR REMOVAL; Getting through narrow spaces; NOTE
- Page 10 – To remove the Custom-Flex
- Page 11 – Reinstalling the Custom-Flex; Temp Drawer
- Page 12 – Removing Freezer Drawer
- Page 13 – DOOR HANDLE INSTALLATION
- Page 14 – WATER SUPPLY CONNECTION
- Page 15 – To Connect Water Tube to
- Page 16 – Awake Mode Display; Sleep Mode Display; CONTROLS AND SETTINGS
- Page 17 – WARNING
- Page 19 – Alarms
- Page 20 – AUTOMATIC ICE AND WATER DISPENSER
- Page 23 – Drawers
- Page 26 – Freezer Features; Dividers
- Page 27 – STORING FOOD AND SAVING ENERGY; Ideas for storing foods; Ideas for saving energy
- Page 28 – NORMAL OPERATING SOUNDS; Understanding the sounds
- Page 29 – FILTER REPLACEMENT; Pure
- Page 31 – Air PK-2 Produce Keeper PlusTM
- Page 32 – CARE AND CLEANING; Vacation and moving tips
- Page 33 – Part; Ready
- Page 34 – TROUBLESHOOTING; Concern Potential Cause
- Page 39 – LIMITED WARRANTY
- Page 40 – welcome; home; owner support; Our home is your home. Visit us if you; registration; (See your registration card
Frigidaire.com USA 1-800-374-4432
Frigidaire.ca Canada 1-800-265-8352
use
&
care
REFRIGERATOR
Introduction .......................................................2
Important Safety Information ....................3
Features ..............................................................6
Installation .........................................................7
Door Removal ...................................................9
Door Handle Installation ............................. 13
Water Supply Connection .......................... 14
Controls and Settings .................................. 16
Automatic Ice and Water Dispenser ..... 20
Storage Features .......................................... 23
Storing Food and Saving Energy ........... 27
Normal Operating Sounds ........................ 28
Filter Replacement ...................................... 29
Care and Cleaning ....................................... 32
Troubleshooting ............................................ 34
Limited Warranty ......................................... 39
A23689601 (January 2022)
"Loading the manual" means you need to wait until the file loads and becomes available for online reading. Some manuals are very large, and the time they take to appear depends on your internet speed.
Was this manual helpful?
About this manual
- Brand
- Frigidaire
- Model
- GRMC2273CF
- Document type
- User Manual
- Category
- Refrigerator
- Language(s)
- English
- Pages
- 40
- File size
- 13.9 MB
- Format
Other Manuals for Frigidaire GRMC2273CF
Summary
INTRODUCTION Doors Handles are secure and tight Door seals completely to cabinet on all sides Leveling Refrigerator is level side-to-side and slightly elevated in front to assist with door and drawer closing (front should be higher than back) Cabinet is setting solid on all corners Electrica...
WARNING WARNING indicates a potentially hazardous situation which, if not avoided, could result in death or serious injury. IMPORTANT IMPORTANT indicates installation, oper- ation or maintenance information which is important but not hazard-related. DANGER DANGER indicates an imminently hazardous si...
5 IMPORTANT SAFETY INFORMATION Grounding type wall receptacle Power cord with 3-prong grounded plug Do not, under any circumstances, cut, remove, or bypass the grounding prong. Electrical information • The refrigerator must be plugged into its own dedicated 115 Volt, 60 Hz., 15 Amp, AC only electric...
Ask a question
Related manuals
Popular Frigidaire Refrigerators
More Frigidaire Refrigerators models
 Frigidaire GRFC2353AF User Manual
 Frigidaire GRFN2853AF User Manual
 Frigidaire GRFS2853AD User Manual
 Frigidaire GRFS2853AF User Manual
 Frigidaire GRMC2273CD User Manual
 Frigidaire GRMG2272CF User Manual
 Frigidaire GRMN2872AF User Manual
 Frigidaire GRMS2773AF User Manual
 Frigidaire GRQC2255BF User Manual
 Frigidaire GRSC2352AD User Manual
 Frigidaire GRSC2352AF User Manual
 Frigidaire GRSS2352AF User Manual