Page 3 - CONTENTS; SAVE THESE INSTRUCTIONS; Registration
1 CONTENTS IMPORTANT! SAVE THESE INSTRUCTIONS The models shown in this user guide may not be available in all markets and are subject to change at any time. For current details about model and specification availability in your country, please go to our website fisherpaykel.com or contact your local...
Page 4 - APPLIANCE PARTS
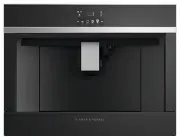
2 Service door Coffee guide Infuser Grinding adjustment dial Beans container lid Beans container Ground coffee funnel Control panel Drip tray Coffee grounds container Cup tray Cup light Hot water/steam connection nozzle Spouts On/Off/ stand-by button Interior lighting APPLIANCE PARTS
Page 5 - ACCESSORIES; Milk container
3 Power cord Power plug Measure compartment Main switch Water tank ACCESSORIES Connection nozzle cover Cleaning brush Frothed milk spout (adjustable) Milk intake tube Milk container Thermal casing Lid with milk frother Froth adjustment and clean dial Lid release buttons ‘Total Hardness Test’ indicat...
Page 6 - IMPORTANT SAFETY INSTRUCTIONS; Save these instructions.; SAFETY AND WARNINGS
4 IMPORTANT SAFETY INSTRUCTIONS Your safety is important to us. Keep the following instructions in mind when you are using your coffee maker. Failure to observe the instructions could result in electric shock, serious injury, burns, fire, or damage to the appliance. Save these instructions. SAFETY A...
Page 9 - Children shall not play with the appliance.
7 SAFETY AND WARNINGS ● Appliances with removable cord: avoid splashes of water on the power cord connector or socket at the back of the appliance. ● WARNING: Models with glass surfaces: do not use the appliance if the surface is cracked. ● This appliance can be used by children aged from 8 years an...
Page 10 - Never turn off the machine during descaling.
8 SAFETY AND WARNINGS ● Do not use the appliance when pulled out from the cabinet. Make sure the appliance is inactive before pulling it out. The only exception is adjusting the coffee mill which must be done with the machine pulled out (see section “Adjusting the coffee mill”). ● Use original or ma...
Page 11 - FIRST USE; Checking the appliance; Display
9 FIRST USE Checking the appliance After removing the packaging, make sure the product is complete. If the appliance is damaged, contact customer support. Note: that coffee has been used to factory test the appliance, so it is possible that there may be traces of coffee in the mill. ● You should cus...
Page 13 - Turning the appliance on
11 FIRST USE Note: ● Before turning the appliance on, make sure the main switch is pressed. ● Each time the appliance is turned on, it performs an automatic preheat and rinse cycle which cannot be interrupted. ● The appliance is ready for use only after completion of this cycle. 1 To turn the applia...
Page 14 - Measuring and setting water hardness; Setting water hardness
12 FIRST USE Measuring and setting water hardness How frequently the appliance alerts you that a descale is required, is determined by the level of water hardness. The appliance has a default water hardness setting of 4. However, to ensure the continued high performance of your coffee maker, it is i...
Page 15 - MENU SETTINGS; Rinsing
13 MENU SETTINGS Rinsing Use this function to deliver hot water from the coffee spouts and steam wand, to clean and heat the appliance’s internal circuit. Place a container under the coffee and hot water spouts. IMPORTANT! Do not leave the appliance unattended while hot water is being delivered. 1 P...
Page 16 - Set time
14 MENU SETTINGS Set time To adjust the time on the display: 1 Press . 2 Press or until SET TIME appears on the display. 3 Press . The time setting panel will appear on the display. 4 Set the current time by pressing or . 5 To confirm, press (to cancel, press BACK), then press BACK to go back to the...
Page 17 - Coffee temperature
15 MENU SETTINGS Coffee temperature To modify the temperature of the water used to make the coffee: 1 Press . 2 Press or until SET COFFEE TEMPERATURE appears on the display along with the current selected temperature of: low, medium, high or maximum. 3 Press SET COFFEE TEMPERATURE until the required...
Page 18 - Default values
16 MENU SETTINGS 5 INSERT GROUNDS CONTAINER AND DRIP TRAY: insert the drip tray complete with grounds container. 6 PLACE 2L CONTAINER UNDER SPOUTS, PRESS OK TO START: position a container under the coffee spouts and hot water spout. Press . 7 RINSING UNDERWAY, PLEASE WAIT: the appliance performs a r...
Page 19 - MAKING COFFEE; Selecting the strength of coffee; STRENGTH; Selecting the coffee size; SIZE
17 MAKING COFFEE Selecting the strength of coffee Select the required strength by pressing STRENGTH : STRENGTH Very Light Light Medium Strong Extra Strong Customised strength – if programmed Pre-ground coffee After delivering the drink, the strength setting is reset to the value. Selecting the coffe...
Page 20 - Using coffee beans
18 MAKING COFFEE Using coffee beans IMPORTANT! Do not use green, caramelised or candied coffee beans as they could stick to the coffee mill and make it unusable. 1 Fill the beans container with coffee beans. Selecting a drink from the menu 1 Press or until your chosen drink is displayed then select ...
Page 21 - Making coffee using pre-ground coffee
19 MAKING COFFEE Making coffee using pre-ground coffee IMPORTANT! ● Never add pre-ground coffee when the machine is off or the grounds could spread through the inside of the appliance which may cause damage. ● Never use more than one level measure or it could dirty the inside of the coffee maker or ...
Page 22 - Making long coffee
20 MAKING COFFEE Making long coffee IMPORTANT! Halfway through preparation, the message ADD PRE-GROUND COFFEE, MAXIMUM ONE MEASURE will be displayed. Add one level measure of pre-ground coffee and press . Tips for a hotter coffee If you prefer a hotter coffee, you should: ● Perform a rinse cycle by ...
Page 23 - MAKING CAPPUCCINOS AND MILK-BASED COFFEES; Filling and attaching the milk container
21 MAKING CAPPUCCINOS AND MILK-BASED COFFEES Note: to avoid milk with poor froth or large bubbles, always clean the milk container lid and hot water connection nozzle as described in sections ‘Cleaning the milk container’ and ‘Cleaning the steam wand connection nozzle’. Filling and attaching the mil...
Page 24 - Adjusting the amount of froth; DIAL POSITION; Making cappuccinos and milk-based coffees automatically
22 MAKING CAPPUCCINOS AND MILK-BASED COFFEES Adjusting the amount of froth Turn the froth adjustment dial on the milk container lid to adjust the amount of froth delivered while making milk-based coffees. Follow the recommendations in the table below: DIAL POSITION FROTH RECOMMENDED FOR None Latte /...
Page 25 - Cleaning the milk container after use
23 Cleaning the milk container after use IMPORTANT! When cleaning the internal tubes of the milk container, a little hot water and steam may leak out of the frothed milk spout. Take care to avoid burns from hot splashes of water. Each time you use a milk function, TURN DIAL TO <CLEAN> POSITION...
Page 26 - DELIVERING HOT WATER
24 DELIVERING HOT WATER IMPORTANT! Do not leave the appliance unattended while hot water is being delivered. 1 Make sure the steam wand is attached correctly to the hot water/steam connection nozzle. 2 Place a container under the spout (as close as possible to avoid splashes). 3 Select HOT WATER The...
Page 27 - STEAM DELIVERY; Tips for using steam to froth milk
25 STEAM DELIVERY IMPORTANT! ● Do not leave the appliance unattended while steam is being delivered. ● Always stop steam delivery before extracting the container filled with liquid to avoid burns from splashes. 1 Make sure the steam wand is attached correctly to the hot water/steam connection nozzle...
Page 28 - CUSTOMISING BEVERAGES; IMPORTANT; Beverage size; BEVERAGE
26 CUSTOMISING BEVERAGES Drinks can be customised by altering the strength and size of coffee delivered. IMPORTANT As part of customising the settings, coffee and milk will be delivered. So place a cup or container below the spouts. 1 Make sure the profile you want to customise is active. The curren...
Page 29 - MEMORISING YOUR PERSONAL PROFILE
27 MEMORISING YOUR PERSONAL PROFILE The appliance allows you to memorise six different profiles, each associated with a different icon. The customised MY beverages strength and size values are saved in each profile (see section ‘Customising the beverages ’). The order in which all the beverages are ...
Page 30 - CLEANING; Cleaning the appliance
28 CLEANING Cleaning the appliance The following parts of the appliance must be cleaned regularly (refer to page 2): ● The appliance’s internal circuit. ● Coffee grounds container. ● Drip tray. ● Water tank. ● Coffee spouts. ● Pre-ground coffee funnel. ● Infuser, accessible after opening the infuser...
Page 31 - Cleaning the drip tray
29 CLEANING To clean (with the appliance on): 1 Open the bottom door. 2 Remove the drip tray, empty and clean. 3 Empty the grounds container and clean thoroughly to remove all residues left on the bottom. This can be done using the spatula or the brush provided. IMPORTANT! When removing the drip tra...
Page 32 - Cleaning the inside of the coffee maker
30 CLEANING Cleaning the inside of the coffee maker IMPORTANT! Before cleaning internal parts, the appliance must be turned off (see section ‘Turning the appliance off’) and unplugged from the mains power supply. Never immerse the the appliance in water. 1 Check regularly (about once a month) that t...
Page 33 - Cleaning the infuser
31 CLEANING Cleaning the infuser The infuser must be cleaned at least once a month. IMPORTANT! The infuser must not be removed when the appliance is on. Do not use force to remove the infuser. 1 Make sure the machine is correctly turned off (see Turning off). 2 Open the service door. 3 Remove the dr...
Page 34 - Cleaning the milk container
32 CLEANING Cleaning the milk container 4 Turn the froth adjustment dial clockwise to the INSERT position and pull off. 5 Wash all the components of the frother thoroughly with hot water and dishwashing liquid. All components and the container are dishwasher safe. Make sure there are no milk residue...
Page 35 - Cleaning the steam connection nozzle
33 CLEANING Cleaning the steam connection nozzle Each time you re-fill the milk container, clean the connection nozzle with a sponge to remove milk residues from the gaskets. 6 Rinse inside the froth adjustment dial seat and the milk frother connector hole. 7 Check that the intake tube and spout are...
Page 36 - DESCALE; Read the instructions and the labelling on the descaler pack.
34 DESCALE IMPORTANT! ● Read the instructions and the labelling on the descaler pack. ● Only use descaler authorised by the manufacturer. Using unsuitable descaler and/or performing descaling incorrectly may result in faults not covered by the manufacturer’s guarantee. Descale the appliance when DES...
Page 39 - WATER SOFTENER FILTER; Installing the filter
37 WATER SOFTENER FILTER Certain models are fitted with a water softener filter. If this is not the case with your model, you are recommended to purchase one from an approved supplier. To use the filter correctly, follow the instructions below. Installing the filter 1 Remove the filter from the pack...
Page 40 - Replacing the filter
38 WATER SOFTENER FILTER Replacing the filter Replace the filter when REPLACE WATER SOFTENER FILTER, PRESS OK TO START appears on the display: to replace immediately, press and follow the instructions from point four. To replace the filter later, press BACK. The symbol appears on the display to remi...
Page 41 - DISPLAYED MESSAGES; DISPLAYED MESSAGE; INSERT WATER TANK; Back
39 DISPLAYED MESSAGES DISPLAYED MESSAGE POSSIBLE CAUSE WHAT TO DO FILL TANK WITH FRESH WATER Insufficient water in the tank. Fill the tank with water and ensure that it is inserted correctly, pushing it as far as it will go until it clicks into place. INSERT WATER TANK The tank is not correctly in p...
Page 42 - to continue
40 DISPLAYED MESSAGES DISPLAYED MESSAGE POSSIBLE CAUSE WHAT TO DO ADD COFFEE, COFFEE MAX. 1 MEASURE A long coffee with pre-ground coffee has been requested. Place pre-ground coffee in the funnel and press to continue and complete delivery. FILL BEANS CONTAINER The coffee beans have run out. Fill the...
Page 43 - INSERT WATER SPOUT
41 DISPLAYED MESSAGES DISPLAYED MESSAGE POSSIBLE CAUSE WHAT TO DO INSERT WATER SPOUT The hot water spout is not inserted or is not inserted correctly. Insert the water spout as far as it will go. INSERT MILK CONTAINER The milk container is not inserted correctly. Insert the milk container as far as ...
Page 45 - Turn the froth adjustment dial to CLEAN.
43 DISPLAYED MESSAGES DISPLAYED MESSAGE POSSIBLE CAUSE WHAT TO DO GENERAL ALARM: REFER TO USER MANUAL The inside of the appliance is very dirty. Clean the inside of the appliance thoroughly, as described in section ‘Cleaning’. If the message is still displayed after cleaning, contact Customer Care. ...
Page 46 - TROUBLESHOOTING; PROBLEM POSSIBLE; Clean the spouts with a toothpick.
44 TROUBLESHOOTING If the problem cannot be resolved as described, contact Customer Care. PROBLEM POSSIBLE CAUSE WHAT TO DO The coffee is not hot The cups were not preheated. Warm the cups by rinsing them with hot water (Note: you can use the hot water function). The infuser has cooled down because ...
Page 47 - Plug into the mains socket.
45 TROUBLESHOOTING PROBLEM POSSIBLE CAUSE WHAT TO DO The appliance does not turn on It is not plugged into the mains socket. Plug into the mains socket. The main switch is not turned on. Press the main switch. The infuser cannot be extracted The appliance has not been turned off correctly. Turn the ...
Page 48 - WARRANTY AND SERVICE; Your product is correctly installed.
46 WARRANTY AND SERVICE Before you call for service or assistance... Check the things you can do yourself. Refer to the installation instructions and your user guide and check that: 1 Your product is correctly installed. 2 You are familiar with its normal operation. If after checking these points yo...