Even Embers GAS1466AS - User Manual
Even Embers GAS1466AS Grill – User Manual, read for free online in PDF format. We hope this helps you resolve any issues you may have. If you have further questions, please contact us through the contact form.


Table of Contents:
- Page 2 – DANGER; IMPORTANT SAFETY; WARNINGS; a) Do not store a spare LP cylinder under or near this appliance.; WARNING
- Page 3 – CALIFORNIA PROPOSITION 65 WARNING
- Page 6 – • Always; LP gas cylinder (not supplied with this grill)
- Page 7 – HOSE & REGULATOR SPECIFICATIONS AND INSTALLATION:; Ensure the tank valve is
- Page 8 – CONNECTING HOSE AND REGULATOR:; REGULATOR RESETTING PROCEDURE:
- Page 9 – Never perform a leak test with a match or open fl ame.; WHEN TO PERFORM A LEAK TEST:; Use caution and common sense when testing for leaks.
- Page 10 – LIGHTING THE MAIN BURNERS:; GAS LIGHTING INSTRUCTIONS:; Follow the instructions exactly.
- Page 12 – BREAKING IN YOUR GRILL:
- Page 13 – TURNING OFF THE GRILL:; USING OTHER FEATURES OF THE GRILL:; In Canada: the Canadian Electrical Code – CSA C22.1
- Page 14 – CLEANING INTERIOR OF GRILL:; INTERIOR OF GRILL LID:
- Page 15 – PROPER VALVE TO BURNER ALIGNMENT
- Page 16 – BEFORE STORING YOUR GRILL:; Never move a grill when hot or in use.; TRANSPORTING AND STORAGE:
- Page 18 – GRILLING TO PROPER TEMPERATURE:
- Page 19 – ASSEMBLY INSTRUCTIONS:; READ ALL SAFETY WARNINGS & ASSEMBLY INSTRUCTIONS CAREFULLY; • Phillips
- Page 21 – Attach cart back panel
- Page 22 – Attach cart base; Attach four casters
- Page 24 – Place grill body
- Page 25 – and; LEFT
- Page 26 – Align Panels; RIGHT
- Page 28 – Install side burner grate
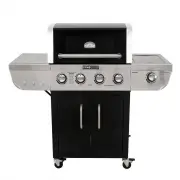
- Page 30 – Even Embers GAS1466AS Assembled
- Page 31 – WARRANTY
4 Burner Gas Grill
OWNER’S MANUAL
ASSEMBLY AND OPERATING IN STRUC TIONS
WARNING
HAZARDOUS EXPLOSION MAY RESULT IF THESE
WARNINGS AND INSTRUCTIONS ARE IGNORED. READ
AND FOLLOW ALL WARNINGS AND INSTRUCTIONS IN THIS
MANUAL TO AVOID PERSONAL INJURY, INCLUDING DEATH
OR PROPERTY DAMAGE.
NOTICE TO INSTALLER:
LEAVE THESE INSTRUCTIONS WITH
THE GRILL OWNER FOR FUTURE
REFERENCE .
SAVE THIS MANUAL FOR FUTURE REFERENCE
Model GAS1466AS
"Loading the manual" means you need to wait until the file loads and becomes available for online reading. Some manuals are very large, and the time they take to appear depends on your internet speed.
Summary
1 WE WANT YOU TO ASSEMBLE AND USE YOUR GRILL AS SAFELY AS POSSIBLE. THE PURPOSE OF THIS SAFETY ALERT SYMBOL IS TO ATTRACT YOUR ATTENTION TO POSSIBLE HAZARDS AS YOU ASSEMBLE AND USE YOUR GRILL. WHEN YOU SEE THE SAFETY ALERT SYMBOL PAY CLOSE ATTENTION TO THE INFORMATION WHICH FOLLOWS! READ ALL SAFETY ...
2 General Warnings . . . . . . . . . . . . . . . . . . . . . . . . . . . . . . . . . . . . . . . . . . . . 3-4 LP Gas Cylinder (Tank) Specifi cations and Installation . . . . . . . . . . . . . . . . 4-6 Hose & Regulator Specifi cations and Installation . . . . . . . . . . . . . . . . . . . . 6-7...
5 • Allow only qualifi ed licensed LP gas dealers to properly fi ll or repair your LP gas cylinder. • New tanks should be purged prior to fi lling; inform LP gas dealer if you are using a new tank. • DO NOT allow the cylinder to be fi lled beyond 80% capacity. Over-fi lled tanks can create a dangero...