Electrolux ERMC2295AS - Installation Manual

An Installation Manual for Electrolux’s multi-door freezer/refrigerator systems outlines essential steps like site preparation, power and water supply connections, door alignment, and final verification to ensure safe and functional operation. The guide emphasizes safety protocols, including electrical and structural checks, while diagrams help visualize critical measurements and adjustments. Key topics include proper setup procedures, alignment techniques, and compliance with installation standards for refrigeration units.

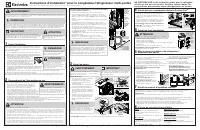
Table of Contents:
- Page 1 – Multi-door Freezer/Refrigerator Installation Instructions
- Page 2 – Two-Door Refrigerator Installation Procedures
- Page 3 – Multi-door Refrigerator Installation Details
DO NOT REMOVE this label until the refrigerator has been lev-
eled. Please follow all instructions for leveling your refrigerator.
P/N: A16995001
* P l e a s e re f e r t o y o u r U s e & C a re G u i d e f o r m o re d e t a i l s .
If you are not satisfied with the installation of your refrigerator, please contact the store where you purchased it or call 1-800-374-4432 for assistance.
I n s t a l l a t i o n I n s t r u c t i o n s * f o r M u l t i - D o o r F re e z e r / R e f r i g e r a t o r
WARNING
To avoid electric shock, which can cause death or severe personal injury, do not connect your
refrigerator to an electrical power source until you have completed Step 2 of these instructions.
CAUTION
Shifting the refrigerator from side to
side may damage flooring.
IMPORTANT
If you are installing your refrigerator without connecting it to
a water supply, make sure the ice maker’s power switch is
turned Off (see the Use & Care Guide for more details).
NOTE
If you need to remove the doors to get your refrigerator into the house, please refer to Section 3:
DOOR REMOVAL
, or, for more detailed instructions,
Removing Doors
in the Use & Care Guide.
These installation instructions are provided only as a possible customer option. Frigidaire recommends
that you use a service or kitchen contracting professional to install your refrigerator.
1
Preparing For Installation
Be sure to coordinate site preparation and installation with your
kitchen contractor.
Include these minimum guidelines in your site preparation:
• Choose a place near a grounded electrical outlet.
• Do not use an extension cord or an adapter plug.
• Avoid direct sunlight and close proximity to a range,
dishwasher or other heat source.
• Floor should be level and able to
support a fully loaded refrigerator.
• The refrigerator’s Ice Dispenser requires
water supply access.
• Plan for easy access to counter tops
when removing food.
• For complete access to drawers and
freezer baskets, doors must be able
to fully open.
• Load refrigerator from side of cabinet only.
• Do not run retaining straps over handles nor overtighten straps.
• Never use refrigerator handles to move the refrigerator.
Allow the following clearances for ease of installation, proper air circulation, and plumbing and electrical
connections: Sides & Top:
⅜
inch / Rear: 1 inch
CAUTION
R o o m t e m p e r a t u re s b e l o w 5 5 ° F
( 1 3 ° C ) o r a b o v e
1 1 0 ° F ( 4 3 ° C ) w i l l i m p a i r c o o l -
i n g a b i l i t y o f y o u r re f r i g e r a t o r ’s
c o m p re s s o r.
NOTE
Please call 1-800-374-4432 if you
need assistance with this installation.
2
Before Installing The Water Supply Line, You Will Need:
• Basic Tools: adjustable wrench, flat-blade screwdriver,
and Phillips
TM
screwdriver.
• Access to a household cold water line with water
pressure between 30 and 100 psi.
A water supply line made of ¼ inch (6 mm) OD, copper or
braided, flexible stainless steel tubing. To determine the
length of tubing needed, measure the distance from the
ice maker inlet valve at the back of the refrigerator to your
cold water pipe. Then add approximately 7 feet, so the refrigerator can be moved out for cleaning.
• A shutoff valve to connect the water supply line to your household water system. DO NOT use a self-
piercing type shutoff valve.
• A compression nut and ferrule (sleeve) for connecting a copper water supply line to the ice maker inlet valve.
Connect Water Supply
WARNING
To avoid electric shock, which can
cause death or severe personal in-
jury, disconnect the refrigerator from
electrical power before connecting
a water supply line to the refrigerator.
CAUTION
To Av o i d P ro p e r t y D a m a g e :
• C o p p e r o r S t a i n l e s s S t e e l b r a i d e d , f l e x i b l e t u b i n g i s re c o m m e n d e d f o r t h e w a t e r s u p-
p l y l i n e . Wa t e r s u p p l y t u b i n g m a d e o f ¼ i n c h ( 6 m m ) p l a s t i c i s n o t re c o m m e n d e d t o b e
u s e d . P l a s t i c t u b i n g g re a t l y i n c re a s e s t h e p o t e n t i a l f o r w a t e r l e a k s , a n d t h e m a n u f a c t u re r
w i l l n o t b e re s p o n s i b l e f o r a n y d a m a g e i f p l a s t i c t u b i n g i s u s e d f o r t h e s u p p l y l i n e .
• D O N O T re u s e c o m p re s s i o n f i t t i n g o r u s e t h re a d s e a l t a p e .
• D O N O T i n s t a l l w a t e r s u p p l y t u b i n g i n a re a s w h e re t e m p e r a t u re s f a l l b e l o w f re e z i n g .
• C h e m i c a l s f ro m a m a l f u n c t i o n i n g s o f t e n e r c a n d a m a g e t h e i c e m a k e r. I f t h e i c e m a k e r i s
c o n n e c t e d t o s o f t w a t e r, e n s u re t h a t t h e s o f t e n e r i s m a i n t a i n e d a n d w o r k i n g p ro p e r l y.
7
Frigidaire uses packing foam and tape to secure the internal parts of your refrigerator for shipping. Once
the refrigerator is in position, you can remove this material.
What’s Next?
Congratulations! You are ready to begin enjoying your new Frigidaire refrigerator.
• For important safety instructions and to learn how to operate your refrigerator, please read the entire
Use & Care Guide.
• You may want to start with the “Normal Operating Sights & Sounds” section of the Guide to learn
what to expect during typical operation.
• Please register your product. You can register online at www.frigidaire.com or you can simply send in
the Registration Card.
Remove Internal Shipping Materials
To Connect Water Supply Line To Ice Maker Inlet Valve
1. Disconnect refrigerator from electrical power source.
2. Place end of water supply line into sink or bucket.
Turn ON water supply and flush supply line until water
is clear. Turn OFF water supply at shutoff valve.
3. Remove plastic cap from water inlet fitting and
discard cap.
4. If using (recommended) stainless steel braided
tubing - the nut and ferrule are already assembled
on the tubing. Slide compression nut onto water
inlet fitting and finger tighten.
5. Using two adjustable wrenches (one to hold the
household water line nut and the other to hold
the water inlet fitting nut), tighten a half turn with
wrench. DO NOT over tighten.
6. Turn ON water supply at shutoff valve and tighten
any connections that leak.
7. Reconnect refrigerator to electrical power source.
8. Ensure ice maker is turned ON.
9. Purge air from Ice & Water Dispenser System.
NOTE
Check with local building authority for recommendations on water lines and associated materials prior
to installing refrigerator. Depending on local/state building codes, Frigidaire recommends for homes with
existing valves its
Smart Choice
®
water line kit 5304437642 with a 6 ft. (1.8 meters) Stainless Steel Water
Line. Please refer to www.frigidaire.com for more information.
Door Removal
Removing the Doors:
3
WARNING
Tu r n o ff p o w e r t o re f r i g e r a t o r, b y
u n p l u g g i n g t h e p o w e r c o rd f ro m
t h e w a l l o u t l e t .
1. Remove screws from top hinge cover
and lift up. See Figure 1.
2. Disconnect electrical harness running
from door to hinge cover. See Figure 2.
3. Pull up on water line gently to remove
from door. See Figure 3.
4. Remove three 8 mm bolts from both
top hinges. See Figure 4.
Lift doors up off lower hinges and
carefully set aside.
5. To gain access to lower hinge, drawer
will need to be extended. Unscrew the
three lower hinge screws and slide the
hinge inwards. See Figure 5.
8
Doors
�
Handles are secure and tight
�
Door seals completely to cabinet on all sides
�
Fresh food doors are level
Leveling
�
Refrigerator is level, side to side and tilted
¼ inch (6 mm) front to back
�
Cabinet is sitting solid on all corners
Installation Check List
Electrical Power
�
House power turned on
�
Refrigerator plugged in
Ice Maker
�
House water supply connected to refrigerator
�
No water leaks present at all connections
�
Ice Maker is turned ON.
Final Checks
�
Shipping material removed
�
Fresh Food and Freezer temperatures set
NOTE
Approximately four feet of water tube
will be pulled from the refrigerator door.
Use care while pulling the water tube
from the door to be sure that the tube
does not kink.
Phillips Screws
Top
Hinge
Cover
Figure 1
Figure 2
Waterline
Figure 3
x2
Figure 4
Figure 5
Water Inlet
Fitting
Remove
plastic cap
from water
inlet fitting
¼ inch
plastic tube
to water
valve
Water Inlet
Fitting
Remove
plastic cap
from water
inlet fitting
¼ inch
plastic tube
to water
valve
6 ft. (1.8 Meters)
Stainless Steel water
line from household
water supply line
Water
Inlet
Fitting
Plastic
tubing
to
water
valve
Connection to
household
water supply
IMPORTANT
Open the refrigerator doors to a 90° angle before
removing or installing the doors on the lower hinges.
To reinstall the doors:
See Use & Care guide for details.
To reinstall the freezer drawer:
See Use & Care guide for details.
5
Removing Freezer Drawer
1. Open drawer and fully extend.
2. Remove the freezer drawer.
3. Remove the freezer basket.
4. Inside the cabinet, press the two tabs on both sides
to release the sliders.
5. Remove the drawer with brackets and sliders.
CAUTION
D r a w e r i s h e a v y. U s e c a u t i o n w h e n l i f t i n g .
Freezer
Drawer
Freezer
Basket
Press the two tabs
on both sides to
release the sliders
4
Removin g Custom-Flex
TM
Temp Drawer
1. Fully open drawer and remove basket.
2. Unsnap the four cable ties by pressing clip sides
together and pushing through opening.
3. Remove screw and retaining clip and disconnect
the harness.
4. Inside the cabinet, press the two tabs on both
sides to release the sliders. Remove the drawer
with brackets and sliders.
Cable
Tie
Cable
Clip
NOTE: Do Not Remove or Cut
Cable Ties From Wire Harness
(4) Cable
Ties
Retaining
Clip
Retaining Clip
To Cabinet
Harness
Screw
To reinstall the Custom-Flex
TM
temp drawer:
See Use & Care guide for details.
Press the two
tabs on both
sides to release
the sliders
Level Refrigerator & Refrigerator Door Alignment
6
Final Positioning of Refrigerator:
• All 4 corners of cabinet must rest firmly on floor.
• The front should be slightly elevated to ensure that
doors close and seal properly.
• Doors should align with each other and be level.
Most of these conditions can be met by raising or
lowering the adjustable front rollers.
To level the cabinet using the anti-tip legs:
1. Slightly open freezer drawer.
2. Lower anti-tip legs until they are both touching the
floor. Use a pair of pliers to
adjust.
To raise:
turn leg clockwise.
To lower:
turn leg
counterclockwise.
3. Ensure both doors are bind-
free with their seals touching
the cabinet on all four sides
and that cabinet is stable.
To make final door height adjustments:
1. Open Custom-Flex Temp drawer to
make lower hinge visible.
2. Insert 6 mm Allen
TM
wrench into the
shaft of the lower hinge.
To lower unit:
turn adjustment
screw clockwise.
To raise unit:
turn adjustment
screw counterclockwise.
Raise
Anti-Tip
Legs
Door
Door
Door
Door
"Loading the manual" means you need to wait until the file loads and becomes available for online reading. Some manuals are very large, and the time they take to appear depends on your internet speed.
Was this manual helpful?
About this manual
- Brand
- Electrolux
- Model
- ERMC2295AS
- Document type
- Installation Manual
- Language(s)
- English, Spanish, French
- Pages
- 3
- File size
- 9.4 MB
- Format
Other Manuals for Electrolux ERMC2295AS
Summary
Installation steps for a multi-door freezer/refrigerator, including site preparation, connecting utilities, door alignment, and final setup verification with safety warnings and diagrams.
Step-by-step instructions for installing a two-door refrigerator, covering site preparation, electrical and water line connections, door handling, unit leveling, and safety precautions.
Detailed instructions for multi-door refrigerator installation, focusing on critical safety warnings, electrical connection, water line setup, door removal and reinstallation, and precise leveling measurements.
Ask a question
Related manuals
Popular Electrolux Other


More Electrolux Other models
 Electrolux ER 7826 B Manual
 Electrolux ER 8133 I Manual
 Electrolux ERB34258W Manual
 Electrolux ERES31800W Manual
 Electrolux ERL6297XS1 Manual
 Electrolux ERN 2821 Manual
 Electrolux ERN 2920 Manual
 Electrolux ERN 2930 Manual
 Electrolux ERN 28600 Manual
 Electrolux ERN 28700 Manual
 Electrolux ERN 29600 Manual
 Electrolux ERT 1646 Manual