Electrolux EIED2CAQS - Manual

Electrolux EIED2CAQS – Manual, read for free online in PDF format. We hope this helps you resolve any issues you may have. If you have further questions, please contact us through the contact form.


Table of Contents:
- Page 2 – IMPORTANT SAFETY INSTRUCTIONS; Definitions; Product Record; Record Your Model and Serial Numbers
- Page 3 – WARNING - RISK OF FIRE
- Page 4 – CAUTION
- Page 5 – Features
- Page 6 – Operating Instructions; Normal Operating Sounds; IMPORTANT
- Page 7 – Operating Your Dryer
- Page 8 – Cycle Selection; For best results
- Page 9 – Specialty Cycle Selection; NOTE; Cycle Options
- Page 10 – Drying System Maintenance Procedures
- Page 11 – Other Features
- Page 12 – Dryer Settings Chart
- Page 13 – Care and Cleaning
- Page 14 – Cleaning Condenser
- Page 15 – Solutions to Common Problems; Common Drying Problems
- Page 16 – Avoid Service Checklist
- Page 17 – Major Appliance Warranty Information
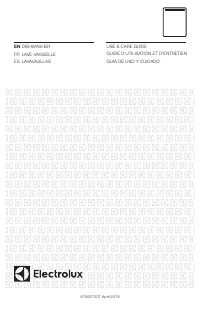
EN
FRONT LOAD DRYER
FR
SÉCHEUSE Á CHARGEMENT FRONTAL
ES
SECADORA DE CARGA FRONTAL
USE & CARE GUIDE
GUIDE D’UTILISATION ET D’ENTRETIEN
GUÍA DE USO Y CUIDADO
EIED200QS
EIED2CAQS
= COLOR CODE / CODE COULEUR / CÓDIGO DE COLOR
"Loading the manual" means you need to wait until the file loads and becomes available for online reading. Some manuals are very large, and the time they take to appear depends on your internet speed.
Was this manual helpful?
About this manual
- Brand
- Electrolux
- Model
- EIED2CAQS
- Document type
- Manual
- Language(s)
- English
- Pages
- 18
- File size
- 3.4 MB
- Format
Summary
2 IMPORTANT SAFETY INSTRUCTIONS Definitions This is the safety alert symbol. It is used to alert you to potential personal injury hazards. Obey all safety messages that follow this symbol to avoid possible injury or death. Recognize safety symbols, words and labels Safety items throughout this manua...
3 IMPORTANT SAFETY INSTRUCTIONS Avoid fire hazard or electrical shock. Do not use an adaptor plug or extension cord or remove grounding prong from electrical power cord. Failure to follow this warning can cause serious injury, fire or death. 10-30R 10-30R 3-wire 3-wire 208-240 v Electric Dryer 208-2...
4 IMPORTANT SAFETY INSTRUCTIONS CAUTION The California Safe Drinking Water and Toxic Enforcement Act requires the Governor of California to publish a list of substances known to the state to cause cancer, birth defects or other reproductive harm, and requires businesses to warn customer of potential...
Ask a question
Related manuals
Popular Electrolux Other


More Electrolux Other models
 Electrolux EI32AF80QSA User Manual
 Electrolux EI32AR80QSC User Manual
 Electrolux EI32AR80QSG User Manual
 Electrolux EIDW1815US0A User Manual
 Electrolux EIDW5705PS0A User Manual
 Electrolux EIED2CAQSW00 User Manual
 Electrolux EIED55HIW0 User Manual
 Electrolux EIED200QSW Manual
- Electrolux EIED200QSW00 User Manual
 Electrolux EIFLS20QSW00 User Manual
 Electrolux EIFLS55IIW0 User Manual
- Electrolux EIFLS55IIW1 User Manual