Defiant THD-WK - User Manual
Defiant THD-WK Security Alarm – User Manual, read for free online in PDF format. We hope this helps you resolve any issues you may have. If you have further questions, please contact us through the contact form.

THANK YOU
We appreciate the trust and confidence you have placed in Defiant through the purchase
of this Shed and Garage Alarm. We strive to continually create quality products designed to
enhance your home. Visit us online to see our full line of products available for your home
improvement needs. Thank you for choosing Defiant!
USE AND CARE GUIDE
Home, Shed and Garage Alarm
1
2
3
4
Safety Information
Save these instructions for future use.
WARNING:
Risk of personal injury. Prolonged exposure to the alarm siren may cause permanent
hearing loss.
WARNING:
For indoor use only. Do not use in wet locations.
WARNING:
Any battery may leak harmful chemicals which may damage skin, clothing or the
inside of the alarm. TO AVOID RISK OF INJURY, DO NOT LET ANY MATERIAL LEAKED FROM A BATTERY
COME IN CONTACT WITH EYES OR SKIN. Any battery may rupture or explode if put in a fire or
otherwise exposed to excessive heat. TO AVOID RISK OF INJURY, DO NOT EXPOSE BATTERIES TO
EXCESSIVE HEAT. To reduce the risk of personal injury or harm to your alarm, take the following
precautions:
Do not use different brands of batteries in the same alarm
When replacing batteries always replace the whole set
Do not use rechargeable or reusable batteries
Do not allow children to install batteries unsupervised
Follow battery manufacturer’s instructions as to proper handling, storage and disposal
of batteries
THIS PRODUCT CANNOT BE LINKED TO A MONITORED SECURITY SYSTEM. THE
SECURITY FEATURE IS EXCLUSIVELY THE 120DB ALARM SOUND.
DEFIANT IS NOT RESPONSIBLE OR LIABLE FOR ANY DAMAGE, VANDALISM,
THEFT OR OTHER ACTIONS THAT MAY OCCUR WHILE THIS PRODUCT IS IN USE.
FCC REGULATION
This device complies with Part 15 of the FCC Rules. Operation is subject to the following
two conditions: (1) This device may not cause harmful interference, and (2) This device must
accept any interference received, including interference that may cause undesired operation.
WARNING:
Changes or modifications to this unit not expressly approved by the party responsible
for compliance could void the user’s authority to operate the equipment.
NOTE:
This equipment has been tested and found to comply with the limits for a Class B digital
device, pursuant to Part 15 of the FCC Rules. These limits are designed to provide reasonable
protection against harmful interference in a residential installation. This equipment generates,
uses and can radiate radio frequency energy and, if not installed and used in accordance with the
instructions, may cause harmful interference to radio communications. However, there is no guarantee
that interference will not occur in a particular installation. If this equipment does cause harmful
interference to radio or television reception, which can be determined by turning the equipment off and
on, the user is encouraged to try to correct the interference by one or more of the following measures:
□
Reorient or relocate the receiving antenna.
□
Increase the separation between the equipment and receiver.
□
Connect the equipment into an outlet on a circuit different from that to which the
receiver is connected.
□
Consult the dealer or an experienced radio/TV technician for help.
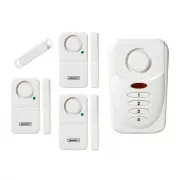
PACKAGE CONTENTS
1
2
3
4
A
C
D
E
B
Part
Description
Qty.
A
Alarm
1
B
Double Sided Tape
1
C
Screw
3
D
Wall Anchor
3
E
Magnet
1
Safety Information (continued)
LIMITATIONS OF ALARM PRODUCTS
WARNING:
Test product regularly to ensure it functions in accordance with these instructions. The
manufacturer does not provide insurance or any guarantee that the risk of burglary or robbery will be
reduced or prevented even if this product is used properly. Obtain proper insurance coverage for these
risks. The manufacturer does not represent or warrant that that this product may not be compromised or
circumvented, that it will provide proper or adequate warning, or that the use of this product will prevent
injury, property damage or other losses. Note that this product may be bypassed, compromised, fail or
fail to warn like any alarm, including due to improper installation, positioning, or maintenance; tampering;
dead, faulty, or improperly installed batteries; sensing limitations and component failures. The product’s
functional range may be affected or limited by environmental conditions, radio frequency interference or
other obstructions. Audible alarm signals may be outside of hearing range, muted by doors, walls, and
floors, unheard by deep sleepers or the hearing-impaired, or overwhelmed by other sounds.
Installation
1
Installing the batteries
Remove the screw from the battery compartment cover located on the back of
the alarm.
Slide off the door in the direction of the arrow.
Insert three AAA alkaline batteries (not included) noting the polarity diagram inside
the battery compartment.
Replace the battery compartment cover and secure the screw.
NOTE:
The alarm has a low battery indicator light. When the batteries need to be replaced, the
indicator light will flash slowly.
1
2
3
4
Indicator light
Item # 1001-090-379
Model # THD-SG
Warranty
1 YEAR LIMITED WARRANTY
This product is guaranteed to be free of defects in materials and workmanship for 1 year
from the date of purchase. If this product is defective, call 844-212-0200 for repair or
replacement parts or return the product to the store from which it was purchased.
Guarantee does not include normal wear and tear, bulbs or batteries.
Contact the Customer Service Team or visit www.HOMEDEPOT.com.
Questions, problems, missing parts? Before returning to the store,
call Customer Service
8 a.m. - 4:30 p.m., CST, Monday - Friday
844-212-0200
HOMEDEPOT.COM
Installation (continued)
2
Installing the alarm
Select a dry and interior location for the alarm such as a door or door frame. Use
either the provided screws (C) and wall anchors (D) (for permanent mounting) or
the double-sided tape (B) (for temporary mounting). The recommended location is
the back of the door, with the magnet (E) mounted to the fixed door frame.
NOTE:
Mounting the alarm to the door ensures that the alarm will not be damaged by opening
and closing the door. The magnet may be mounted to either side of the alarm as long as the
arrows line up.
IMPORTANT:
Whether mounting to the door or the door frame, the gap distance between the
alarm (A) and the magnet (E) must be no more than 12 mm/0.4 in. (approximately a ½ in. gap).
Screw and anchor installation:
Measure and mark the locations of the
screws for the alarm and the magnet. Line up the arrows of the alarm (A) and
the magnet (E). Ensure the distance between the two pieces is 12 mm/0.4 in. or
less. To test the gap distance, turn the ALARM/CHIME switch to CHIME and open
the door. If it does not sound, move either the alarm or magnet closer. Secure
the position of the alarm (A) and the magnet (E) once they work correctly in
combination.
Double-sided tape installation:
Ensure the mounting surface is clean and
dry. Use the double-sided tape (B) to lightly attach the magnet (E) and the alarm
(A) to the desired mounting surface. Ensure the distances are correct between the
alarm (A) and magnet (E) as previously described. When the distances are correct
and the chime works, secure the alarm and magnet into position.
1
2
3
4
A
E
Gap must not exceed
“12mm/0.4 in.
(approximately a 1/2 in.)”
Operation
1
Creating a personal alarm code
Use the keypad to set a personal 4-digit code for arming and disarming the alarm.
Remove the screw from the battery compartment door located on the back of
the unit.
Slide off the door in the direction of the arrow.
Press the LEARN button. The red light on the front of the alarm will blink for 15
seconds.
During this time, input your 4-digit code using the keypad on the alarm. A beep
will confirm each input. When the 4th digit is entered, the alarm will beep to
confirm the new code has been accepted. If the LED stops flashing before the
code is entered, or the alarm does not produce the confirmation beep, start the
process again.
Replace the battery compartment cover and secure the screw.
2
Operating in alarm mode
In ALARM mode, the device produces a constant high-volume alarm sound when
triggered.
To activate ALARM mode, slide the mode selector switch located in the battery
compartment to the ALARM position.
Enter the 4-digit User Access Code . The alarm will beep as each digit is entered.
If entered incorrectly, the unit will sound and the indicator light will flash red
three times.
There will be a 45 second exit delay before the unit is armed. The alarm’s
indicator light will flash red quickly, alerting you that the unit has been activated
and has begun the 45 second count down. The delay allows time for you to leave
the protected area without triggering the alarm. When returning the protected
area, there is a 30 second delay to allow time to enter the 4-digit code before the
alarm will sound.
`
Operation (continued)
3
Disarming the alarm
Enter the 4-digit User Access Code. The alarm will beep as each digit is entered.
Two beeps will indicate that the User Access Code is correct and the system has
been disarmed. If an incorrect code is entered, the unit will sound a louder beep.
Enter the correct code anytime after the alarm has sounded to deactivate.
4
Operating in chime mode
CHIME mode is used for lower security situations and produces a door chime sound
when activated.
To activate CHIME mode, slide the mode selector switch located in the battery
compartment to the CHIME position.
Enter the 4-digit User Access Code. The alarm will beep as each digit is entered.
A door chime will indicate that the User Access Code is correct and the system
has armed.
The alarm will produce a door chime sound each time the door is opened and the
magnet is moved away from the alarm.
To deactivate the chime, slide the ALARM/CHIME switch to ALARM mode.
5
Testing
It is recommended that the alarm is tested immediately after installation and at regular
intervals not exceeding 1 month.
NOTE:
A cloth can be used to cover the siren and reduce the sound output of the alarm
during testing.
"Loading the manual" means you need to wait until the file loads and becomes available for online reading. Some manuals are very large, and the time they take to appear depends on your internet speed.