Deeshe D-fan-OW30M - User Manual
Deeshe D-fan-OW30M Fan – User Manual, read for free online in PDF format. We hope this helps you resolve any issues you may have. If you have further questions, please contact us through the contact form.

210X290mm 对折
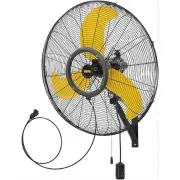
30" HEAVY DUTY MISTING OSCILLATION WALL FAN
CAUTION
a. concrete wall
b.wall stud
1. Mark the mounting hole locations by using the holes in the bracket as a guide, then drill the holes.
A. For concrete wall installation, after drilling, you would insert the wall anchors and tap them flush with
the wall, position the bracket and then screw the two bolts into the anchors, securely attaching the
bracket to the wall.
3. Remove four sets of hexagonal nuts, spring washers, and flat washers from the motor, save them for step 4.
4. Set the rear guard in the proper position and affix it to the motor using the hexagonal nuts, spring washers, and
flat washers.
5. Assemble the fan blade onto the motor shaft by tightening the two screws. Make sure the crews are tightly secured.
7. Secure the assembly on the front guard and rear guard by tightening the screw, washer and nut at the bottom of the
fan guards.
9. Assemble the swivel bracket with wall bracket and fasten with hexagon screw, flat washer, spring washer and nut.
8. Insert the swivel bracket into motor Z brackets and fasten it with bolt (a), flat washer (b), spring washer (C) and
nut (d). Fasten the bolt (f) with the knob (e) for adjusting the tilt angle of the fan or fix the tilt angle of the fan.
10. Loosen the knob (g) and adjust until the fan head is at the desired angle. Tighten the knob (g) back.
6. Attach t he front guard to the rear guard and secure them together by using the clips on the front guard.
B. For wall stud installation, after drilling the smaller diameter pilot hole, position the bracket and screw
the two holts into the wall until they are secured.
The fan is only suitable for concrete wall or direct to stud installation. Do not use for dry wall mounting. Use
the mounting accessories shipped with products for wall mounting.
2. Assemble the motor Z brackets by fastening screws and nuts.
This fan is to be mounted with wall bracket, it MUST be mounted and secured on a solid wall that is structurally
sound to support the fan and mounting bracket. The wall bracket along with the fan MUST NOT be mounted on
any surface that is subject to vibration, wobbling, movement or the like. The fan MUST be mounted and properly
secured to a stationary structure.
Unplug the appliance before cleaning. Don’t use any water for cleaning metal surfaces. Slightly moisten a cloth and
then wipe off the surfaces of the fan. In order to remove dust from the grill, use a vacuum cleaner or remove the front
grill by removing the securing screws on the edge of the grill. After cleaning, remount the grill. After doing this, fasten
the screws on the edge of the grill.
The manufacturer warrants this product to be free from manufacturing defects in the material and workmanship under
normal use for a period of one year after the date of purchase by the original purchaser.
This warranty does not cover transit damages. This warranty does not apply to damages from accident, misuse,
alteration of any kind to the fan or where the connected voltage is more than above the nameplate voltage. This
warranty does not apply to the finish on any portion of the product. Servicing performed by unauthorized persons
shall render the warranty invalid. The warranty is not responsible for damages of any kind, including accident and
consequential damages. Some states do not allow the exclusion or limitation of the incidental or consequential
damages, so the above exclusion or limitation may not apply to you. This warranty gives you specific legal rights,
and you may also have other rights which vary from state to state.
Warning:
U s e o f s e c o n d a r y s a f e t y s u p p o r t c a b l e d o e s n o t
guarantee protection against injury of persons. Mounting
of both the circulator and cable could fail if subject
to abuse, neglect or if improperly installed. To avoid
personal injury, circulators must be supported anytime
angle is adjusted.
PARTS
SPECIFICATION
QTY
Φ
3*3050
M5*13
ST8*50
1
1
2
1
1
Φ
8*
Φ
24*
δ
2
Φ
10*60
1. Loop one end of the cable around the large diameter
wires of both the front and rear guard as shown below.
Attach a cable retainer with the “U” on the tail side of the
loop leaving a tail of approximately 1 to 2 inches. Tighten
clamp nuts forming a tight loop, 32in. lbs of torque.
Make sure the cable does not interfere with the propeller.
Top Of
Circulator
Guards
1-2” Tail
Large
Guard
Wires
Tight Loop in Cable
2. Wrap the other end of the cable around a secure
building joist, beam, truss or other support near the fan
as shown below. Take up all excess slack in the cable. If
the fan is an oscillating model and wall mounted, leave
enough slack to allow free movement through range of
motion.
Installation -- Secondary
Safety Support Cable
Secondary
Support
Cable
Wall, Ceiling or Post Bracket
3 . A t t a ch t h e r e m a i n i n g c a b l e r e t a i n e r s a s d o n e
previously in “step 1”. The excess tail should be trimmed
to extend 1 to 2 inches past the second clamp.
4. Check the assembly to assure the propeller is free of
all obstructions and turns freely.
5. Connect the circulator to the proper power supply
ensuring that it conforms to the electrical rating listed on
the circulator’s motor nameplate.
For concrete wall installation
1. Drill a hole in concrete wall,
insert the wall anchor and tap
wall.
2. Fasten a blot and a washer
through the terminal of
secondary safety support
cable into the anchor for
security.
A
30
Blade
FAN-OW30M
1
2
3
4
5
6
7
8
9
10
SIZE PART
DESCRIPTION
PART #
1. Unplug the fan from the socket and clean it with a soft cloth.
2. DO NOT immerse the fan.
3. Fit the guard onto fan before starting up the fan.
4. This fan is not intended for use by people (including children) with reduced physical,
sensory or mental capabilities or lack of experience and knowledge unless they have
been given supervisionor or instruction concerning use of the fan by a person responsible
for their safety. Supervise children to ensure they do not play with the fan.
WARNING
a
e
b
c
d
f
g
swivel bracket
1. Test GFCI(Ground Fault Circuit Interrupter) plug BEFORE EACH USE.
Plug GFCI into power outlet. Press RESET button(b).
Indicator(a) should turn red.
Press TEST button(c). Indicator (a) should turn off.
GFCI plug is tripped.
DO NOT USE FAN IF ABOVE TEST FAILS.
Call customer service for aaaistance.
a
b
c
1
2
ITEM NO.: FAN-OW30M
120V / 60Hz, 2A
READ & SAVE THESE INSTRUCTIONS
Questions, problems, missing parts? Before returning the product,
please e-mail our customer service by
A
11.Connect the misting switch (1) to the water pipe (2) and tighten it. Turn the switch (open) to open the misting function.
Turn the switch (close) to close the misting function.
Loose
Tight
3/4" Water Pipe Terminal 3/4"-11.5 External Thread
3/4"-11.5 Internal Thread
Open
Close
①
②
READ AND SAVE THESE INSTRUCTIONS
OPERTATING INSTRUCTIONS
ASSEMBLY INSTRUCTION
ASSEMBLY INSTRUCTION
ASSEMBLY INSTRUCTION
ASSEMBLY INSTRUCTION
ASSEMBLY INSTRUCTION
ASSEMBLY INSTRUCTION
CARE AND MAINTENANCE
1-YEAR LIMITED WARRANTY
REPLACEMENT PARTS LIST
SAFETY INFORMATION
CAUTION
1. Unplug the fan before moving it or performing maintenance.
Don't operate the fan when your hands are wet.
2. Do not disassemble, repair or rebuild the fan.
3. Unplug the fan when it is not in use.
4. Do not unplug the fan by holding the cable cord. Unplug by holding the
plug.
5. DO NOT use the fan when there is damage to the cable cord or plug. If
the supply cord is damaged, it has to be replaced by the manufacturer,
its service agent or similarly qualified persons.
6. To Reduce The Risk Of Fire, Electric Shock Or Injury To Persons, Do Not Use
Replacement Parts That Have Not Been Recommended By The Manufacturer
(e.g. Parts Made At Home Using A 3D Printer).
7. Do not use the fan close to fires.
8. Do not insert your hand or other objects into the guard or near movable
parts.
9. To reduce the risk of fire or electric shock, do not use this fan with any
solid-state speed control device.
10. Do Not Use An Extension Cord With This Fan.
To prevent serious injury or property damage, read and understand owner's
manual before operating.
This prodct can be used indoor or outdoor with a proper GFCI plug.
"Loading the manual" means you need to wait until the file loads and becomes available for online reading. Some manuals are very large, and the time they take to appear depends on your internet speed.