Page 2 - Indicazioni ambientali
2 Grazie per aver scelto questo prodotto. Siamo orgogliosi di offrirti un prodotto ideale per te e la miglior gamma completa di elettrodomestici per la vita di tutti i giorni. Leggere attentamente le istruzioni per un corretto funzionamento della macchina. Questo opuscolo fornisce importanti linee g...
Page 3 - ATTENZIONE
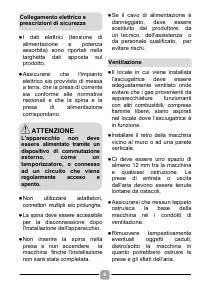
IT 3 1. NORME GENERALI DI SICUREZZA l Questo apparecchio è destinato ad uso in ambienti domestici e simili come per esempio: − aree di ristoro di negozi, uffici o altri ambienti di lavoro; − negli agriturismo; − dai clienti di hotel, motel o altre aree residenziali simili; − nei bed & breakfast....
Page 4 - antifilacce; Se è esposto il simbolo
4 l Se si presume che la macchina sia guasta, non continuare ad usarla. l L'asciugatrice non dev'essere usata se sono stati usati prodotti chimici per il lavaggio. l Evitare che sul pavimento attorno alla macchina si raccolgano filacce e pelucchi. l Prima di pulire la macchina, staccare sempre la sp...
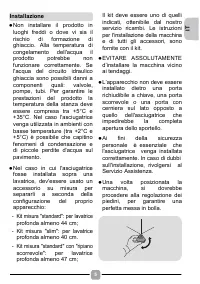
Page 5 - Installazione
IT 5 l Non installare il prodotto in luoghi freddi o dove vi sia il rischio di formazione di ghiaccio. Alla temperatura di congelamento dell'acqua il prodotto potrebbe non funzionare correttamente. Se l'acqua del circuito idraulico ghiaccia sono possibili danni a componenti quali: valvole, pompe, tu...
Page 9 - Da piena, la vaschetta dell'acqua pesa; Da piena la vaschetta dell'acqua
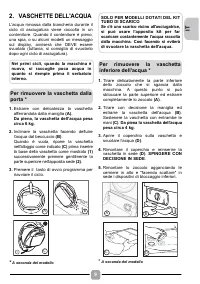
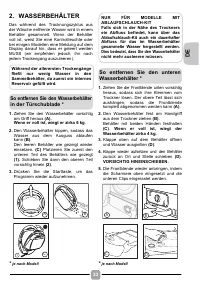
IT 9 2. VASCHETTE DELL'ACQUA L'acqua rimossa dalla biancheria durante il ciclo di asciugatura viene raccolta in un contenitore. Quando il contenitore è pieno, una spia, o su alcuni modelli un messaggio sul display, avviserà che DEVE essere svuotato (tuttavia, si consiglia di svuotarlo dopo ogni cicl...
Page 10 - CONDENSATORE; Spia di pulizia filtro
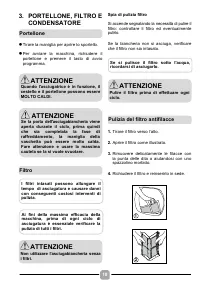
10 3. PORTELLONE, FILTRO E CONDENSATORE l Tirare la maniglia per aprire lo sportello. l Per avviare la macchina, richiudere il portellone e premere il tasto di avvio programma. Spia di pulizia filtro Si accende segnalando la necessità di pulire il filtro: controllare il filtro ed eventualmente pulir...
Page 11 - UP
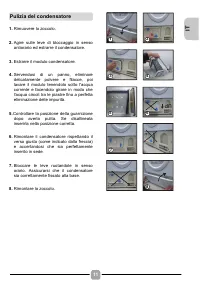
IT 11 1. Rimuovere lo zoccolo. 2. Agire sulle leve di bloccaggio in senso antiorario ed estrarre il condensatore. 3. Estrarre il modulo condensatore. 4. Servendosi di un panno, eliminare delicatamente polvere e filacce, poi lavare il modulo tenendolo sotto l'acqua corrente e facendolo girare in modo...
Page 12 - CONSIGLI PRATICI; Preparazione dei capi; Risparmio energia
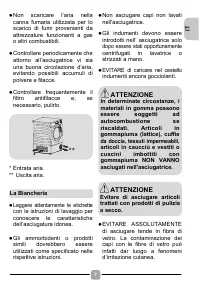
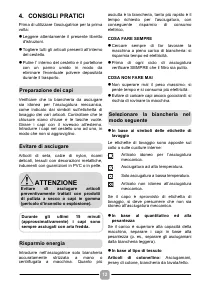
12 4. CONSIGLI PRATICI Prima di utilizzare l’asciugatrice per la prima volta: l Leggere attentamente il presente libretto d'istruzioni. l Togliere tutti gli articoli presenti all’interno del cestello. l Pulire l’ interno del cestello e il portellone con un panno umido in modo da eliminare l’eventual...
Page 13 - Articoli sintetici:; Pulizia dell’asciugatrice; macchina
IT 13 Articoli sintetici: Camicette, camicie, tute ecc. in poliestere o poliammide e misti cotone/sintetici. l Si consiglia di pulire il filtro e di svuotare la vaschetta dell’acqua dopo ogni ciclo di asciugatura. l Pulire regolarmente il condensatore. l Dopo l'uso, pulire l'interno del cestello e l...
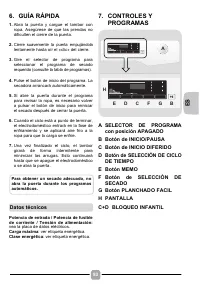
Page 15 - Efficienza Energetica:; COMANDI E PROGRAMMI; A Manopola
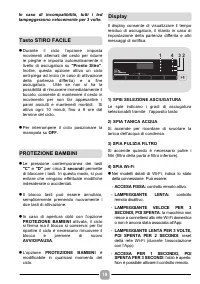
IT 15 6. GUIDA RAPIDA ALL'USO 1. Aprire la porta e caricare la biancheria nel cesto. Assicurarsi che i capi non si incastrino nella porta. 2. Chiudere gentilmente la porta fino a sentire un "click". 3. Ruotare la manopola programmi e scegliere il programma di asciugatura desiderato (per dett...
Page 16 - Prima accensione
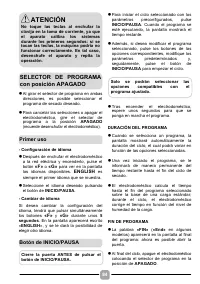
16 l Ruotando la manopola in entrambe le direzioni è possibile selezionare il programma di asciugatura desiderato. l Per annullare il programma selezionato o spegnere l’asciugatrice, ruotare la manopola in posizione OFF (ricordarsi anche di togliere la spina). - Impostazione lingua l Dopo aver colle...
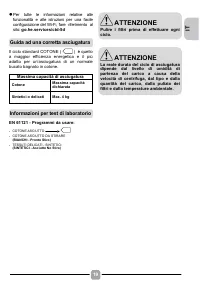
Page 19 - Massima capacità di asciugatura; Guida ad una corretta asciugatura
IT 19 l Per tutte le informazioni relative allefunzionalità e alle istruzioni per una facileconfigurazione del Wi-Fi, fare riferimento al sito: go.he.services/ctd-5d Il ciclo standard COTONE ( ) è quello a maggior efficienza energetica e il più adatto per un’asciugatura di un normale bucato bagnato ...
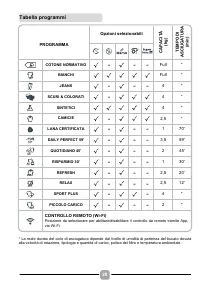
Page 20 - Tabella programmi
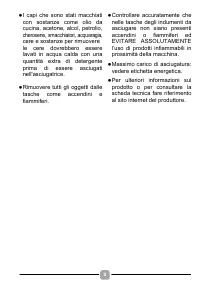
20 PROGRAMMA Opzioni selezionabili CA P A CI T À (k g ) TEM PO D I AS C IU GAT U R A (m in ) COTONE NORMATIVO - - - Full * BIANCHI Full * JEANS - - - 4 * SCURI & COLORATI - 4 * SINTETICI 4 * CAMICIE - 2,5 * LANA CERTIFICATA - - - 1 70' DAILY PERFECT 59' - - - 3,5 59' QUOTIDIANO 45' - - - 2 45' R...
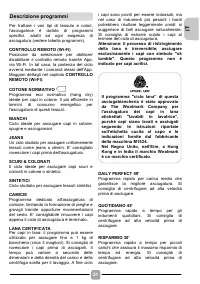
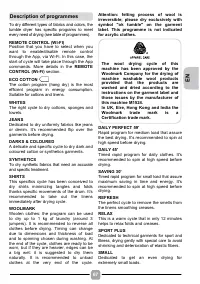
Page 21 - Descrizione programmi
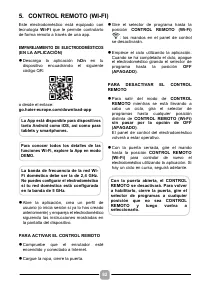
IT 21 Per trattare i vari tipi di tessuto e colori, l’asciugatrice è dotata di programmi specifici, adatti ad ogni esigenza di asciugatura (vedere tabella programmi). CONTROLLO REMOTO (Wi-Fi) Posizione da selezionare per abilitare/ disabilitare il controllo remoto tramite App, via Wi-Fi. In tal caso...
Page 23 - L’asciugatrice non funziona; Servizio assistenza clienti
IT 23 8. RISOLUZIONE PROBLEMI E GARANZIA Problemi che può risolvere l’utente. Prima di rivolgersi al Centro Assistenza consultare la seguente checklist. La chiamata verrà addebitata all'utente nel caso in cui risulti che la macchina funziona o è stata installata o utilizzata in maniera errata. Se il...
Page 24 - Servizio assistenza tecnica
24 Per assistenza e riparazioni, rivolgersi al tecnico del Servizio Assistenza più vicino. Apponendo la marcatura su questo prodotto, dichiariamo, sotto la nostra responsabilità, di ottemperare a tutti i requisiti relativi alla tutela di sicurezza, salute e ambiente previsti dalla legislazione europ...
Page 26 - Inhalt
26 Vielen Dank, dass Sie sich für dieses Produkt entschieden haben. Wir freuen uns, Ihnen das ideale Produkt und das bestmögliche, vollständige Sortiment an Haushaltsgeräten für Ihren Alltag bieten zu können. Bitte lesen Sie diese Anleitung sorgfältig durch und richten Sie sich bei der Bedienung der...
Page 27 - SICHERHEITSHINWEISE; und Kleidungsstücken.; WARNUNG
DE 27 1. GENERELLE SICHERHEITSHINWEISE l Dieses Gerät ist ausschließlichfür den Haushaltsgebrauch konzipiertbzw. für den haushaltsnahenGebrauch, wie z.B: - Teeküchen für das Personal von Büros, Geschäften oder ähnlichenArbeitsbereichen; - Ferienhäuser;- Gäste von Hotels, Motels und anderen Wohneinri...
Page 28 - An der Stelle an der sich das; Wäschestücke
28 l Lehnen Sie sich nicht gegen die Tür, wenn Sie die Maschine beladen, und fassen Sie die Maschine nicht an der Tür, wenn Sie sie hochheben oder verschieben. l Verwenden Sie die Maschine bei vermuteten Störungen nicht weiter. l Den Trockner nicht einsetzen, wenn für die Reinigung Chemikalien verwe...
Page 29 - Installation
DE 29 l Bitte das Gerät keinesfalls in einem Raum mit zu niedriger Raumtemperatur, außerhalb geschlossener Räume oder im Freien in Betrieb nehmen. Bei diesen Umgebungsbedingungen ist der ordnungsgemäße Betrieb des Gerätes nicht gewährleistet bzw. das Gerät könnte Schaden nehmen (Flüssigkeiten im Hyd...
Page 30 - oder
30 l Die technischen Details (Versorgungsspannung und Leistungsaufnahme) sind auf dem Typenschild angegeben. l Vergewissern Sie sich, dass die elektrische Anlage geerdet ist, alle geltenden Gesetze eingehalten werden und dass Ihre Steckdose mit dem Stecker des Gerätes kompatibel ist. Ansonsten holen...
Page 31 - Die Wäsche; entzünden
DE 31 l Die Abluft darf nicht in einen Kaminschacht geleitet werden, der für das Ableiten von Rau ch aus der Verbrennung von Gas oder anderen Brennstoffen verwendet wird. l Prüfen Sie in regelmäßigen Abständen, dass die Luftzirkulation im und um den Trockner nicht blockiert wird, und verhindern Sie,...
Page 34 - KONDENSATOR; Filter; Verstopfte; Filter vor jedem Durchgang reinigen.
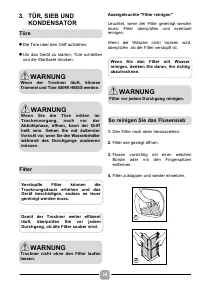
34 3. TÜR, SIEB UND KONDENSATOR l Die Türe über den Griff aufziehen. l Um das Gerät zu starten, Türe schließen und die Starttaste drücken. Anzeigeleuchte "Filter reinigen" Leuchtet, wenn der Filter gereinigt werden muss: Filter überprüfen und eventuell reinigen. Wenn die Wäsche nicht trocken...
Page 35 - So reinigen Sie den Kondensator
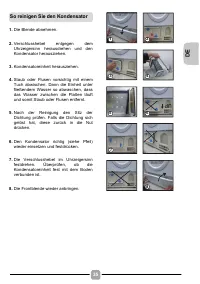
DE 35 1. Die Blende abnehmen. 2. Verschlusshebel entgegen dem Uhrzeigersinn herausdrehen und den Kondensator herausziehen. 3. Kondensatoreinheit herausziehen. 4. Staub oder Flusen vorsichtig mit einem Tuch abwischen. Dann die Einheit unter fließendem Wasser so abwaschen, dass das Wasser zwischen die...
Page 36 - PRAKTISCHE TIPPS; IMMER; NIE; Anhand der Pflegeanleitungssymbole; Nach Menge und Volumen; Vorbereitung der Textilien; chemischen; Energiesparen
36 4. PRAKTISCHE TIPPS Bevor Sie den Trockner das erste Mal benutzen: l Lesen Sie die Gebrauchsanleitung bitte sorgfältig durch! l Entfernen Sie alle in der Trommel befindlichen Gegenstände! l Wischen Sie die Innenseiten der Trommel und Tür mit einem feuchten Tuch aus, um den beim Transport eventuel...
Page 37 - Nach Stoffart; Textilien aus Kunstfaser:; Überladen Sie die Trommel nicht,; Reinigung des Trockners; Trommel, Tür und die Wäsche selbst; Die Daten für die Elektrik finden Sie
DE 37 l Nach Stoffart Baumwolle/Leinen: Handtücher, Baumwolljersey , Bett- und Tischwäsche. Textilien aus Kunstfaser: Blusen, Hemden, Overalls, usw. aus Polyester oder Polyamid und auch Baumwoll/Synthetikgemische. l Reinigen Sie nach jedem Trocknungsvorgang das Flusensieb und leeren Sie den Kondensw...
Page 39 - Maximale Ladekapazität:; PROGRAMME; A PROGRAMMAUSWAHL STEHT
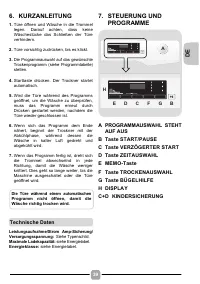
DE 39 6. KURZANLEITUNG 1. Türe öffnen und Wäsche in die Trommel legen. Darauf achten, dass keine Wäschestücke das Schließen der Türe verhindern. 2. Türe vorsichtig zudrücken, bis es klickt. 3. Die Programmauswahl auf das gewünschte Trockenprogramm (siehe Programmtabelle) stellen. 4. Starttaste drück...
Page 40 - Erste Inbetriebnahme
40 l Über die Programmauswahl können in beiden Richtungen Trockenprogramme ausgewählt werden. l Um die Auswahl abzubrechen oder das Gerät auszuschalten, die Programmauswahl auf AUS stellen (und den Netzstecker des Geräts ziehen). - Spracheinstellung l Nachdem die Maschine an die Stromversorgung ange...
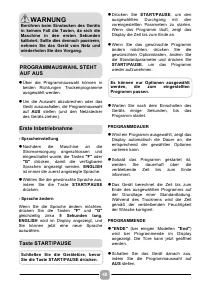
Page 41 - Taste VERZÖGERTER START
DE 41 UNTERBRECHEN DER MASCHINE l Halten Sie die Taste START/PAUSE zirka 2 Sekunden gedrückt (der Programmname und die Restzeitanzeige blinken, was bedeutet dass die Maschine unterbrochen wurde). l Drücken Sie erneut die Taste START/PAUSE , um das Programm ab dem Punkt neu zu starten, an dem es ange...
Page 42 - Taste BÜGELHILFE
42 Aufhängtrocken : Die Wäsche kann auf einen Bügel gehängt werden. Schranktrocken : Die Wäsche kann direkt in den Schrank gelegt werden. Extratrocken : Die Wäsche ist vollständig trocken; ideales Programm für volle Waschladung. l Dieses Gerät verfügt über eine Drying Manager -Funktion. Bei automati...
Page 43 - Anleitung zum Trocknen
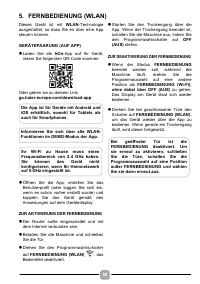
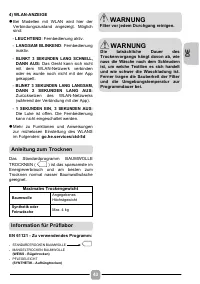
DE 43 4) WLAN-ANZEIGE l Bei Modellen mit WLAN wird hier derVerbindungszustand angezeigt. Möglichsind: - LEUCHTEND : Fernbedienung aktiv. - LANGSAM BLINKEND : Fernbedienung inaktiv. - BLINKT 3 SEKUNDEN LANG SCHNELL, DANN AUS: Das Gerät kann sich nicht mit dem WLAN-Netzwerk verbindenoder es wurde noch...
Page 44 - Programmtabelle
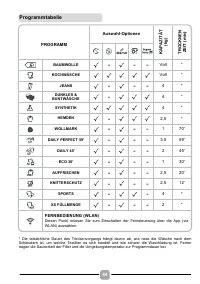
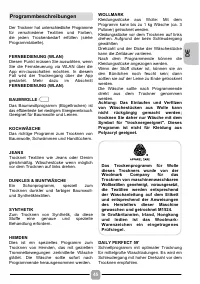
44 PROGRAMM Auswahl-Optionen KA P A Z IT Ä T (k g ) TR O C K N EN ZE IT ( m in) BAUMWOLLE - - - Voll * KOCHWÄSCHE Voll * JEANS - - - 4 * DUNKLES & BUNTWÄSCHE - 4 * SYNTHETIK 4 * HEMDEN - 2,5 * WOLLMARK - - - 1 70' DAILY PERFECT 59' - - - 3,5 59' DAILY 45' - - - 2 45' ECO 30' - - - 1 30' AUFFRISC...
Page 45 - Programmbeschreibungen
DE 45 Der Trockner hat unterschiedliche Programme für verschiedene Textilien und Farben, die jeden Trockenbedarf erfüllen (siehe Programmtabelle). FERNBEDIENUNG (WLAN) Diesen Punkt müssen Sie auswählen, wenn Sie die Fernsteuerung via WLAN über die App ein-/ausschalten möchten. In diesem Fall wird de...
Page 47 - UND GARANTIE; Fehler, die Sie selbst beheben können; ändern. Die Restzeit wird kontinuierlich; Der Trockner funktioniert nicht; Der Trockner ist zu laut; Kundendienst
DE 47 8. PROBLEMLÖSUNGEN UND GARANTIE Fehler, die Sie selbst beheben können Prüfen Sie alle Punkte in der folgenden Checkliste, bevor Sie sich an den Service wenden. Sollte die Maschine funktionstüchtig sein oder unsachgemäß installiert oder verwendet worden sein, wird Ihnen der Besuch des Kundendie...
Page 48 - Mit der Anbringung des; Technischer Kundendienst; Garantie
48 Verwenden Sie immer Original-Ersatzteile, die Sie direkt beim Service erhalten. Wenden Sie sich für Wartungs und Reparaturarbeiten an Ihren Servicetechniker. Mit der Anbringung des -Zeichens am Gerät zeigen wir an, dass wir sämtliche für dieses Produkt geltenden und notwendigen europäischen Siche...
Page 49 - Contents
EN 49 Thank you for choosing this product. We are proud to offer the ideal product for you and the best complete range of home appliances for your daily routine. Please read and follow these instructions carefully and operate the machine accordingly. This booklet provides important guidelines for sa...
Page 50 - RULES; - Staff kitchen areas in shops, offices; WARNING
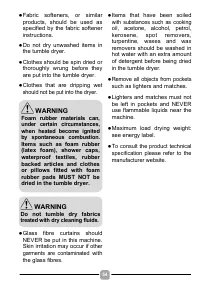
50 1. GENERAL SAFETY RULES l This appliance is intended to be used in household and similar applications such as: - Staff kitchen areas in shops, offices and other working environments; - Farm houses; - By clients in hotels, motels and other residential type environments; - Bed and breakfast type en...
Page 51 - is located the
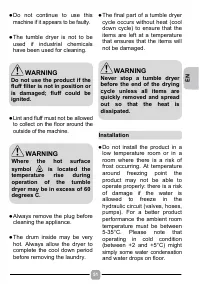
EN 51 l Do not continue to use this machine if it appears to be faulty. l The tumble dryer is not to be used if industrial chemicals have been used for cleaning. l Lint and fluff must not be allowed to collect on the floor around the outside of the machine. l Always remove the plug before cleaning t...
Page 53 - Ventilation; The Laundry
EN 53 l Do not use adapters, multipleconnectors and/or extensions. l The plug should be accessiblefor disconnection after theappliance has been installed. l Do not plug the machine in andswitch it on at the mains untilthe installation is completed. l If the supply cord is damaged,it must be replaced...
Page 55 - When full, the water container will
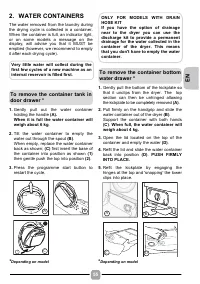
EN 55 2. WATER CONTAINERS The water removed from the laundry during the drying cycle is collected in a container. When the container is full, an indicator light, or on some models a message on the display, will advise you that it MUST be emptied (however, we recommend to empty it after each drying c...
Page 56 - CONDENSER; Filter cleaning indicator light; Door
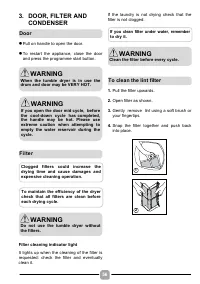
56 3. DOOR, FILTER AND CONDENSER l Pull on handle to open the door. l To restart the appliance, close the doorand press the programme start button. Filter cleaning indicator light It lights up when the cleaning of the filter is requested: check the filter and eventually clean it. If the laundry is n...
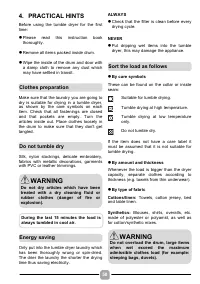
Page 58 - ALWAYS; By amount and thickness; Clothes preparation; Energy saving
58 4. PRACTICAL HINTS Before using the tumble dryer for the first time: l Please read this instruction book thoroughly. l Remove all items packed inside drum. l Wipe the inside of the drum and door with a damp cloth to remove any dust which may have settled in transit. Make sure that the laundry you...
Page 59 - Cleaning the dryer
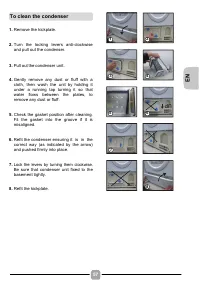
EN 59 l Clean the filter and empty the watercontainer after every drying cycle. l Regularly clean the condenser. l After each period of use, wipe the insideof the drum and leave the door open for awhile to allow circulation of air to dry it. l Wipe the outside of the machine and thedoor with a soft ...
Page 61 - OFF; PROGRAMMES; A PROGRAMME SELECTOR with
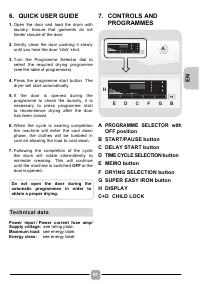
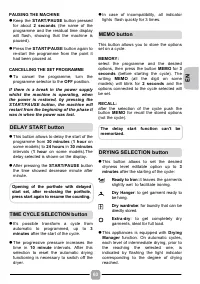
EN 61 6. QUICK USER GUIDE 1. Open the door and load the drum withlaundry. Ensure that garments do nothinder closure of the door. 2. Gently close the door pushing it slowlyuntil you hear the door 'click' shut. 3. Turn the Programme Selector dial toselect the required drying programme(see the table of...
Page 62 - First starting
62 l Rotating the programme selector in bothdirections it's possible to select thedesired drying programme. l To cancel the selections or switch off theappliance rotate the programme selectoron OFF (remember to unplug the appliance). - Language setting l After connecting the machine to thenetwork an...
Page 65 - Maximum Drying Weight; Drying Guide; Clean the filters before every cycle.
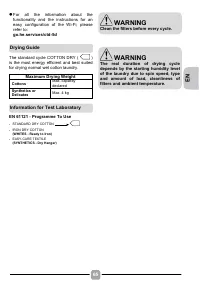
EN 65 l For all the information about thefunctionality and the instructions for aneasy configuration of the Wi-Fi, pleaserefer to: go.he.services/ctd-5d The standard cycle COTTON DRY ( ) is the most energy efficient and best suited for drying normal wet cotton laundry. Maximum Drying Weight Cottons ...
Page 68 - AND WARRANTY; Defects you can remedy yourself; Customer Service
68 8. TROUBLESHOOTING AND WARRANTY Defects you can remedy yourself Before calling Service for technical advice please run through the following checklist. A charge will be made if the machine is found to be working or has been installed incorrectly or used incorrectly. If the problem persists after ...
Page 70 - Índice
70 Gracias por haber elegido este producto. Estamos orgullosos de ofrecer el producto ideal para ti y la mejor gama completa de electrodomésticos para tu rutina diaria. Por favor lea cuidadosamente estas instrucciones y utilice la máquina según las indicaciones. Este folleto presenta directrices imp...
Page 71 - SEGURIDAD; Este; ATENCIÓN
ES 71 1. NORMAS DE SEGURIDAD l Este producto es exclusivamentepara uso doméstico o similar: − zona de cocina para elpersonal de tiendas, oficinas yotros entornos laborales; − granjas; − pasajeros de hoteles, motelesu otros entornos residenciales; − hostales (B&B). No se recomienda el uso de este...
Page 73 - Instalación
ES 73 l No instalar el producto en unahabitación expuesta a bajas temperaturas o en la que exista riesgo de formación de hielo. A la temperatura de congelación del agua, el producto podría no funcionar correctamente. Si el agua del circuito hiela, se pueden producir daños en los componentes tales co...
Page 74 - Ventilación
74 l Los detalles técnicos (suministrode corriente y entrada dealimentación) están indicados enla placa de características delproducto. l Asegúrate de que el Sistemaeléctrico dispone de conexiónde tierra, de que cumple conlos requisitos legales y de que latoma de corriente es compatiblecon el enchuf...
Page 75 - La Colada; Los
ES 75 l El aire extra do no debe descargarse dentro de un conducto que sea utilizado para expulsar humos de aparatos que quemen gas u otros combustibles. l Compruebe con regularidad que no haya restricciones para el aire que fluye alrededor de la secadora, para ello preste atención a evitar que se a...
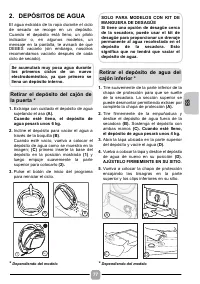
Page 77 - DEPÓSITOS DE AGUA; Cuando esté lleno, el depósito de; Cuando esté lleno,
ES 77 2. DEPÓSITOS DE AGUA El agua extraída de la ropa durante el ciclo de secado se recoge en un depósito. Cuando el depósito está lleno, un piloto indicador o, en algunos modelos, un mensaje en la pantalla, te avisará de que DEBES vaciarlo (sin embargo, nosotros recomendamos vaciarlo después de ca...
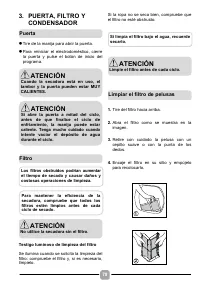
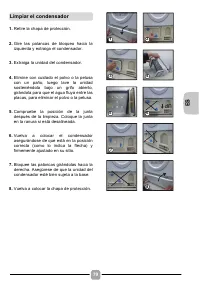
Page 78 - CONDENSADOR; Testigo luminoso de limpieza del filtro; No utilice la secadora sin el filtro.
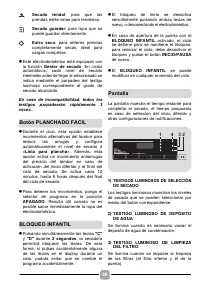
78 3. PUERTA, FILTRO Y CONDENSADOR l Tire de la manija para abrir la puerta. l Para reiniciar el electrodoméstico, cierre la puerta y pulse el botón de inicio del programa. Testigo luminoso de limpieza del filtro Se ilumina cuando se solicita la limpieza del filtro: compruebe el filtro y, si es nece...
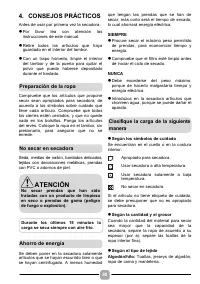
Page 80 - CONSEJOS PRÁCTICOS; SIEMPRE; Según la cantidad y el grosor; Preparación de la ropa; Ahorro de energía
80 4. CONSEJOS PRÁCTICOS Antes de usar por primera vez la secadora: l Por favor lea con atención lasinstrucciones de este manual. l Retire todos los artículos que hayaguardado en el interior del tambor. l Con un trapo húmedo, limpie el interiordel tambor y de la puerta para quitar elpolvo que pueda ...
Page 81 - Limpieza de la secadora
ES 81 Fibras sintéticas: Blusas, camisas, monos, etc. hechos de poliéster o poliamida y también para mezclas de algodón/fibras sintéticas. l Limpiar el filtro y vaciar el depósito de agua después de cada ciclo de secado. l Limpiar el condensador regularmente. l Después de usar la secadora pase un tr...
Page 83 - PROGRAMAS; A SELECTOR DE PROGRAMA
ES 83 6. GUÍA RÁPIDA 1. Abra la puerta y cargue el tambor con ropa. Asegúrese de que las prendas no dificulten el cierre de la puerta. 2. Cierre suavemente la puerta empujándola lentamente hasta oír el «clic» del cierre. 3. Gire el selector de programa para seleccionar el programa de secado requerid...
Page 84 - ENGLISH; Primer uso
84 l Al girar el selector de programa en ambas direcciones, es posible seleccionar el programa de secado deseado. l Para cancelar las selecciones o apagar el electrodoméstico, gire el selector de programa a la posición APAGADO (recuerde desenchufar el electrodoméstico). - Configuración de idioma l D...
Page 85 - Botón de INICIO DIFERIDO
ES 85 PAUSAR EL ELECTRODOMÉSTICO l Mantenga pulsado el botón de INICIO/ PAUSA durante aproximadamente 2 segundos (el nombre del programa y el tiempo restante parpadearán en la pantalla, lo que indica que el electrodoméstico está en pausa). l Vuelva a pulsar el botón de INICIO/PAUSA para reiniciar el...
Page 87 - Peso máximo de secado; Guía de secado; Limpie los filtros antes de cada ciclo.
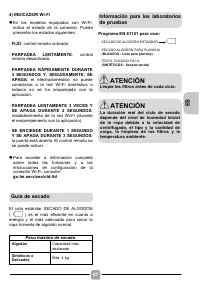
ES 87 4) INDICADOR Wi-Fi l En los modelos equipados con Wi-Fi,indica el estado de la conexión. Puedepresentar los estados siguientes: - FIJO : control remoto activado. - PARPADEA LENTAMENTE : control remoto desactivado. - PARPADEA RÁPIDAMENTE DURANTE3 SEGUNDOS Y, SEGUIDAMENTE, SEAPAGA : el electrodo...
Page 88 - Tabla de programas
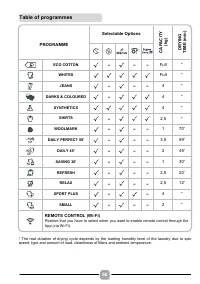
88 PROGRAMA Opciones seleccionables CA P A CI DA D (k g ) TI EM PO D E SEC A D O ( m in ) ALGODÓN - - - Lleno * BLANCOS Lleno * VAQUEROS - - - 4 * OSCURA Y DE COLOR - 4 * SINTÉTICOS 4 * CAMISAS - 2,5 * LANA - - - 1 70' DIARIO PERFECTO 59' - - - 3,5 59' DIARIO 45' - - - 2 45' ECO 30' - - - 1 30' REFR...
Page 89 - Descripción de los programas
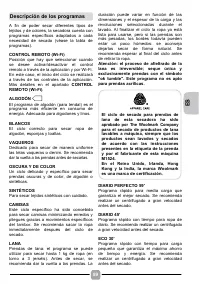
ES 89 A fin de poder secar diferentes tipos de tejidos y de colores, la secadora cuenta con programas específicos adaptados a cada necesidad de secado (véase la tabla de programas). CONTROL REMOTO (Wi-Fi) Posición que hay que seleccionar cuando se desee activar/desactivar el control remoto a través ...
Page 91 - AVERÍAS Y GARANTÍA; La secadora no funciona; Servicio de atención al cliente
ES 91 8. DIAGNÓSTICO DE AVERÍAS Y GARANTÍA Defectos que puede solucionar usted mismo Antes de llamar al Servicio técnico de para obtener asesoramiento técnico, lea detenidamente la siguiente lista de comprobación. Se cobrará el servicio técnico si resulta que la máquina funciona correctamente, o si ...
Page 92 - Servicio de recambios; Garantía
92 Utilice siempre recambios originales, que se pueden conseguir a través del Servicio técnico. Para mantenimiento y reparaciones, llame al ingeniero del Servicio técnico local. Al mostrar el logo marcado en este producto, declaramos, bajo nuestra propia responsabilidad, el cumplimiento de todos los...
Page 94 - Index
94 Merci d'avoir choisi ce produit. Nous sommes fiers d’offrir le produit idéal pour vous et la meilleure gamme complète d’électroménagers pour votre routine quotidienne. Veuillez lire et suivre ces instructions avec soin et utiliser la machine en conséquence. Ce livret contient des instructions imp...
Page 95 - ATTENTION
FR 95 1. RÈGLES GÉNÉRALES DE SÉCURITÉ l Le produit est conçu pour être utilisé dans un foyer domestique, comme: - Le coin cuisine dans des magasins ou des lieux de travail, - Employés et clients dans un hôtel, un motel ou résidence de ce type, - Dans des bed and breakfast, - Service de stock ou simi...
Page 99 - Le Linge; de
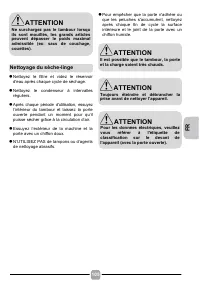
FR 99 l L’air d’échappement ne doit pas être évacué par un conduit qui est également utilisé pour évacuer le sfumées d’échappement d’appareils qui brûlent du gaz ou d’autres combustibles. l Contrôlez régulièrement qu’il n’y a aucune restriction au flux d’air autour du sèche-linge, en évitant l’accum...
Page 101 - Lorsque le conteneur
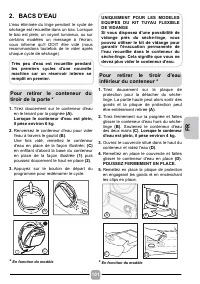
FR 101 2. BACS D'EAU L'eau éliminée du linge pendant le cycle de séchage est recueillie dans un bac. Lorsque le bac est plein, un voyant lumineux, ou sur certains modèles un message à l'écran, vous informe qu'il DOIT être vidé (nous recommandons toutefois de le vider après chaque cycle de séchage). ...
Page 102 - CONDENSATEUR; Voyant de nettoyage du filtre; Nettoyez le filtre avant chaque cycle.
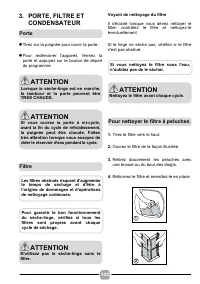
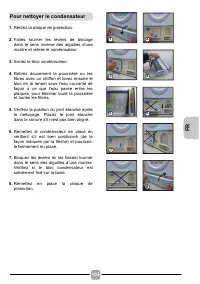
102 3. PORTE, FILTRE ET CONDENSATEUR l Tirez sur la poignée pour ouvrir la porte. l Pour redémarrer l'appareil, fermez laporte et appuyez sur le bouton de départdu programme. Voyant de nettoyage du filtre Il s'éclaire lorsque vous devez nettoyer le filtre: contrôlez le filtre et nettoyez-le éventuel...
Page 104 - CONSEILS PRATIQUES; Préparation des vêtements; Triez la charge comme suit
104 4. CONSEILS PRATIQUES Avant d’utiliser le sèche-linge pour la première fois: l Veuillez lire ce manuel d’instruction en détail. l Retirez tous les articles qui se trouvent à l’intérieur du tambour. l Essuyez l’intérieur du tambour et de la porte avec un chiffon humide pour éliminer la poussière ...
Page 105 - Nettoyage du sèche-linge; référer
FR 105 l Nettoyez le filtre et videz le réservoir d'eau après chaque cycle de séchage. l Nettoyez le condenseur à intervalles réguliers. l Après chaque pèriode d'utilisation, essuyez l’intérieur du tambour et laissez la porte ouverte pendant un moment pour qu’il puisse sécher grâce à la circulation ...
Page 107 - A SÉLECTEUR DE PROGRAMME; automatiques
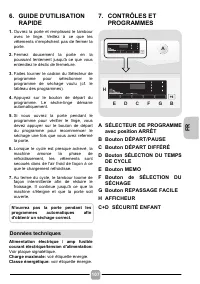
FR 107 6. GUIDE D'UTILISATION RAPIDE 1. Ouvrez la porte et remplissez le tambour avec le linge. Veillez à ce que les vêtements n'empêchent pas de fermer la porte. 2. Fermez doucement la porte en la poussant lentement jusqu'à ce que vous entendiez le déclic de fermeture. 3. Faites tourner le cadran d...
Page 108 - Premier démarrage
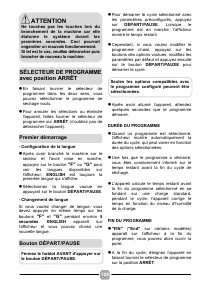
108 l En faisant tourner le sélecteur de programme dans les deux sens, vous pouvez sélectionner le programme de séchage voulu. l Pour annuler les sélections ou éteindre l'appareil, faites tourner le sélecteur de programme sur ARRÊT (n'oubliez pas de débrancher l'appareil). - Configuration de la lang...
Page 111 - Guide de séchage
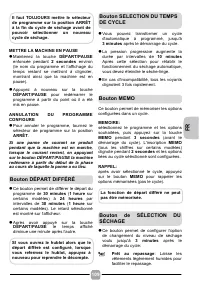
FR 111 4) INDICATEUR Wi-Fi l Sur les modèles équipés du Wi-Fi, cevoyant indique l’état de la connexion. Ilpeut: - ÊTRE ALLUMÉ EN CONTINU : contrôle à distance activé. - CLIGNOTER LENTEMENT : contrôle à distance désactivé. - CLIGNOTER RAPIDEMENT 3 SECONDES, PUIS S’ÉTEINDRE : la machine n’arrive pas à...
Page 112 - Tableau des programmes
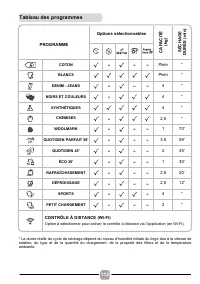
112 PROGRAMME Options sélectionnables CA P A CI T É (k g ) SÉC H A G E DURÉ E ( m in ) COTON - - - Plein * BLANCS Plein * DENIM - JEANS - - - 4 * NOIRS ET COULEURS - 4 * SYNTHÉTIQUES 4 * CHEMISES - 2,5 * WOOLMARK - - - 1 70' QUOTIDIEN PARFAIT 59' - - - 3,5 59' QUOTIDIEN 45' - - - 2 45' ÉCO 30' - - -...
Page 113 - Description des programmes
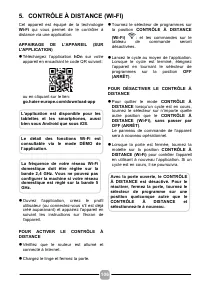
FR 113 Pour sécher différents types de tissus et couleurs, le sèche-linge a des programmes spécifiques pour répondre à toutes les exigences de séchage (voir le tableau des programmes). CONTRÔLE À DISTANCE (Wi-Fi) Option à sélectionner pour activer/ désactiver par Wi-Fi le contrôle à distance via l’a...
Page 115 - GARANTIES; Le sèche-linge ne fonctionne pas; Service clientèle
FR 115 8. DÉPANNAGE ET GARANTIES Défauts que vous pouvez rectifier vous-même Avant d’appeler le service pour obtenir des conseils, veuillez suivre la liste des vérifications ci-dessous. L’intervention sera facturée si la machine fonctionne correctement ou si elle a été installée ou utilisée de maniè...