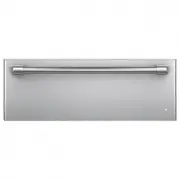
Page 2 - Electric Warming Drawer; Contents; Owner’s Manual & Installation Instructions; Español
Write the model and serial numbers here: Model # _______________________________ Serial # _______________________________ You can find them on a label located on the backside of the lower drawer front. 49-2000685 Rev. 1 06-20 GEA Electric Warming Drawer Model: CTW900M and CTW900P Contents Safety Inf...
Page 3 - THANK YOU FOR MAKING CAFÉ A PART OF YOUR HOME.
2 49-2000685 Rev. 1 THANK YOU FOR MAKING CAFÉ A PART OF YOUR HOME. We take pride in the craftsmanship, innovation and design that goes into every Café product, and we think you will too. Among other things, registration of your appliance ensures that we can deliver important product information and ...
Page 4 - READ ALL INSTRUCTIONS BEFORE USING THE APPLIANCE; IMPORTANT SAFETY NOTICE; WARNING; GENERAL SAFETY INSTRUCTIONS; CAUTION
49-2000685 Rev. 1 3 SAFETY INFORMATION READ AND SAVE THESE INSTRUCTIONS IMPORTANT SAFETY INFORMATION READ ALL INSTRUCTIONS BEFORE USING THE APPLIANCE WARNING Read all safety instructions before using the product. Failure to follow these instructions may result in fire, electrical shock, serious inju...
Page 5 - KEEP FLAMMABLE MATERIALS AWAY FROM THE WARMING DRAWER; IN THE EVENT OF A FIRE, TAKE THE FOLLOWING; WARMING DRAWER SAFETY INSTRUCTIONS; How to Remove Protective Shipping Film and Packaging Tape
4 49-2000685 Rev. 1 SAFETY INFORMATION READ AND SAVE THESE INSTRUCTIONS IMPORTANT SAFETY INFORMATION READ ALL INSTRUCTIONS BEFORE USING THE APPLIANCE WARNING KEEP FLAMMABLE MATERIALS AWAY FROM THE WARMING DRAWER Failure to do so may result in fire or personal injury. Ŷ 'RQRWVWRUHRUXVHIODPPDEOHPDWHUL...
Page 6 - Features; Control Knob; ON Signal Light; Moisture Selector
49-2000685 Rev. 1 5 Features USING THE W ARMING DRA WER: Features 1RWDOOIHDWXUHVDUHRQDOOPRGHOV$SSHDUDQFHPD\YDU\ The warming drawer will keep hot, cooked foods at serving temperature. Always start with hot food. Do not use to heat cold food other than proofing yeast dough, crisping crackers, chips or...
Page 7 - Operating Tips; Rack; USING THE W; Operating; When Using The Warming Drawer; To Warm Serving Bowl And Plates
6 49-2000685 Rev. 1 Operating Tips Rack Ŷ 5DFNZLOOILWIURPIURQWWREDFN Ŷ 3UHKHDWZLWKWKHUDFNLQSODFH Ŷ 8VLQJWKHUDFNDOORZVIRUGRXEOHVWDFNLQJRILWHPV USING THE W ARMING DRA WER: Operating T ips Double stacking items with the rack in position. When Using The Warming Drawer Do not line the warming drawer with...
Page 8 - To Proof Yeast Bread Dough; To Crisp Stale Items
49-2000685 Rev. 1 7 Operating Tips To Proof Yeast Bread Dough Yeast dough can be proofed in the warming drawer. Ŷ 3ODFH\RXUGLVKRQWKHZDUPLQJGUDZHUERWWRP Ŷ <RXPXVWDOZD\VWXUQWKHFRQWURONQREWR LOW then immediately back to PROOF . Ŷ &ORVHWKHYHQW Ŷ /LJKWO\RLOWKHWRSRIWKHGRXJKLQDERZOODUJHHQRXJK to dou...
Page 9 - Temperature Selection Chart for Moist Foods
8 49-2000685 Rev. 1 Mois t Closed Vent Operating Tips Temperature Selection Chart for Moist Foods To keep several different foods hot, set the temperature to the food needing the highest setting. Place the items needing the highest setting on the bottom of the drawer and items needing less heat on t...
Page 10 - Cleaning The Warming Drawer; Painted Or Enameled Surfaces; CARE AND; Cleaning; Stainless Steel
49-2000685 Rev. 1 9 Cleaning The Warming Drawer %HVXUHWKHFRQWUROVDUHLQWKH2))SRVLWLRQDQGDOOVXUIDFHVDUHFRROEHIRUHFOHDQLQJDQ\SDUWRIWKHZDUPLQJGUDZHU Painted Or Enameled Surfaces 8VHVRDSDQGZDUPZDWHUWRWKRURXJKO\FOHDQ CARE AND CLEANING: Cleaning The W a rming Drawer Stainless Steel Do not use a steel wool ...
Page 11 - BEFORE YOU BEGIN; IMPORTANT; MATERIALS YOU WILL NEED; Warming Drawer
10 49-2000685 Rev. 1 Installation Instructions If you have questions visit our website at: cafeappliances.com BEFORE YOU BEGIN Read these instructions completely and carefully. Ŷ IMPORTANT – Save these instructions for local inspector’s use. Ŷ IMPORTANT – Observe all governing codes and ordinances. ...
Page 12 - GROUNDING INSTRUCTIONS
49-2000685 Rev. 1 11 INST ALLA TION INSTRUCTIONS Installation Instructions IMPORTANT SAFETY INSTRUCTIONS PRE-INSTALLATION CHECKLIST GROUNDING INSTRUCTIONS IMPORTANT—(Please read carefully) FOR PERSONAL SAFETY, THIS APPLIANCE MUST BE PROPERLY GROUNDED. This warming drawer must be supplied with 120V, ...
Page 13 - INSTALLATION INSTRUCTIONS
12 49-2000685 Rev. 1 Installation Instructions PREPARING CABINET: BELOW A COUNTERTOP Ŷ When installed, the front face of the warming drawer will be nearly flush with cabinetry doors or drawer fronts. Ŷ Drawer overlaps will conceal cut edges on all sides of the opening. The rough opening for the draw...
Page 14 - PREPARING CABINET: BELOW WALL OVENS; INSTALLATION BELOW A SINGLE OVEN; INST
49-2000685 Rev. 1 13 PREPARING CABINET: BELOW WALL OVENS INSTALLATION BELOW A SINGLE OVEN INSTALLATION BELOW A DOUBLE OVEN Ŷ When installed, the front face of the warming drawer will be nearly flush with cabinetry doors or drawer fronts. Ŷ 'UDZHURYHUODSVZLOOFRQFHDOFXWHGJHVRQDOOVLGHV of the opening. ...
Page 15 - PREPARE THE INTERIOR
14 49-2000685 Rev. 1 Installation Instructions INSTALLING CABINET SUPPORT FLUSHMOUNT INSTALLATION PREPARATION (for CTW900M models only) IMPORTANT: When installed below a single or double oven, check to be sure that any oven supports above the cutout do not obstruct the 22-1/2" or 23-1/2" req...
Page 16 - INSTALLING ANTI-TIP BRACE; INSTALLING WARMING DRAWER
49-2000685 Rev. 1 15 INSTALLING ANTI-TIP BRACE 1. Slide the left corner into opening and push power cord into the hole leading to the outlet location. Thread the cord through as drawer is being pushed back into the opening. If the outlet is installed inside the opening, plug the cord into the outlet...
Page 17 - TROUBLESHOOTING TIPS
16 49-2000685 Rev. 1 Problem Possible Cause What To Do Warming drawer will not work A fuse in your home may be blown or the circuit breaker tripped. Replace the fuse or reset the circuit breaker. Warming drawer not plugged in. Plug in. Controls improperly set. 6HHWKH8VLQJWKHZDUPLQJGUDZHUVHFWLRQ Draw...
Page 18 - What Café will not cover:; EXCLUSION OF IMPLIED WARRANTIES; Warrantor: GE Appliances, a Haier company; Café Electric Warming Drawer Limited Warranty; LIMITED W
49-2000685 Rev. 1 17 cafeappliances.com All warranty service is provided by our Factory Service Centers, or an authorized service technician. To schedule service online, visit us at cafeappliances.com/service . Please have your serial number and your model number available when scheduling service. W...
Page 19 - Notes
Page 20 - ACCESSORIES; Looking For Something More?; Accessories
49-2000685 Rev. 1 19 Accessories ´:LGH&XVWRP3DQHO.LW 30” Cafe Pro Custom Handle kits Parts Wire Rack Cleaning Supplies CitruShine™ Stainless Steel Wipes Stainless Steel Appliance Cleaner ACCESSORIES Looking For Something More? GE Appliances offers a variety of accessories to improve your cooking...
Page 22 - Cajón para Calentar Eléctrico; Contenido; Manual del Propietario y Instalación
Escriba los números de modelo y de serie aquí: Nº de Modelo __________________________ Nº de Serie ____________________________ Los podrá encontrar en la etiqueta ubicada en el lado trasero sobre el frente del cajón inferior. 49-2000685 Rev. 1 06-20 GEA Cajón para Calentar Eléctrico Modelos: CTW900M...
Page 23 - GRACIAS POR HACER QUE CAFÉ SEA PARTE DE SU HOGAR.
2 49-2000685 Rev. 1 GRACIAS POR HACER QUE CAFÉ SEA PARTE DE SU HOGAR. Sentimos orgullo por el nivel de arte, innovación y diseño de cada uno de los electrodomésticos de Café, y creemos que usted también. Entre otras cosas, el registro de su electrodoméstico asegura que podamos entregarle información...
Page 24 - INFORMACIÓN DE SEGURIDAD; AVISO IMPORTANTE DE SEGURIDAD; ADVERTENCIA; INSTRUCCIONES GENERALES DE SEGURIDAD; PRECAUCIÓN; LEA Y GUARDE ESTAS INSTRUCCIONES
49-2000685 Rev. 1 3 INFORMACIÓN DE SEGURIDAD ADVERTENCIA Lea todas las instrucciones antes de usar el producto. Si no se siguen estas instrucciones se podrán producir incendios, descargas eléctricas, lesiones graves o la muerte. ADVERTENCIA AVISO IMPORTANTE DE SEGURIDAD Todos los cajones para calent...
Page 25 - MANTENGA LOS MATERIALES INFLAMABLES ALEJADOS DEL; INSTRUCCIONES DE SEGURIDAD DEL CAJÓN PARA CALENTAR
4 49-2000685 Rev. 1 ADVERTENCIA MANTENGA LOS MATERIALES INFLAMABLES ALEJADOS DEL CAJÓN PARA CALENTAR Si esto no se cumple, se podrán sufrir lesiones personales graves o incendios. Ŷ 1RJXDUGHQLXVHPDWHULDOHVLQIODPDEOHVHQR cerca de un cajón para calentar, incluyendo papel, plástico, mangos de ollas, tr...
Page 26 - Funciones; Perilla de Control; Selector de Humedad
49-2000685 Rev. 1 5 Funciones USO DEL CAJÓN P ARA CALENT AR: Funciones No todas las funciones corresponden a todos los modelos. El aspecto puede variar. El cajón para calentar mantendrá las comidas calientes y cocinadas en la temperatura para servir. Siempre comience con comida caliente. No lo use p...
Page 27 - Consejos de Funcionamiento; Estante; USO DEL; Al Usar el Cajón para Calentar; Para Calentar Tazones y Platos para Servir
6 49-2000685 Rev. 1 Consejos de Funcionamiento Estante Ŷ (OHVWDQWHFDO]DUiGHVGHHOIUHQWHKDVWDODSDUWHWUDVHUD Ŷ 3UHFDOLHQWHFRQHOHVWDQWHHQVXSRVLFLyQ Ŷ (OXVRGHOHVWDQWHSHUPLWHXQGREOHDSLODPLHQWRGHORV ítems. USO DEL CAJÓN P ARA CALENT AR: Consejos de Funcionamiento Apilamiento doble de los ítems con el estan...
Page 28 - Para que Ítems Duros queden Crocantes; Cuadro de Selección de Temperatura para Comidas Crocantes
49-2000685 Rev. 1 7 Consejos de Funcionamiento La masa con levadura se podrá leudar en el cajón para calentar. La masa con levadura se podrá leudar en el cajón para calentar. Ŷ &RORTXHVXSODWRHQODSDUWHLQIHULRUGHOFDMyQSDUDFDOHQWDU Ŷ 6LHPSUHGHEHUiJLUDUODSHULOODGHFRQWUROKDVWD/2:%DMR y luego inmediat...
Page 29 - Cuadro de Selección de Temperatura para Comidas Húmedas
8 49-2000685 Rev. 1 Mois t Closed Vent Consejos de Funcionamiento Cuadro de Selección de Temperatura para Comidas Húmedas Para mantener calientes varios tipos de comidas diferentes, programe la temperatura en la configuración para comidas que necesitan el grado más alto. Coloque los ítems que necesi...
Page 30 - Superficies Pintadas o Esmaltadas; CUIDADO Y; Limpieza del Cajón para Calentar; Acero Inoxidable
49-2000685 Rev. 1 9 Limpieza del Cajón para Calentar Asegúrese que todos los controles estén en la posición OFF (Apagado) y que todas las superficies estén frías antes de limpiar cualquier parte del cajón para calentar. Superficies Pintadas o Esmaltadas 8VHDJXDFDOLHQWH\MDEyQSDUDOLPSLDUDIRQGR CUIDADO...
Page 31 - ANTES DE COMENZAR; IMPORTANTE; MATERIALES NECESARIOS; HERRAMIENTAS REQUERIDAS; Cajón para Calentar
10 49-2000685 Rev. 1 Instrucciones de instalación Ante cualquier otra consulta, visite nuestro sitio web en: cafeappliances.com. ANTES DE COMENZAR Lea estas instrucciones en su totalidad y atentamente. Ŷ IMPORTANTE – Conserve estas instrucciones para uso del inspector local. Ŷ IMPORTANTE – Cumpla co...
Page 32 - LISTA DE CONTROL DE PREINSTALACIÓN
49-2000685 Rev. 1 11 INSTRUCCIONES DE INST ALACIÓN Instrucciones de instalación INSTRUCCIONES IMPORTANTES DE SEGURIDAD LISTA DE CONTROL DE PREINSTALACIÓN INSTRUCCIONES DE CONEXIÓN A TIERRA IMPORTANTE – (Lea detenidamente) PARA SU SEGURIDAD PERSONAL, ESTE ELECTRODOMÉSTICO DEBERÁ ESTAR ADECUADAMENTE C...
Page 33 - Instrucciones de instalación; PREPARACIÓN DEL GABINETE. DEBAJO DE UNA MESADA; INSTRUCCIONES DE INST
12 49-2000685 Rev. 1 Instrucciones de instalación PREPARACIÓN DEL GABINETE. DEBAJO DE UNA MESADA Ŷ 8QDYH]LQVWDODGRODFDUDIURQWDOGHOFDMyQSDUDFDOHQWDU estará correctamente nivelado con las puertas de los gabinetes y frentes de los cajones. Ŷ /DVVXSHUSRVLFLRQHVGHORVFDMRQHVHVFRQGHUiQORV estremos puntiagu...
Page 34 - PREPARACIÓN DEL GABINETE: HORNOS DEBAJO DE LAS PAREDES; INSTALACIÓN DEBAJO DE UN HORNO SIMPLE
49-2000685 Rev. 1 13 PREPARACIÓN DEL GABINETE: HORNOS DEBAJO DE LAS PAREDES INSTALACIÓN DEBAJO DE UN HORNO SIMPLE INSTALACIÓN DEBAJO DE UN HORNO DOBLE Ŷ 8QDYH]LQVWDODGRODFDUDIURQWDOGHOFDMyQSDUDFDOHQWDU estará correctamente nivelada con las puertas de los gabinetes y frentes de los cajones. Ŷ /DVVXSH...
Page 35 - PREPARE EL INTERIOR
14 49-2000685 Rev. 1 Instrucciones de instalación INSTALACIÓN DEL SOPORTE DEL GABINETE IMPORTANTE: Cuando se instalen debajo de un horno simple o doble, asegúrese de que cualquier soporte del horno que se encuentre por encima del espacio libre no obstruya la profundidad requerida de 22 ½” o 23 ½” de...
Page 36 - INSTALACIÓN DEL SOPORTE ANTI VOLCADURAS; INSTALACIÓN DEL CAJÓN PARA CALENTAR
49-2000685 Rev. 1 15 INSTALACIÓN DEL SOPORTE ANTI VOLCADURAS 1. Deslice la esquina izquierda sobre la abertura y empuje el cable de corriente dentro del agujero que conduce hasta la ubicación del tomacorriente. Pase el cable a medida que el cajón se está empujando hacia atrás en la abertura. Si se i...
Page 37 - CONSEJOS P; Antes de solicitar el servicio técnico
16 49-2000685 Rev. 1 Problema Causa Posible Qué Hacer El cajón para calentar no funciona Es posible que haya un fusible quemado en su hogar o que se haya desconectado el disyuntor. Reemplace el fusible o reinicie el disyuntor. El cajón para calentar no está enchufado. Enchufe el mismo. El control es...
Page 38 - Garantía Limitada del Cajón para Calentar Eléctrico Café; GARANTÍA; EXCLUSIÓN DE GARANTÍAS IMPLÍCITAS
49-2000685 Rev. 1 17 Garantía Limitada del Cajón para Calentar Eléctrico Café Qué no cubrirá Café: Ŷ 9LDMHVGHOWpFQLFRGHOVHUYLFLRDVXKRJDUSDUDHQVHxDUOH sobre cómo usar el producto. Ŷ ,QVWDODFLyQHQWUHJDRPDQWHQLPLHQWRLQDGHFXDGRVŶ )DOODVGHOSURGXFWRHQFDVRGHDEXVRPDOXVRPRGLILFDFLyQ o uso para propósitos dif...
Page 39 - Notas
Page 40 - ACCESORIOS
49-2000685 Rev. 1 19 Piezas Kit del Panel a Medida de 30” de Ancho Kits de Manijas a medida Cafe Pro de 30" Piezas Estante con Rejilla Suministros de Limpieza Limpiadores de Acero Inoxidable CitriShine Limpiador para Electrodomésticos de Acero Inoxidable ACCESORIOS Accesorios ¿Busca Algo Más? ¡C...