ZLINE Kitchen and Bath RFM-W-36 - Manuals
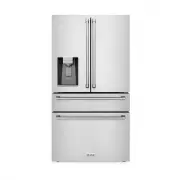
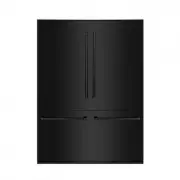
ZLINE Kitchen and Bath RFM-W-36 Refrigerator – User Manual in PDF format online.
Manuals:
User Manual ZLINE Kitchen and Bath RFM-W-36


Summary
WARRANTY IMPORTANT SAFETY INSTRUCTIONS 1 ELECTRICAL CONNECTION 6 PLACEMENT AND PRODUCT DIMENSIONS 8 INSTALLING THE WATER LINE 14 OPERATION 16 MAINTENANCE AND CLEANING 27 TROUBLESHOOTING 32 TABLE OF CONTENTS COVERAGE ZLINE Kitchen and Bath refrigerators have a one year parts and service warranty and ...
2 1 Gener al Safet y SAFETY INSTRUCTIONS This manual contains lots of important safety information which should be observed by the users. WARNING WARNING: Indicates a potentially hazardous situation which, if not avoided, could result in death or serious injury. CAUTION CAUTION: Indicates a potentia...
4 3 Energy W arnings SAFETY INSTRUCTIONS • WARNING : To avoid a hazard due to instability of the appliance, it must be fixed in accordance with the instructions. • Connect to potable water supply only.• Do not arbitrarily disassemble or reconstruct the refrigerator, nor damage the refrigerant circui...
ZLINE Kitchen and Bath Refrigerators Manuals
-
 ZLINE Kitchen and Bath RBIV-30
User Manual
ZLINE Kitchen and Bath RBIV-30
User Manual
-
 ZLINE Kitchen and Bath RBIV-304-30
User Manual
ZLINE Kitchen and Bath RBIV-304-30
User Manual
-
 ZLINE Kitchen and Bath RBIV-304-36
User Manual
ZLINE Kitchen and Bath RBIV-304-36
User Manual
-
 ZLINE Kitchen and Bath RBIV-304-60
User Manual
ZLINE Kitchen and Bath RBIV-304-60
User Manual
-
 ZLINE Kitchen and Bath RBIV-36
User Manual
ZLINE Kitchen and Bath RBIV-36
User Manual
-
 ZLINE Kitchen and Bath RBIV-60
User Manual
ZLINE Kitchen and Bath RBIV-60
User Manual
-
 ZLINE Kitchen and Bath RBIV-BS-30
User Manual
ZLINE Kitchen and Bath RBIV-BS-30
User Manual
-
 ZLINE Kitchen and Bath RBIV-BS-36
User Manual
ZLINE Kitchen and Bath RBIV-BS-36
User Manual
-
 ZLINE Kitchen and Bath RBIV-BS-60
User Manual
ZLINE Kitchen and Bath RBIV-BS-60
User Manual
-
 ZLINE Kitchen and Bath RBIV-SN-60
User Manual
ZLINE Kitchen and Bath RBIV-SN-60
User Manual
-
 ZLINE Kitchen and Bath RBIV-WM-30
User Manual
ZLINE Kitchen and Bath RBIV-WM-30
User Manual
-
 ZLINE Kitchen and Bath RBIV-WM-36
User Manual
ZLINE Kitchen and Bath RBIV-WM-36
User Manual
-
 ZLINE Kitchen and Bath RBIV-WM-60
User Manual
ZLINE Kitchen and Bath RBIV-WM-60
User Manual
-
 ZLINE Kitchen and Bath RBIVZ-304-30-CB
User Manual
ZLINE Kitchen and Bath RBIVZ-304-30-CB
User Manual
-
 ZLINE Kitchen and Bath RBIVZ-304-30-G
User Manual
ZLINE Kitchen and Bath RBIVZ-304-30-G
User Manual
-
 ZLINE Kitchen and Bath RBIVZ-304-30-MB
User Manual
ZLINE Kitchen and Bath RBIVZ-304-30-MB
User Manual
-
 ZLINE Kitchen and Bath RBIVZ-304-36-CB
User Manual
ZLINE Kitchen and Bath RBIVZ-304-36-CB
User Manual
-
 ZLINE Kitchen and Bath RBIVZ-304-36-G
User Manual
ZLINE Kitchen and Bath RBIVZ-304-36-G
User Manual
-
 ZLINE Kitchen and Bath RBIVZ-304-36-MB
User Manual
ZLINE Kitchen and Bath RBIVZ-304-36-MB
User Manual
-
 ZLINE Kitchen and Bath RBIVZ-304-60-CB
User Manual
ZLINE Kitchen and Bath RBIVZ-304-60-CB
User Manual