ZLINE Kitchen and Bath RBIV-60 - Manuals

ZLINE Kitchen and Bath RBIV-60 Refrigerator – User Manual in PDF format online.
Manuals:
User Manual ZLINE Kitchen and Bath RBIV-60


Summary
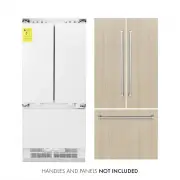
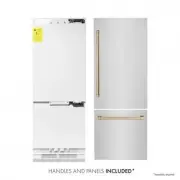
1 DUAL INSTALLATION COMPONENTS " ! !"#$%&'()#$$#)&*'%+*,-*'.')( !"#$%&'() *+,-./--.012- 03& 4)&563'7$883) 8(9 +3& 4)&563'7%(:3) *;,-./0.2< ;3& #5)3: =/.0< ;- >3"'3)7')?9 8@5 0 Adhesive Foam Divider Metal Lower Bracket Divider Trim Plastic Uppe...
2 TOOLS AND PARTS Part Image Description Quantity Adhesive Foam Divider 1/8” x 15 3/4" x 68 7/8" 1 Plastic Upper Bracket 1/8” x 2" x 4 1/2" 3 Metal Lower Bracket 1/16" x 1 5/8" x 2 1/4" 2 Screw Phillips head 20 Center Trim 73 3/4" long 1 INSTALLATION 2 Tools and P ar ...
3 At tach th e Adh esive F oam Divider INSTALLATION ATTACH THE ADHESIVE FOAM DIVIDER 1. Approach the refrigerators from behind and angle one of them out.2. Next, measure 2 1/8” from both the top and left corner of the side of the unit.3. Using a level, ensure the divider remains parallel to the edge...
ZLINE Kitchen and Bath Refrigerators Manuals
-
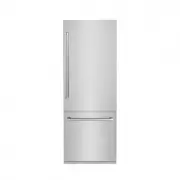
 ZLINE Kitchen and Bath RBIV-30
User Manual
ZLINE Kitchen and Bath RBIV-30
User Manual
-
 ZLINE Kitchen and Bath RBIV-304-30
User Manual
ZLINE Kitchen and Bath RBIV-304-30
User Manual
-
 ZLINE Kitchen and Bath RBIV-304-36
User Manual
ZLINE Kitchen and Bath RBIV-304-36
User Manual
-
 ZLINE Kitchen and Bath RBIV-304-60
User Manual
ZLINE Kitchen and Bath RBIV-304-60
User Manual
-
 ZLINE Kitchen and Bath RBIV-36
User Manual
ZLINE Kitchen and Bath RBIV-36
User Manual
-
 ZLINE Kitchen and Bath RBIV-BS-30
User Manual
ZLINE Kitchen and Bath RBIV-BS-30
User Manual
-
 ZLINE Kitchen and Bath RBIV-BS-36
User Manual
ZLINE Kitchen and Bath RBIV-BS-36
User Manual
-
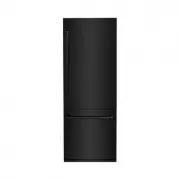
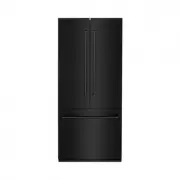
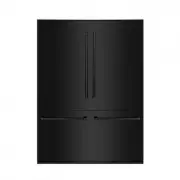 ZLINE Kitchen and Bath RBIV-BS-60
User Manual
ZLINE Kitchen and Bath RBIV-BS-60
User Manual
-
 ZLINE Kitchen and Bath RBIV-SN-60
User Manual
ZLINE Kitchen and Bath RBIV-SN-60
User Manual
-
 ZLINE Kitchen and Bath RBIV-WM-30
User Manual
ZLINE Kitchen and Bath RBIV-WM-30
User Manual
-
 ZLINE Kitchen and Bath RBIV-WM-36
User Manual
ZLINE Kitchen and Bath RBIV-WM-36
User Manual
-
 ZLINE Kitchen and Bath RBIV-WM-60
User Manual
ZLINE Kitchen and Bath RBIV-WM-60
User Manual
-
 ZLINE Kitchen and Bath RBIVZ-304-30-CB
User Manual
ZLINE Kitchen and Bath RBIVZ-304-30-CB
User Manual
-
 ZLINE Kitchen and Bath RBIVZ-304-30-G
User Manual
ZLINE Kitchen and Bath RBIVZ-304-30-G
User Manual
-
 ZLINE Kitchen and Bath RBIVZ-304-30-MB
User Manual
ZLINE Kitchen and Bath RBIVZ-304-30-MB
User Manual
-
 ZLINE Kitchen and Bath RBIVZ-304-36-CB
User Manual
ZLINE Kitchen and Bath RBIVZ-304-36-CB
User Manual
-
 ZLINE Kitchen and Bath RBIVZ-304-36-G
User Manual
ZLINE Kitchen and Bath RBIVZ-304-36-G
User Manual
-
 ZLINE Kitchen and Bath RBIVZ-304-36-MB
User Manual
ZLINE Kitchen and Bath RBIVZ-304-36-MB
User Manual
-
 ZLINE Kitchen and Bath RBIVZ-304-60-CB
User Manual
ZLINE Kitchen and Bath RBIVZ-304-60-CB
User Manual
-
 ZLINE Kitchen and Bath RBIVZ-304-60-G
User Manual
ZLINE Kitchen and Bath RBIVZ-304-60-G
User Manual