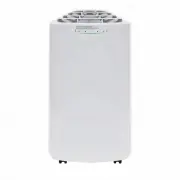
Whynter ARC-115WG - Manuals

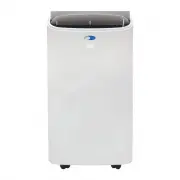
User Manual Whynter ARC-115WG


Summary
SAFETY PRECAUTIONS To prevent death or injury to the user or other people and property damage, the following instructions must be followed. Inco rrect operation due to ignoring of instructions may cause death, harm or damage. • Installation must be performed according to the installation instruction...
PREPARATION All illustrations in the manual are for explanation purpose only. Your machine may be slightly different. The actual shape shall prevail. The unit can be controlled by the unit control panel alone or with the remote controller. DESIGN NOTICE In order to ensure the optimal performance of ...
AMBIENT TEMPERATURE RANGE FOR UNIT OPERATION MODE Cool Dry TECHNICAL DATA Model Cooling Capacity (SACC): TEMPERATURE RANGE 61°F - 95°F (16°C - 35°C) 6 1 - 89 °F | 1 6 - 3 2 °C ARC-1 15WG Cool / Fan / Dry ASHRAE: 11,000 BTU / SACC : 6,800 BTU 4 00 sq. ft. Low, Medium, High 6 1 - 89 °F Up to 24 hours ...
Whynter Air Conditioners Manuals
-
 Whynter ARC-102CS
User Manual
Whynter ARC-102CS
User Manual
-
 Whynter ARC-1030WN
User Manual
Whynter ARC-1030WN
User Manual
-
 Whynter ARC-110WD
User Manual
Whynter ARC-110WD
User Manual
-
 Whynter ARC-122DHP
User Manual
Whynter ARC-122DHP
User Manual
-
 Whynter ARC-122DS
User Manual
Whynter ARC-122DS
User Manual
-
 Whynter ARC-1230WN
User Manual
Whynter ARC-1230WN
User Manual
-
 Whynter ARC-1230WNH
User Manual
Whynter ARC-1230WNH
User Manual
-
 Whynter ARC-12S
User Manual
Whynter ARC-12S
User Manual
-
Whynter ARC-12S
Manual
-
 Whynter ARC-12SD
User Manual
Whynter ARC-12SD
User Manual
-
Whynter ARC-12SD
Manual
-
 Whynter ARC-12SDH
User Manual
Whynter ARC-12SDH
User Manual
-
Whynter ARC-12SDH
Manual
-
 Whynter ARC-131GD
User Manual
Whynter ARC-131GD
User Manual
-
Whynter ARC-131GD
Manual
-
 Whynter ARC-143MX
User Manual
Whynter ARC-143MX
User Manual
-
Whynter ARC-143MX
Manual
-
 Whynter ARC-147WF
User Manual
Whynter ARC-147WF
User Manual
-
 Whynter ARC-147WFH
User Manual
Whynter ARC-147WFH
User Manual
-
 Whynter ARC-148MHP
User Manual
Whynter ARC-148MHP
User Manual