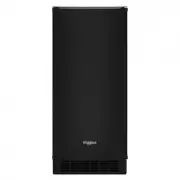
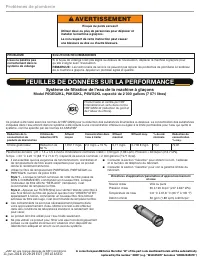
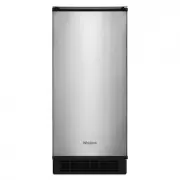
Page 2 - INSTALLATION INSTRUCTIONS; Unpack the Ice Maker; Removing Packaging Materials; Location Requirements; IMPORTANT SAFETY INSTRUCTIONS; precautions; SAVE THESE INSTRUCTIONS; other reproductive harm.; WARNING
2 INSTALLATION INSTRUCTIONS Unpack the Ice Maker Removing Packaging Materials Remove tape and glue from your ice maker before using. ■ To remove any remaining tape or glue from the exterior of the ice maker, rub the area briskly with your thumb. Tape or glue residue can also be easily removed by rub...
Page 3 - Electrical Requirements; Water Supply Requirements
3 ■ Check that the ice maker door is not flush with the standard cabinets to avoid problems with opening the ice maker door. ■ Choose a location where the floor is even. It is important for the ice maker to be level in order to work properly. If needed, you can adjust the height of the ice maker by ...
Page 4 - Connect Water Supply; Connecting the Water Line
4 Connect Water Supply Read all directions before you begin. IMPORTANT: ■ Plumbing shall be installed in accordance with the International Plumbing Code and any local codes and ordinances. ■ Use copper tubing or Whirlpool supply line, Part Number 8212547RP, and check for leaks. ■ Install tubing only...
Page 5 - If Ice Maker Is Currently Installed; Drain Pump Installation
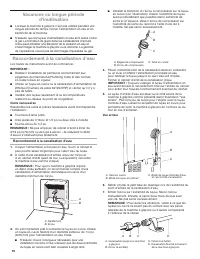
5 8. Install the water supply tube clamp around the water supply line to reduce strain on the coupling. 9. Turn shutoff valve ON. 10. Check for leaks. Tighten any connections (including connections at the valve) or nuts that leak. Drain Pump Installation (on some models) NOTES: ■ Connect drain pump ...
Page 7 - Drain Connection; Gravity Drain System
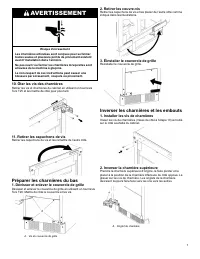
7 14. Remove wiring cover. Refer following illustration for location of the screws. 15. Route vent tube through plastic retainer that is located underneath top deck in open pump area as shown in illustration. Using cable tie, tie the vent tube to the black suction tube which is located behind the wi...
Page 8 - Connecting the Drain
8 Side View Drain Pump System (on some models) IMPORTANT: ■ Connect the ice maker drain to your drain in accordance with the International Plumbing Code and any local codes and ordinances. ■ The drain pump discharge line must terminate at an open sited drain. ■ Maximum rise 10 ft (3.1 m) ■ Maximum r...
Page 9 - Door Reversal—Side Swing Only; Remove Stainless Steel Door Wrap Panel
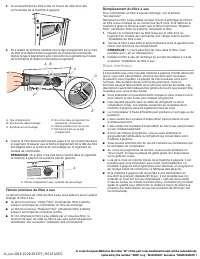
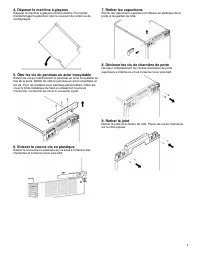
9 Door Reversal—Side Swing Only Tools Needed Gather the required tools and parts before starting installation. ■ 5/16" wrench ■ 1/4" wrench ■ Flat putty knife ■ Phillips screwdriver Remove Stainless Steel Door Wrap Panel (on some models) 1. Remove the two hex-head screws located under the st...
Page 10 - Reverse Door Catch
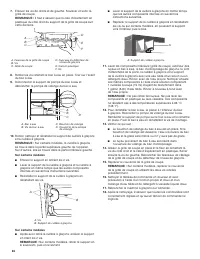
10 Reverse Hinges 1. Unscrew and remove the top hinge. Replace the screws in the empty hinge holes. 2. Remove the screws from the bottom of the opposite side of the ice maker cabinet. Turn the top hinge upside down so that the hinge pin points up. Place the hinge on the bottom opposite side of the i...
Page 11 - Leveling; Cleaning; Interior Components
11 3. Install the white decorative screws on the opposite side of the door. 4. Plug into a grounded 3 prong outlet. Leveling It is important for the ice maker to be level in order to work properly. Depending upon where you install the ice maker, you may need to make several adjustments to level it. ...
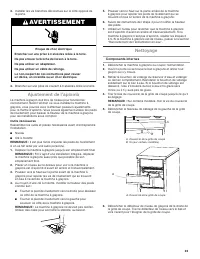
Page 13 - SÉCURITÉ DE LA MACHINE À GLAÇONS; Votre sécurité et celle des autres est très importante.; AVERTISSEMENT; CONSERVEZ CES INSTRUCTIONS; l’origine de malformations et autres déficiences de naissance.
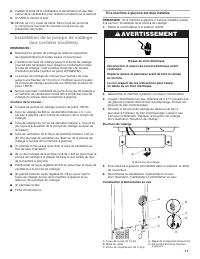
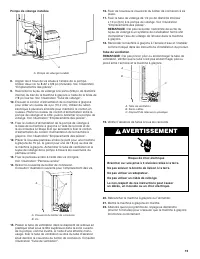
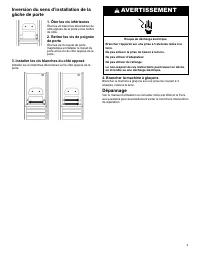
13 SÉCURITÉ DE LA MACHINE À GLAÇONS Risque possible de décès ou de blessure grave si vous ne suivez pas immédiatement les instructions. Risque possible de décès ou de blessure grave si vous ne suivez pas les instructions. Tous les messages de sécurité vous diront quel est le danger potentiel et vous...
Page 14 - INSTRUCTIONS D’INSTALLATION; Déballage de la machine à glaçons; Enlèvement des matériaux d’emballage; Exigences d’emplacement
14 INSTRUCTIONS D’INSTALLATION Déballage de la machine à glaçons Enlèvement des matériaux d’emballage Enlever le ruban adhésif et la colle de la machine à glaçons avant de l’utiliser. ■ Pour enlever tout résidu de ruban adhésif ou de colle de la surface extérieure de la machine à glaçons, frotter vi...
Page 15 - Spécifications électriques; Spécifications de l’alimentation en eau
15 ■ Vérifier que la porte de la machine à glaçon n’arrive pas en affleurement avec les armoires pour éviter les problèmes lors de l’ouverture de la machine à glaçons. ■ Choisir un emplacement où le plancher est de niveau. La machine à glaçon doit être de niveau pour fonctionner correctement. Au bes...
Page 16 - Raccordement à la canalisation d’eau
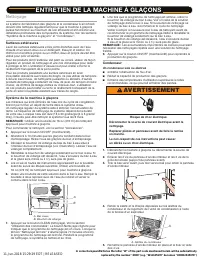
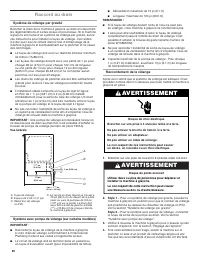
16 Vacances ou longue période d’inutilisation ■ Lorsque la machine à glaçons n’est pas utilisée pendant une longue période de temps, fermer l’alimentation en eau et en électricité de la machine. ■ S’assurer que les tuyaux d’alimentation en eau sont isolés contre le gel. La formation de glace dans le...
Page 17 - Installation de la pompe de vidange; Si la machine à glaçons est déjà installée
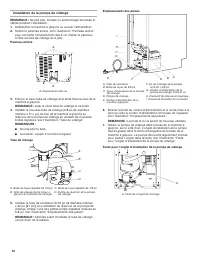
17 8. Installer la bride de la canalisation d’alimentation en eau bien autour de la canalisation pour réduire la pression sur le raccord. 9. OUVRIR le robinet d’arrêt. 10. Vérifier qu’il n’y a pas de fuites. Serrer tous les raccords (y compris les raccords du robinet) ou les écrous qui présentent de...
Page 20 - Raccord au drain; Système de vidange par gravité; Système avec pompe de vidange (sur certains modèles)
20 Raccord au drain Système de vidange par gravité Brancher le drain de la machine à glaçons au drain en respectant les réglementations et codes locaux et provinciaux. Si la machine à glaçons est munie d’un système de vidange par gravité, suivre ces instructions pour installer le tuyau de vidange. C...
Page 21 - Retrait du panneau de revêtement de porte en acier
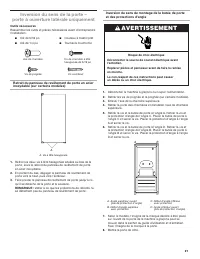
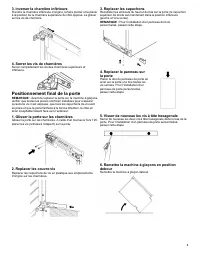
21 Inversion du sens de la porte – porte à ouverture latérale uniquement Outils nécessaires Rassembler les outils et pièces nécessaires avant d’entreprendre l’installation. ■ Clé de 5/16 po ■ Clé de 1/4 po ■ Couteau à mastic plat ■ Tournevis cruciforme Retrait du panneau de revêtement de porte en ac...
Page 22 - Inversion du sens d’installation de la gâche de porte
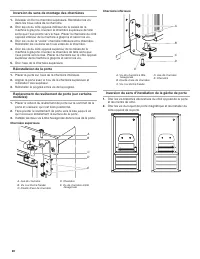
22 Inversion du sens de montage des charnières 1. Dévisser et ôter la charnière supérieure. Réinstaller les vis dans les trous vides de la charnière. 2. Ôter les vis du côté opposé inférieur de la caisse de la machine à glaçons. Inverser la charnière supérieure de telle sorte que l’axe pointe vers l...
Page 23 - Ajustement de l’aplomb; Nettoyage; Composants internes
23 3. Installer les vis blanches décoratives sur le côté opposé de la porte. 4. Brancher sur une prise de courant à 3 alvéoles reliée à la terre. Ajustement de l’aplomb La machine à glaçon doit être de niveau pour fonctionner correctement. Selon l’endroit où vous installez la machine à glaçons, vous...
Page 25 - SEGURIDAD DE LA FÁBRICA DE HIELO; Su seguridad y la seguridad de los demás es muy importante.; ADVERTENCIA; GUARDE ESTAS INSTRUCCIONES; fábrica de hielo, siga estas precauciones básicas:
25 SEGURIDAD DE LA FÁBRICA DE HIELO Si no sigue las instrucciones de inmediato, usted puede morir o sufrir una lesión grave. Si no sigue las instrucciones, usted puede morir o sufrir una lesión grave. Todos los mensajes de seguridad le dirán el peligro potencial, le dirán cómo reducir las posibilida...
Page 26 - INSTRUCCIONES DE INSTALACIÓN; Cómo desempacar la fábrica de hielo; Cómo quitar los materiales de empaque; Requisitos de ubicación
26 INSTRUCCIONES DE INSTALACIÓN Cómo desempacar la fábrica de hielo Cómo quitar los materiales de empaque Quite las cintas y el pegamento de la fábrica de hielo antes de usarla. ■ Para eliminar los residuos de cinta o goma, frote el área enérgicamente desde afuera de la fábrica de hielo con su dedo ...
Page 27 - Requisitos eléctricos; Requisitos de suministro de agua
27 ■ Verifique que la puerta de la fábrica de hielo no esté a ras con los gabinetes estándar para evitar problemas al abrir la puerta de la fábrica de hielo. ■ Elija una ubicación donde el piso esté nivelado. Es importante que la fábrica de hielo esté nivelada para que funcione adecuadamente. Si es ...
Page 28 - Conexión del suministro de agua
28 Vacaciones o tiempo prolongado sin uso ■ Cuando no utilice la fábrica de hielo por un período largo de tiempo, retire la electricidad y el suministro de agua de la fábrica de hielo. ■ Verifique que las líneas de suministro de agua estén protegidas contra congelamiento. La formación de hielo en la...
Page 29 - Instalación de la bomba de desagüe; Si la fábrica de hielo ya se encuentra instalada
29 8. Instale la abrazadera para tubería de suministro de agua alrededor de la línea de suministro de agua para reducir la tensión sobre el acoplamiento. 9. ABRA la válvula de cierre. 10. Revise si hay fugas. Ajuste las conexiones (incluso las conexiones en la válvula) o tuercas que tengan fugas. In...
Page 30 - Instalación de bomba de desagüe
30 Instalación de bomba de desagüe NOTA: No doble, apriete o dañe las tuberías o cables durante la instalación. 1. Desenchufe la fábrica de hielo o desconecte el suministro de energía. 2. Retire el panel posterior. Consulte la ilustración “Panel posterior” para ver la ubicación de los 5 tornillos. J...
Page 32 - Conexión de desagüe; Sistema de desagüe por gravedad; Sistema de la bomba de desagüe (en algunos modelos)
32 Conexión de desagüe Sistema de desagüe por gravedad Conecte la manguera de la bomba de desagüe a su desagüe de conformidad con todos los códigos y ordenanzas locales y estatales. Si la fábrica de hielo viene con un sistema de desagüe por gravedad, siga estas directrices cuando instale las líneas ...
Page 33 - Retire el panel de ajuste de puerta de acero
33 Reversión de puertas— Solo lado de apertura Herramientas necesarias Reúna las herramientas y piezas necesarias antes de comenzar la instalación. ■ Llave de 5/16" ■ Llave de 1/4" ■ Cuchillo plano para masilla ■ Destornillador Phillips Retire el panel de ajuste de puerta de acero inoxidable...
Page 34 - Cómo invertir el seguro de la puerta
34 Invierta las bisagras 1. Destornille y saque la bisagra superior. Vuelva a colocar los tornillos en los orificios vacíos para la bisagra. 2. Saque los tornillos de la parte inferior del lado opuesto de la carcasa de la fábrica de hielo. Dé vuelta la bisagra superior de manera que el pasador de la...
Page 35 - Nivelación; Limpieza; Piezas interiores
35 3. Instale los tornillos decorativos blancos en el lado opuesto de la puerta. 4. Conecte a un contacto de pared con conexión a tierra de 3 terminales. Nivelación Es importante que la fábrica de hielo esté nivelada para que funcione adecuadamente. Dependiendo del lugar donde instale la fábrica de ...