Page 2 - WARNING; WARNING; CAUTION; Conditions of use; Please ensure you read the instruction manual fully; CONTENTS; IMPORTANT INFORMATION THAT MAY
2 CONTENTS Important safety instructions ........................................................3Installing your appliance ..................................................................5Product description .........................................................................10Before first u...
Page 3 - IMPORTANT; Important – check for any damages or marks.; ENVIRONMENT; Information on disposal for users; These warnings have been provided in the interest of; IMPORTANT SAFETY INSTRUCTIONS
3 IMPORTANT SAFETY INSTRUCTIONS Please read the user manual carefully and store in a handy place for later reference. TIPS & INFORMATION IMPORTANT Important – check for any damages or marks. • If you find the oven is damaged or marked, you must report it within 7 days if you wish to claim for da...
Page 4 - IMPORTANT SAFETY INSTRUCTIONS (CONTINUED); Cooktop only; NOTE: You must read these warnings carefully before
4 IMPORTANT SAFETY INSTRUCTIONS IMPORTANT SAFETY INSTRUCTIONS (CONTINUED) Cooktop only • If the ceramic glass on cooktop is accidently cracked, switch off the appliance to avoid the possibility of electric shock. • Unattended cooking on a hob with fat or oil can be dangerous and may result in a fire...
Page 5 - Rated power input; INSTALLING YOUR APPLIANCE
5 INSTALLING YOUR APPLIANCE WARNING WARNING To avoid any potential hazard, you must follow our instructions when you install your appliance. Failure to install the appliance correctly could invalidate any warranty or liability claims and lead to prosecution. • This appliance must be installed by an ...
Page 6 - Hard wiring detail; Cabinet construction for your appliance; For all Pyrolytic clean oven models, the oven must be; Levelling oven
6 INSTALLING YOUR APPLIANCE • If a powerpoint is fitted it must be accessible with the appliance installed, as the plug must be accessible after installation. • This appliance must be mounted on a flat surface for the full width and depth of the product. • To avoid overheating, the appliance must no...
Page 7 - Non-pyrolytic underbench ovens and side open door oven; cabinet. This can be a full width opening 20mm deep.
7 INSTALLING YOUR APPLIANCE Non-pyrolytic underbench ovens and side open door oven Your underbench oven looks best when the control panel is directly under the benchtop. An upper infill panel may have to be added if the cooktop placed over the oven is too deep. Refer to cooktop installation instruct...
Page 8 - Separate grill underbench oven; clearance between cooktop and oven.; Separate grill wall oven & duo oven; Flush fit
8 INSTALLING YOUR APPLIANCE Separate grill underbench oven Your underbench oven looks best when the control panel is directly under the benchtop. An upper infill panel may have to be added if the cooktop placed over the oven is too deep. Refer to cooktop installation instructions for required cleara...
Page 9 - Double oven; GAS TYPE; Combo oven – cooktop cut-out dimensions; COOKTOP DIMENSIONS; The cooktop MUST be installed above the underbench
9 INSTALLING YOUR APPLIANCE Double oven GAS TYPE A B C Flush fit 600 1086 581min Proud fit 565 1078 560min C B A 561 596 mounting holes use black installation screws supplied use black installation screws supplied 450mm min. Combo oven – cooktop cut-out dimensions A minimum gap of 40mm must be maint...
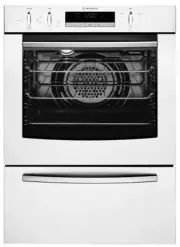
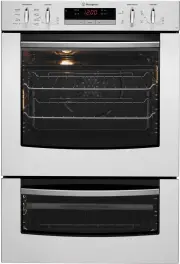
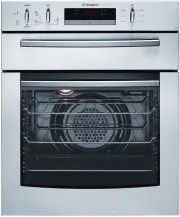
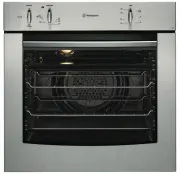
Page 10 - PRODUCT DESCRIPTION
10 PRODUCT DESCRIPTION PRODUCT DESCRIPTION WVE613/WVES613/WVES614 WVE615 WVEP615 655 645 636 617 625 616 615 614 613SC 665 P615 P617 P618 P627 FUNCTION TEMP Hold 3s BACK FAVOURITE SET TIME ALARM OK ON/OFF 655 645 636 617 625 616 615 614 613SC 665 P615 P617 P618 P627 FUNCTION TEMP Hold 3s BACK FAVOUR...
Page 14 - Preparing your appliance for the first time; Setting the time of day; Electronic clock; BEFORE FIRST USE
14 BEFORE FIRST USE Preparing your appliance for the first time • Please remove all internal boxes and bags from the oven before operation. • Please wipe out the oven interior prior to operation with warm soapy water and polish dry with a soft clean cloth. Do not close the oven door until the oven i...
Page 15 - Side racks; INSTALLING YOUR OVEN ACCESSORIES; Shelves and trays; NOTE: To Locate the rear edge of the shelves, the detents
15 INSTALLING YOUR OVEN ACCESSORIES Slides (Telescopic runners) (For applicable models only) 1. Obtain left hand side rack and left hand slide – see image to identify. CLICK ! 1 2 3 2. The shaded wires indicate the wire the slide can be mounted on. Fit slide rear clips to the rear of wire at an angl...
Page 16 - INSTALLING YOUR OVEN ACCESSORIES (CONTINUED); To fit a shelf or tray to telescopic slides
16 INSTALLING YOUR OVEN ACCESSORIES INSTALLING YOUR OVEN ACCESSORIES (CONTINUED) To fit a shelf or tray to telescopic slides (For applicable models only): 1. Push the shelf or tray along the top of the slide until it hits the back post. Front post Back post 2. Drop the front of the shelf or tray ont...
Page 17 - USING YOUR OVEN; Large oven; NOTE: Steam will only start if the water tank has been
17 USING YOUR OVEN USING YOUR OVEN Understanding your oven functions Your oven will have a selection of the following functions. Refer to “Description of your appliance” to confirm what functions are available to you. Large oven Rapid Heat Heat comes from the element surrounding the fan as well as t...
Page 18 - Fan Assist
18 USING YOUR OVEN Fan Assist Heat comes from two elements, one above and one below the food. The fan circulates the hot air around the oven cavity so that you can put the food in different places in the oven and still cook them at the same time. You should only use a maximum of 2 shelves with “Fan ...
Page 19 - WVEP627 models only. Select cleaning function in
19 USING YOUR OVEN Maxi Grill (grill-in-oven models only) “Maxi grill” directs radiant heat from 2 powerful upper elements onto the food. You can use the “Maxi grill” function for tender cuts of meat, steak, chops, sausages, fish, cheese toasties and other quick cooking foods. Grill with the oven do...
Page 21 - Operating the electronic clock; NOTE: Your touch control clock only operates with your
21 USING YOUR OVEN To set the time of day in hours and minutes, touch the or symbols. Refer to the diagram above. 5 seconds after the last change, the clock symbol will disappear, confirming the time has been set. Once the time has been entered, the clock advances minute by minute. NOTE: The clock h...
Page 22 - Setting the delayed start cooking time; To check or cancel settings; NOTE: If a timer mode is set, then it is not possible to; Select the oven function; NOTE: each oven function has a default temperature
22 USING YOUR OVEN 3. Enter the time of day to finish cooking by pressing or symbols while the indicator symbol is flashing. 4. After 5 seconds from the last change, the indicator symbol will stop flashing and the current time of day will be displayed. Setting the delayed start cooking time 1. Progr...
Page 24 - ADDITIONAL FUNCTIONALITY
24 USING YOUR OVEN 4. Touch the button as often as necessary, until the ‘end time’ symbol appears flashing. 5. Set the desired switch-off time using or whilst the ‘end time’ symbol is flashing. 6. 5 seconds after the last change the ‘cook time’ and ‘end time’ arrows are lit to confirm that the oven ...
Page 25 - Pyrolytic cleaning of the oven cavity; Pyrolytic Cleaning Operation
25 USING YOUR OVEN 1. Ensure the oven is in the off state. Toggle and hold the selector to until a beep sounds. The ‘DEMO’ text will begin to flash. 2. Toggle the temperature selector to set the first digit of display to 2. Touch clock to set. 3. Repeat step 2 until display shows 24:68. 3 beeps soun...
Page 26 - NOTE: The cooling fan will operate at an increased speed
26 USING YOUR OVEN USING YOUR OVEN (CONTINUED) This knob cannot be turned anticlockwise from off position IMPORTANT During Pyrolytic cleaning the door will automatically lock when the temperature in the oven approaches 300˚C. will appear on the display. During the pyrolytic cleaning cycle there may ...
Page 27 - Operating the Programmable Controller (WVEP618); FUNCTION
27 USING YOUR OVEN Operating the Programmable Controller (WVEP618) 655 645 636 617 625 616 615 614 613SC 665 P615 P617 P618 P627 FUNCTION TEMP Hold 3s BACK FAVOURITE SET TIME ALARM OK ON/OFF 1 2 4 7 9 3 5 6 8 10 11 Use the sensor fields to operate the oven. FUNCTION DESCRIPTION 1 ON/OFF To turn the ...
Page 28 - Display; SYMBOL
28 USING YOUR OVEN Display 1 Heating function 2 Time of day 3 Heat-up indicator 4 Function duration/end time 5 Temperature 16:3000:15 140°C 1 2 4 5 3 Other indicators of the display: SYMBOL FUNCTION DESCRIPTION Minute minder The function is currently working Time of day The display shows the current...
Page 29 - Before first use; Initial cleaning; Daily Use; Navigating the menus
29 USING YOUR OVEN Before first use Initial cleaning Remove all accessories and removable shelf supports from the oven. Refer to “Care and cleaning” chapter. Clean the oven and the accessories before first use. After cleaning, put the accessories and the removable shelf supports back to their initia...
Page 30 - Submenu for “Basic Settings”
30 USING YOUR OVEN Submenu for “Basic Settings” SYMBOL FUNCTION DESCRIPTION Set time of day Sets the current time on the clock. Time indication When ON, the display shows the current time when you deactivate the appliance. Fast heat up When ON, the function decreases the heat-up time. Time extension...
Page 31 - Clock functions; Symbol; Additional Functions
31 USING YOUR OVEN Setting a heating function 1. Turn on the oven.2. Select a heating function.3. Press to confirm. 4. Set the temperature.5. Press to confirm. Heat-up indicator When you turn on a heating function, the bar on the display comes on. The bar shows that the temperature increases. When t...
Page 32 - Hints and tips; Advice for special heating functions of the oven; Keep warm
32 USING YOUR OVEN 10. Press and hold to save. You can overwrite a memory position. When the display shows the first free memory position, press or and press to overwrite an existing program. You can change the name of a program in the menu: Edit Program Name. Activating the program 1. Turn on the o...
Page 33 - Roasting meat
33 USING YOUR OVEN • Do not use a lot of cooking oil when roasting. This will prevent the splattering of oil on the sides of the oven and the oven door. Polyunsaturated fats can leave residue which is very difficult to remove. • When cooking things which require a high heat from below (e.g. tarts), ...
Page 34 - COOKING GUIDE; Choosing the best oven settings
34 COOKING GUIDE COOKING GUIDE Choosing the best oven settings The following table is intended as a guide and experience may show some variation in cooking times necessary to meet individual requirements. It may be necessary to change some cooking times and temperatures from your previous oven. For ...
Page 35 - AIR FRY COOKING; AIR FRY COOKING (FOR APPLICABLE MODELS ONLY); To Set the Air Fry Function:; NOTE: Set the minute minder for the minimum suggested; Frozen chips; A separate tray should be placed on the bottom shelf
35 AIR FRY COOKING AIR FRY COOKING (FOR APPLICABLE MODELS ONLY) The Air Fry feature works best for single shelf baking. Air Fry is suitable for French Fries, Chicken Wings, Chicken Nuggets and similar products, See settings in the table below. TIPS & INFORMATION IMPORTANT • Air Fry is designed f...
Page 36 - Grilling hints; NOTE: Below is a table indicating the door position whilst; Grilling with separate grill underbench; Operating the oven may result in a hot grill tray frame; Guide to better grilling; Fan grill (multifunction grill in oven models only); GRILLING GUIDE
36 Grilling hints WARNING WARNING Always clean the grill/oven dish after every use. Excessive fat build up may cause a fire. As a method of cooking, grilling can be used to: • Enhance the flavours of vegetables, fish, poultry and meat. • Seal the surface of the food and retain the natural juices. NO...
Page 37 - Risk of burns and damage to the appliance; Steam bake; Steam operating sequence; STEAM ASSISTED COOKING
37 Cooking with steam is a great addition to straight ‘hot air’ cooking. Steam brings out all the natural flavours and goodness in the food, cooks evenly from surface to centre and retains more nutrients and vitamins. Steam assisted cooking consistently produces juicy, succulent interiors with crisp...
Page 38 - Draining the tank
38 Use measuring jug WARNING CAUTION Do not use any liquid other than normal tap water. Do not use demineralised or distilled water. Doing so could affect the normal operation of the steam generator. Do not put solid matter into the water drawer. 4. Turn on the oven and select the steam cooking func...
Page 39 - DEALING WITH COOKING PROBLEMS; PROBLEM
39 DEALING WITH COOKING PROBLEMS PROBLEM CAUSES REMEDY Uneven cooking • Incorrect shelf position • Select shelf suitable for cooking function. See cooking function tables in cooking guide • Oven tray too large • Experiment with other trays or dishes • Trays not centralised • Centre trays • Air flow ...
Page 40 - Get to know the oven with this ‘Simple Test Cake’; ‘Simple Test Cake’; GETTING TO KNOW THE OVEN
40 Get to know the oven with this ‘Simple Test Cake’ Although we strive for a perfect performing oven, it’s possible that there will be some variation in colour when baking. Therefore, we suggest this simple, easy and delicious to make Simple Test Cake, it can help you understand your new oven. All ...
Page 41 - CARE AND CLEANING
41 WARNING WARNING Ensure the oven is electrically isolated before cleaning. This can be done by switching off the appliance via the powerpoint or isolating switch (if available), or the switchboard. Do not use steam cleaners, as this may cause moisture build up. WARNING CAUTION Do not use sharp met...
Page 42 - Do not remove the slide mechanism on the separate grill; Removing the side racks; NOTE: :Light globes are not covered by warranty; Releasing the grill element; Make sure the appliance is turned off before you remove
42 WARNING CAUTION Do not remove the slide mechanism on the separate grill underbench model (WVE655). The grill dish can easily be removed for cleaning. Removing the side racks 1. Grasp the middle wire at the front. 2. Pull firmly inwards while pushing back. Slides (Telescopic runners) (For applicab...
Page 43 - Cleaning the triple glazed oven door; Do not lift the door by the handle. Rough handling will; Removing the oven door; Your oven is equipped with a door that can be; Removing oven door top trim
43 Cleaning the triple glazed oven door (on selected models) WARNING CAUTION Do not lift the door by the handle. Rough handling will cause glass to break. Removing the oven door TIPS & INFORMATION IMPORTANT Your oven is equipped with a door that can be disassembled in order to clean all the pane...
Page 44 - Removing the door glass panels; Cleaning the door glass panels; Removing bottom trim (on selected models)
44 Removing the door glass panels WARNING CAUTION Rough handling, especially around the edges can cause the glass to break. • Lift the black bordered glass panel out of the guide and place on something soft and flat to prevent scratches. • Repeat this for the smaller clear glass panel (when fitted)....
Page 46 - Cleaning the quad glazed oven door
46 Cleaning the quad glazed oven door (on selected models) WARNING CAUTION Do not lift the door by the handle. Rough handling will cause glass to break. Removing the oven door TIPS & INFORMATION IMPORTANT Your oven is equipped with a door that can be disassembled in order to clean all the panes ...
Page 47 - Do not use harsh abrasives on the glass panes as the; Re-assembling the quad glazed oven door; Re-assembling the door glass panels; Replacing the top door trim; Fitting the oven door
47 Cleaning the door glass panels WARNING CAUTION Do not use harsh abrasives on the glass panes as the reflective surface plays a role in the function of the oven. Do not place glass in dishwasher. Hand wash only with a soft cloth and warm soapy water. When dry polish with a soft cloth and ensure th...
Page 48 - Cleaning the side open door (on selected models); Rough handling, especially around the edges can cause
48 • Open the door fully to access the hinges. • Rotate the ‘stirrups’ (see the image below) until they lock into the hook. The oven door may now be closed. stirrup in locked position door column Cleaning the side open door (on selected models) Side open door models have been designed to allow for t...
Page 49 - Re-assembling the side open oven door
49 Cleaning the door glass panels WARNING CAUTION Do not to use harsh abrasives on the glass panes as the reflective surface plays a role in the function of the oven. Do not place glass in dishwasher. Hand wash only with a soft cloth and warm soapy water. When dry polish with a soft cloth and ensure...
Page 50 - NOTE: The “Remaining time” does not include cool-down; SUBMENU
50 during the pyrolytic cleaning process. It is strongly advised to remove any pets (especially birds) from the vicinity of the appliance during and after each pyrolytic cleaning process. • Small pets can also be highly sensitive to the localized temperature changes in the vicinity of all pyrolytic ...
Page 52 - Cleaning your ceramic hotplate; NOTE: Items with high sugar content not only include jam; Cooking hints; Utensils; USING YOUR COOKTOP
52 USING YOUR COOKTOP Cleaning your ceramic hotplate 1. Remove all spilt food and fat with a razor blade scraper (supplied with the unit) while the ceramic glass is still warm, but not hot. Wipe clean with dishwashing detergent on a damp cloth. 2. If aluminium foil, plastic items or high sugar conte...
Page 53 - Cooktop; Faults; NOTE: We may charge for service even in the guarantee; Data Plate; TROUBLESHOOTING
53 TROUBLESHOOTING Cooktop PROBLEM POSSIBLE CAUSE SOLUTION Heating elements not working • Power not switched on • Check cooktop is plugged in and power is on • Controls incorrectly set • Check correct knob turned for element • Household fuse blown • Replace household fuse. If the fuse continues to b...
Page 54 - Oven
54 TROUBLESHOOTING Oven PROBLEM POSSIBLE CAUSE Oven or grill not working • Time of day not set. • Power not turned on. • Controls are incorrectly set. • Oven is in ‘Demo’ mode, refer to Using your oven section. • Household fuse has blown or power supply is off. NOTE: If the household fuse continues ...
Page 55 - WARRANTY; Warranty; Important Notice; AUSTRALIA; NEW ZEALAND
55 WARRANTY This document sets out the terms and conditions of the product warranties for Westinghouse Appliances. It is an important document. Please keep it with your proof of purchase documents in a safe place for future reference should there be a manufacturing defect in your Appliance. This war...


 Westinghouse DSP635S
User Manual
Westinghouse DSP635S
User Manual
 Westinghouse GOR474SLPG
User Manual
Westinghouse GOR474SLPG
User Manual
 Westinghouse GOR476S
User Manual
Westinghouse GOR476S
User Manual
 Westinghouse GOR476SLPG
User Manual
Westinghouse GOR476SLPG
User Manual
 Westinghouse GXR650WLPG
User Manual
Westinghouse GXR650WLPG
User Manual
 Westinghouse PAK557W
User Manual
Westinghouse PAK557W
User Manual
 Westinghouse PDR790S
User Manual
Westinghouse PDR790S
User Manual
 Westinghouse PGR659S
User Manual
Westinghouse PGR659S
User Manual
 Westinghouse POR663S
User Manual
Westinghouse POR663S
User Manual
 Westinghouse POR667S
User Manual
Westinghouse POR667S
User Manual
 Westinghouse WFE512SC
User Manual
Westinghouse WFE512SC
User Manual
 Westinghouse WFE612SC
User Manual
Westinghouse WFE612SC
User Manual
 Westinghouse WFE614SC
User Manual
Westinghouse WFE614SC
User Manual
 Westinghouse WFE647SA
User Manual
Westinghouse WFE647SA
User Manual
 Westinghouse WFE914SA
User Manual
Westinghouse WFE914SA
User Manual
 Westinghouse WFE914SB
User Manual
Westinghouse WFE914SB
User Manual
 Westinghouse WFE915SD
User Manual
Westinghouse WFE915SD
User Manual
 Westinghouse WFE916DSD
User Manual
Westinghouse WFE916DSD
User Manual
 Westinghouse WFE916SA
User Manual
Westinghouse WFE916SA
User Manual
 Westinghouse WFE946SA
User Manual
Westinghouse WFE946SA
User Manual