Page 2 - IMPORTANT SAFETY INSTRUCTIONS
2 3 IMPORTANT SAFETY INSTRUCTIONS CONTENTS Important safety instructions �������������������������������������������������������������������3Installation ��������������������������������������������������������������������������������������������������������� 5Operating for the first time ����������...
Page 3 - GENERAL APPLIANCE DESCRIPTION; Location; WARNING; Stabilising bolt; WARNING; WARNING; INSTALLATION; Electric Separate Grill Oven depicted�
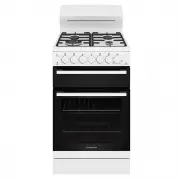
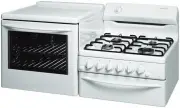
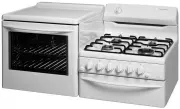
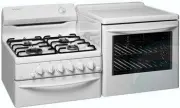
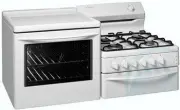
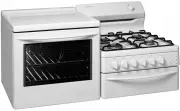
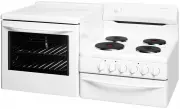
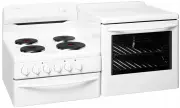
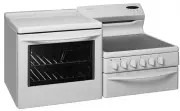
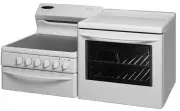
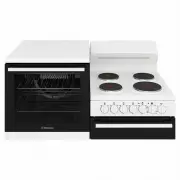
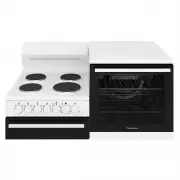
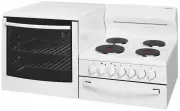
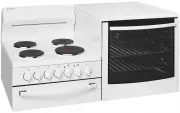
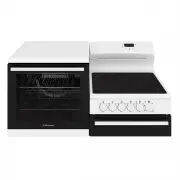
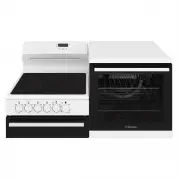
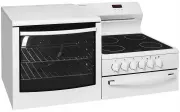
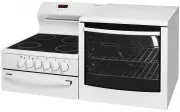
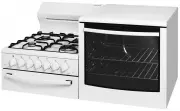
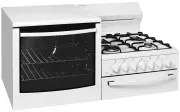
5 INSTALLATION 4 APPLIANCE DESCRIPTION Control panel Grill door (where fitted) Kick panel Front adjustable feet Hotplate Oven door GENERAL APPLIANCE DESCRIPTION Location This appliance must not be placed on a base� This appliance must not be installed behind a decorative door� The appliance has been...
Page 4 - Removing the oven door; Replacing the oven light
6 7 INSTALLATION INSTALLATION Removing the oven door (to be done by qualified personnel only) 1� With door fully open, rotate the two stirrups to its rest position� Stirrup 2� Close the door until it stops against the stirrups� 3� Close the door further� 4� Lift the door slightly and evenly while co...
Page 5 - Service fuse location – Models with power point only; Electric wiring requirements; IMPORTANT; Hard wiring; Replacing the oven door; installation; Procedure to assemble the door; Frame slot; L ocate both hinges into the frame slots at the
8 9 INSTALLATION INSTALLATION Service fuse location – Models with power point only This product is fitted with a power outlet at each end of the control panel� The outlets are protected by a replaceable 15 amp fuse located at the rear of the product� WARNING WARNING Before servicing the fuse, ensure...
Page 7 - Do not use utensils which are too large or too small�; OPERATING FOR THE FIRST TIME
12 INSTALLATION 13 OPERATING Choosing utensils for gas hotplates Refer to the diagram below� (oversize) (undersize) Do not use utensils which are too large or too small� Installation and service warning WARNING WARNING • Only an authorised person must install and service this appliance (Certif...
Page 8 - USING THE GAS COOKER; INSTALLING OVEN ACCESSORIES
15 GAS COOKER Gas oven features and descriptions USING THE GAS COOKER 14 ACCESSORIES FITTING OVEN SHELVES 1� Ensure shelf orientation is correct (refer to diagram below)� 2� Slide oven shelves onto oven supports (side runners) at an angle until raised back of shelf is past the stop on oven supports ...
Page 9 - LIGHTING GAS HOTPLATE, GRILL AND OVEN
17 GAS COOKER LIGHTING GAS HOTPLATE, GRILL AND OVEN Electronic ignition with flame safeguard This hob is fitted with mains powered electronic ignition� When the appliance has been connected and the power is on, depressing ignite button will release sparks to all burners� To light a burner, depress t...
Page 10 - USING THE ELECTRIC COOKER; ELECTRIC OVEN FEATURES AND DESCRIPTIONS; Grill in Oven Models
19 ELECTRIC COOKER 18 ELECTRIC COOKER USING THE ELECTRIC COOKER ELECTRIC OVEN FEATURES AND DESCRIPTIONS Grill in Oven Models WLE524WC Separate grill models – conventional oven WLE530WCA Separate grill models - fan-forced oven WLE522WC/WLE532WC Separate grill models - fan-forced oven WLE543WC 1� Radi...
Page 11 - Your oven is equipped with a 3 button timer that has; BUTTON PROGRAMMABLE CLOCK
20 ELECTRIC COOKER Radiant hotplates The high-speed radiant hotplates heat rapidly from a cold start� This saves power� The hotplates have a tray underneath the hob which collects spilt liquids� This tray can be removed by sliding it out through the open grill door (except model WLE524WC)� Radiant e...
Page 12 - GENERAL HINTS AND TIPS; CLEANING THE COOKER
22 HINTS AND TIPS WARNING CAUTION Using the grill Separate Grill Grill with door open� Grill dish must be fully inserted� (Refer to SEPARATE GRILL DISH INSERTION) Grill In Oven Grill with door closed� General hints For best baking results preheat oven for 30 minutes� The material and finish of bakin...
Page 13 - Cleaning the oven door; To remove the inner door glass for cleaning; Re-Assembling the oven door inner glass; SAFETY WARNINGS ABOUT CLEANING; CAUTION; Door glass
24 HINTS AND TIPS Cleaning the oven door Cool air circulates through the door to lower the surface temperature on the outside of the oven door� WARNING CAUTION • Do not remove the outer oven door� This product has a removable inner glass insert for ease of cleaning� To remove the inner door glass fo...
Page 14 - Getting to know your new oven with this simple; GETTING TO KNOW YOUR OVEN; Temperature; OVEN GUIDE
26 TEST CAKE Getting to know your new oven with this simple ‘Test Cake’ When baking, it is normal to experience some slight variation in temperature throughout the oven, resulting in minor differences in colour of the items being baked� You may need to rotate items whilst cooking to ensure an even c...
Page 15 - tips and information; TROUBLE SHOOTING
28 TROUBLE SHOOTING PROBLEM CAUSES WHAT TO DO Uneven cooking Incorrect shelf position Select shelf that puts food in centre of oven Oven tray too large Try other trays or dishes Trays not in centre Put trays in centre Air flow in oven uneven Rotate food during cooking Grill tray affecting thermostat...
Page 16 - NOTES; Warranty; AUSTRALIA; NEW ZEALAND
30 NOTES NOTES 31 WARRANTY This document sets out the terms and conditions of the product warranties for Westinghouse Appliances. It is an important document. Please keep it with your proof of purchase documents in a safe place for future reference should there be a manufacturing defect in your Appl...