Page 2 - CONGRATULATIONS; WARNING; WARNING; CAUTION; ENVIRONMENTAL TIPS; ENVIRONMENT; Conditions of use; Please ensure you read the instruction manual fully; CONTENTS
2 CONGRATULATIONS Please read the user manual carefully and store in a handy place for later reference. The symbols you will see in this booklet have these meanings: WARNING WARNING This symbol indicates information concerning your personal safety. WARNING CAUTION This symbol indicates information o...
Page 3 - Installation, cleaning and servicing; General warnings; IMPORTANT SAFETY INSTRUCTIONS; IMPORTANT INFORMATION THAT MAY IMPACT
3 IMPORTANT SAfETy INSTRUCTIONS Installation, cleaning and servicing • An authorised person must install this appliance. (Certificate of Compliance to be retained). • Before using the appliance, ensure that all packing materials are removed from the appliance. • In order to avoid any potential hazar...
Page 4 - IMPORTANT SAfETy INSTRUCTIONS; Oven; Child safety
4 IMPORTANT SAfETy INSTRUCTIONS WARNING WARNING Oven • During use the appliance becomes hot. Care should be taken to avoid touching the hot surfaces inside the oven. • Switch the appliance off at the isolating switch before removing the oven light glass for globe replacement. • To avoid an accident,...
Page 5 - PRODUCT DESCRIPTION; Control Panel
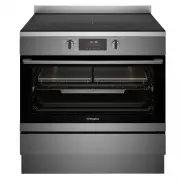
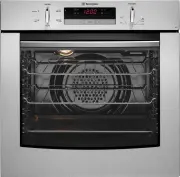
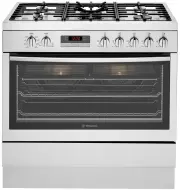
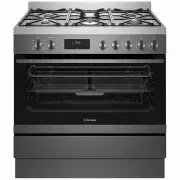
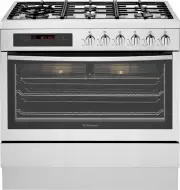
5 PRODUCT DESCRIPTION PRODUCT DESCRIPTION freestanding cooker with electric induction hob and multi-function electric oven Timer Temp Light Lock OK Induction glass hob (Refer to Chapter ‘Get to know your induction cooktop’) Hob element controls Oven control panel Oven door Storage compartment Clip o...
Page 6 - INSTALLATION Of ThE APPLIANCE; Cabinet requirement; Gas model clearance requirements; INSTALLATION OF THE APPLIANCE
6 INSTALLATION Of ThE APPLIANCE Cabinet requirement Model WFEP9757DD is designed to fit into a 900mm wide gap between standard kitchen cabinets. The appliance integrates with the kitchen cabinets by matching the height, depth and kick panel. The cooker may also be installed at the end of a line of be...
Page 7 - Freestanding installation; The freestanding type installation requires four screw-in; INSTALLATION OF THE APPLIANCE (CONTINUED)
7 INSTALLATION Of ThE APPLIANCE Freestanding installation Cabinet construction for freestanding installation The freestanding type installation requires four screw-in feet to be installed before it can be fitted in between cabinets, with cabinets on one side or without adjacent cabinets. There is no ...
Page 8 - Installation of screw-in feet; IMPORTANT; To avoid scratching the floor and the appliance
8 INSTALLATION Of ThE APPLIANCE Freestanding installation (continued) Installation of screw-in feet • Freestanding appliance are supplied with four screw-in feet in the internal accessory pack. The screw-in feet can be adjusted by turning the lower half clockwise or anti-clockwise. TIPS & INFORM...
Page 9 - Heavy item! This step must be performed by two; Leveling oven
9 INSTALLATION Of ThE APPLIANCE Bench height + 10mm minimum If your kitchen has a 900mm height kitchen bench top, follow the quick measurement guide below before putting the cooker upright For a 900mm height kitchen bench top, adjust the lower half of the feet to measure 50mm as shown in the illustr...
Page 10 - Installation the anti-tilt brackets
10 INSTALLATION Of ThE APPLIANCE Freestanding installation (continued) Installation the anti-tilt brackets To ensure cooker stability, the anti-tilt brackets must be installed.There are left and right engagement slots for the anti-tilt bracket at the bottom rear of the appliance. The following steps...
Page 11 - Appropriate fasteners must be used to suit the type
11 INSTALLATION Of ThE APPLIANCE Freestanding installation (continued) WARNING WARNING • Appropriate fasteners must be used to suit the type of wall on which the anti-tilt brackets are installed. • Freestanding unit must be pushed up against the wall on installation. On gas units check that the gas ...
Page 12 - Installing the clip-on kick panel
12 INSTALLATION Of ThE APPLIANCE Freestanding installation (continued) • Connect services to the appliance prior to placing into cavity. • To locate appliance, slide into cavity ensuring the anti-tilt brackets fully engaged with the rear left and right engagement slots. • The unit must be pushed aga...
Page 13 - Make sure both clip modules are in the same orientation
13 INSTALLATION Of ThE APPLIANCE INSTALLATION OF THE APPLIANCE (CONTINUED) Freestanding installation (continued) Make sure both clip modules are in the same orientation after installation. Clip the kick panel onto the front feet of the appliance. Make sure the kick panel snaps onto the larger sectio...
Page 16 - WIRING REqUIREMENTS; WIRING REQUIREMENTS; For New Zealand Only:; Rated power input; MODEL; Before you cook in your new oven it is important that; Connecting to services and commissioning; Hard wiring detail
16 WIRING REqUIREMENTS WIRING REQUIREMENTS The cooker MUST be installed in compliance with: • Wiring connections in AS/NZS 3000 Wiring Rules. • Local regulations, municipal building codes and other statutory regulations. For New Zealand Only: The cooking range must be connected to the supply by a su...
Page 17 - INSTALLING ThE fREESTANDING COOKER; INSTALLING THE FREESTANDING COOKER
17 INSTALLING ThE fREESTANDING COOKER INSTALLING THE FREESTANDING COOKER Model WFEP9757DD 27 8 95 Electrical cable entry point
Page 18 - BEfORE OPERATING yOUR APPLIANCE fOR ThE fIRST TIME; BEFORE OPERATING YOUR APPLIANCE FOR THE FIRST TIME; Preparing your appliance for the first time; adjust
18 BEfORE OPERATING yOUR APPLIANCE fOR ThE fIRST TIME BEFORE OPERATING YOUR APPLIANCE FOR THE FIRST TIME Preparing your appliance for the first time • Please remove all internal boxes and bags from the oven before operation. • Please wipe out the oven interior prior to operation with warm soapy wate...
Page 19 - INSTALLING yOUR OvEN ACCESSORIES; INSTALLING YOUR OVEN ACCESSORIES; Installing the slides (telescopic runners)
19 INSTALLING yOUR OvEN ACCESSORIES INSTALLING YOUR OVEN ACCESSORIES Slides (telescopic runners) (on selected models) 1. The selected models are supplied with a set of slides and instructions on how to assemble. Ensure the rack and slides are of the same hand. E.g. left hand slide should be fitted o...
Page 20 - Fitting grill dish and insert; Maximum grill power; Fitting the AirFry
20 INSTALLING yOUR OvEN ACCESSORIES Fitting grill dish and insert Your oven comes with a full width grill dish and a grill insert. The grill dish insert is designed with flexibility to adjust distance between the food and the grill element. Maximum grill power Grill dish insert brings the food close...
Page 21 - GETTING TO KNOW yOUR INDUCTION COOKTOP; GETTING TO KNOW YOUR INDUCTION COOKTOP
21 GETTING TO KNOW yOUR INDUCTION COOKTOP 1 3 2 4 5 9 10 7 6 8 Use the sensor fields to operate the appliance. The displays, indicators and sounds tell which functions operate. Sense Field Function Description 1 On/Off To activate and deactivate the appliance. 2 Timer To set the function. 3 / - To i...
Page 22 - BEfORE fIRST USE Of INDUCTION hOB; Power limitation; BEFORE FIRST USE OF INDUCTION HOB
22 BEfORE fIRST USE Of INDUCTION hOB Power limitation Power limitation defines how much power is used by the hob in total, within the limits of the house installation fuses. The hob is set to its highest possible power level by default. To decrease or increase the power level: 1. Enter Menu > Use...
Page 23 - USING yOUR INDUCTION hOB; Activating and deactivating; USING YOUR INDUCTION HOB; Heat setting
23 USING yOUR INDUCTION hOB Activating and deactivating Press and hold to activate or deactivate the hob. Pot detection This feature indicates the presence of cookware on the hob and deactivates the cooking zones if no cookware is detected during a cooking session. If you put cookware on a cooking z...
Page 24 - OptiHeat Control (3 step Residual heat indicator)
24 USING yOUR INDUCTION hOB OptiHeat Control (3 step Residual heat indicator) WARNING! / / As long as the indicator is on, there is a risk of burns from residual heat. The induction cooking zones produce the heat necessary for the cooking process directly in the bottom of the cookware. The glass cer...
Page 25 - Menu structure
25 USING yOUR INDUCTION hOB • For cooking zones that have a reduced power, the control bar blinks and shows the maximum possible heat settings. • Wait until the display stops flashing or reduce the heat setting of the cooking zone selected last. The cooking zones will continue operating with the red...
Page 27 - Cookware
27 USING yOUR INDUCTION hOB Operating the fan speed manually You can also operate the function manually. To do that press when the hob is active. This deactivates automatic operation of the function and allows you to change the fan speed manually. When you press you raise the fan speed by one. When ...
Page 28 - USING yOUR OvEN; USING YOUR OVEN; COOKING FUNCTIONS; Symbol
28 USING yOUR OvEN USING YOUR OVEN COOKING FUNCTIONS Symbol Function description Fan Forced Heat comes from the element surrounding the fan. This fan circulates the hot air around the oven cavity so that you can put your food in different places in the oven and still cook them at the same time. You ...
Page 29 - OPERATING SEQUENCE; USING THE APPLIANCE
29 USING yOUR OvEN OPERATING SEQUENCE Select the oven function Turn the oven function selector clockwise to select the desired oven function. NOTE: each oven function has a default temperature which can then be adjusted as outlined below. This knob cannot be turned anticlockwise from off position Se...
Page 30 - BEFORE FIRST USE
30 USING yOUR OvEN The display with the maximum number of functions set. Display indicators Lock Assisted cooking Cleaning Settings Fast heat up Progress bar for temperature or time Steam cooking indicator Timer indicators Minute minder Cooking time Time delay Uptimer BEFORE FIRST USE WARNING Refer ...
Page 31 - DAILY USE
31 USING yOUR OvEN DAILY USE Start cooking 1. Set a heating function. 2. Set the temperature. How to set: Assisted Cooking Every dish in this submenu has a recommended function and temperature. You can adjust the time and the temperature during cooking. The degree to which a dish is cooked: • Rare •...
Page 32 - CLOCK FUNCTIONS
32 USING yOUR OvEN CLOCK FUNCTIONS Clock function Application Minute minder. When the timer ends, the signal sounds. Cooking time. When the timer ends, the signal sounds and the heating function stops. Time Delay. To postpone the start and/or end of cooking. Uptimer. Maximum is 23 hours 59 minutes. ...
Page 34 - START
34 USING yOUR OvEN How to set: Time Delay 1. Select the heating function. 2. Press repeatedly: Timer The display shows: the time of day h:min START STOP 3. Set the start time. 4. Press OK. The display shows: START STOP 5. Set the end time. 6. Press OK. Timer starts counting down immediately. How to ...
Page 36 - Risk of burns and damage to the appliance.; Do not refill the cavity well with water during cooking; Make sure that the appliance is cool before you remove
36 EASyBAKE +STEAM Your WFEP9757DD has the ability to add steam while baking. Cooking with steam is a great addition to straight ‘hot air’ cooking. Steam brings out all the natural flavours and goodness in the food, cooks evenly from surface to centre and retains more nutrients and vitamins. Steam a...
Page 37 - Get to know your new oven with this; NOTE: If desired substitute butter for either margarine; COOKING TEST; Oven shelf location
37 COOKING TEST Get to know your new oven with this ‘Simple Test Cake’ Although we strive for a perfect performing oven, it’s possible that there will be some variation in colour when baking. Therefore, we suggest this simple, easy and delicious to make Simple Test Cake, it can help you understand y...
Page 38 - Choosing the best oven settings; COOKING GUIDE
38 COOKING GUIDE Choosing the best oven settings The following table is intended as a guide and experience may show some variation in cooking times necessary to meet individual requirements. We recommend that you preheat your oven for 30 minutes. Modes without Oven Fan fOOD TEMPERATURE ˚C OvEN ShELf...
Page 39 - EasyBake +Steam function; fOOD; Air Fry Cooking (for applicable models only); Air Fry is designed for single shelf cooking.; To set the Air Fry Function:; Arrange food on to the Air Fry tray.
39 COOKING GUIDE EasyBake +Steam function fOOD WATER IN CAvITy WELL (ML) TEMPERATURE • C OvEN ShELf POSITION* TIME IN MINUTES Yeast goods Bread loaves 200 180 - 200 2 or 3 35 - 45 Bread rolls 200 190 - 210 2 or 3 20 - 25 Gluten free bread 200 180 - 200 2 or 3 40 - 50 Pizza (fresh) 200 210 - 220 2 or...
Page 40 - Always clean the grill/oven dish after every use.
40 COOKING GUIDE AirFry Cooking Guide We recommend that you pre-heat the oven for 5 minutes for the best AirFry performance. fOOD TEMPERATURE • C OvEN ShELf POSITION* TIME IN MINUTES Potatoes Frozen chips 220 2 or 3 18 - 20 Potato wedges 220 3 20 - 23 Coated/battered goods Chicken drummetts/wingette...
Page 41 - DEALING WITH COOKING PROBLEMS
41 DEALING WITh COOKING PROBLEMS PROBLEM CAUSES REMEDIES Uneven cooking: • Incorrect shelf position. • Oven tray too large.• Trays not centralised.• Air flow in oven uneven.• Grill dish affecting thermostat. – Select shelf that puts food in the centre of the oven. – Experiment with other trays or di...
Page 42 - CLEANING yOUR OvEN; Stainless steel; NOTE: Make sure you follow the polish or brushing lines; Glass; Grill; NOTE: Items with high sugar content not only include; CLEANING YOUR OVEN
42 CLEANING yOUR OvEN WARNING WARNING • Always make sure that the oven is electrically isolated before cleaning. This can be done by the functional switch nearby. • Do not line the bottom of the oven with foil or cookware. • Do not use steam cleaners. Stainless steel WARNING WARNING • The oven door ...
Page 43 - Ensure the appliance is off and cool before cleaning.; Harsh abrasive cleaners, powder; Use pots with a flat base.
43 CLEANING yOUR OvEN CAUTION Ensure the appliance is off and cool before cleaning. Enamel (on burner skirts and trivets) Persistent stains may require rubbing with a nylon scourer or creamed powder cleansers. Household enamel cleaners are available, follow the manufacturer’s instructions in their u...
Page 44 - Ceramic Cooktop Cleaning; Available at the following web shops.
44 CLEANING yOUR OvEN Ceramic Cooktop Cleaning CUSTOMER ADVICE Sometimes SURFACE stains appear to be a “bubble” mark under the ceramic glass. These can be cleaned off with a razor blade scraper and ceramic cleaner. Keeping the ceramic cooktop clean and protected will keep it in good condition and he...
Page 45 - Stainless Steel Cooktop Cleaning; Wash with warm soapy water.; Available at the following web shops or distributors.; Before
45 CLEANING yOUR OvEN Stainless Steel Cooktop Cleaning NOTE: Ensure any oil is cleaned off the hob before use, otherwise it may cause the hob to turn a yellowish colour. All grades of stainless steel may stain, discolour or attain an adhering layer of grime in normal operation. To achieve maximum su...
Page 46 - CLEANING yOUR OvEN ACCESSORIES; CLEANING YOUR OVEN ACCESSORIES; Removing the trays and shelves from your
46 CLEANING yOUR OvEN ACCESSORIES CLEANING YOUR OVEN ACCESSORIES Removing the trays and shelves from your appliance • Slide the dish and grill tray towards you until they reach the front stop. • Tilt them up at the front to clear the side supports, taking care not to spill the contents. • Lift them ...
Page 47 - Cleaning your oven door; Make sure the appliance power is switched off at the; Changing the light globes; DO NOT store flammable or combustible items in the
47 CLEANING yOUR OvEN ACCESSORIES Cleaning your oven door WARNING WARNING • DO NOT use the oven without the inner and middle door glass fitted. • NEVER spray any caustic cleaners on any surface of the door or damage to the surface coatings will result. • DO NOT use metal utensils, scrapers, scourers...
Page 48 - STEAM ASSISTED CLEANING; Steam Assisted Clean; OFF; Cleaning the cavity well; Perform the cleaning precedure at least every
48 STEAM ASSISTED CLEANING STEAM ASSISTED CLEANING Steam Assisted Clean This function assists in the removal of food residue from inside the oven. This method is effective in removing light soiling only. It is not effective in removing stubborn baked-on stains. This function can only be used when th...
Page 49 - CLEANING yOUR PyROLyTIC OvEN; PYROLYTIC CLEANING THE OVEN; CLEANING YOUR PYROLYTIC OVEN
49 CLEANING yOUR PyROLyTIC OvEN PYROLYTIC CLEANING THE OVEN Pyrolytic cleaning of the oven cavity The oven has the Pyrolytic self-cleaning function. It cleans by burning o the spatters and accumulated dirt and grease from the oven liner, at high temperature. This process produces ash which can then ...
Page 50 - TROUBLEShOOTING; TROUBLESHOOTING; Faults; PROBLEM
50 TROUBLEShOOTING TROUBLESHOOTING Faults If there is a problem with the oven and/or grill, please: • Check the points listed below before calling for service. It may be possible to avoid a call by fixing the problem yourself – and so continue cooking. PROBLEM POSSIBLE CAUSE WhAT TO DO Oven or grill...
Page 51 - Further information
51 TROUBLEShOOTING Further information When you need information, service or replacement parts or have a warranty enquiry, please contact the Customer Care Centre: • Australia - 13 13 49, 8.00am - 5.00pm EST Monday to Friday • New Zealand - 0800 10 66 10, 8.00am - 5.00pm EST Monday to Friday Please ...
Page 52 - WARRANTy; Warranty; Important Notice; AUSTRALIA; NEW ZEALAND
52 WARRANTy This document sets out the terms and conditions of the product warranties for Westinghouse Appliances. It is an important document. Please keep it with your proof of purchase documents in a safe place for future reference should there be a manufacturing defect in your Appliance. This war...


 Westinghouse DSP635S
User Manual
Westinghouse DSP635S
User Manual
 Westinghouse GOR474SLPG
User Manual
Westinghouse GOR474SLPG
User Manual
 Westinghouse GOR476S
User Manual
Westinghouse GOR476S
User Manual
 Westinghouse GOR476SLPG
User Manual
Westinghouse GOR476SLPG
User Manual
 Westinghouse GXR650WLPG
User Manual
Westinghouse GXR650WLPG
User Manual
 Westinghouse PAK557W
User Manual
Westinghouse PAK557W
User Manual
 Westinghouse PDR790S
User Manual
Westinghouse PDR790S
User Manual
 Westinghouse PGR659S
User Manual
Westinghouse PGR659S
User Manual
 Westinghouse POR663S
User Manual
Westinghouse POR663S
User Manual
 Westinghouse POR667S
User Manual
Westinghouse POR667S
User Manual
 Westinghouse WFE512SC
User Manual
Westinghouse WFE512SC
User Manual
 Westinghouse WFE612SC
User Manual
Westinghouse WFE612SC
User Manual
 Westinghouse WFE614SC
User Manual
Westinghouse WFE614SC
User Manual
 Westinghouse WFE647SA
User Manual
Westinghouse WFE647SA
User Manual
 Westinghouse WFE914SA
User Manual
Westinghouse WFE914SA
User Manual
 Westinghouse WFE914SB
User Manual
Westinghouse WFE914SB
User Manual
 Westinghouse WFE915SD
User Manual
Westinghouse WFE915SD
User Manual
 Westinghouse WFE916DSD
User Manual
Westinghouse WFE916DSD
User Manual
 Westinghouse WFE916SA
User Manual
Westinghouse WFE916SA
User Manual
 Westinghouse WFE946SA
User Manual
Westinghouse WFE946SA
User Manual