Page 2 - WARNING; WARNING; CAUTION; ENVIRONMENTAL TIPS; ENVIRONMENT; Conditions of use; Please ensure you read the instruction manual fully; CONTENTS
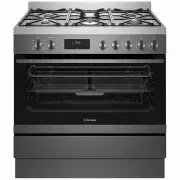
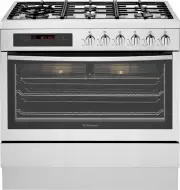
2 CONTENTS Important safety instructions ........................................................3Description of your appliance: WFE914SB .....................................................................................5 WFEP915SB ....................................................................
Page 3 - General warnings; IMPORTANT SAFETY INSTRUCTIONS; Installation, cleaning and servicing
3 IMPORTANT SAFETY INSTRUCTIONS Please read the user manual carefully and store in a handy place for later reference. Pass the user manual on to possible new owners of the appliance. Read the following carefully to avoid damage or injury. Note: You must read these warnings carefully before installin...
Page 4 - Oven; Child safety
4 IMPORTANT SAFETY INSTRUCTIONS WARNING WARNING Oven • During use the appliance becomes hot. Care should be taken to avoid touching the hot surfaces inside the oven. • Switch the appliance off at the isolating switch before removing the oven light glass for globe replacement. • To avoid an accident,...
Page 5 - Control Panel
5 WFE914SB Function Off Oven/Grill Off Maxi Grill Fan Grill Grill Defrost Base Heat Bake/ Pizza Fan Bake 260 220 200 180 100 Keep Warm Timer Cook Time Mode Clock End Time Rapid Heat High Off Low High Off Low High Off Low High Off Low High Off Low MODEL WFE914SB Gas hob with flame safeguard, multi-fu...
Page 9 - BEFORE OPERATING YOUR APLIANCE; BEFORE OPERATING YOUR APPLIANCE; TIPS AND INFORMATION; Programmable Controller: models WFEP915SB,
9 BEFORE OPERATING YOUR APLIANCE BEFORE OPERATING YOUR APPLIANCE FOR THE FIRST TIME TIPS & INFORMATION TIPS AND INFORMATION Setting the time If you have purchased a model fitted with an electronic or programmable timer, you MUST set the time of day before you can operate your appliance. After el...
Page 10 - INSTALLING YOUR OVEN ACCESSORIES; INSTALLING YOUR OVEN; Installing burners; NOTE: When the burner is correctly fitted it will sit level; Side racks
10 INSTALLING YOUR OVEN ACCESSORIES INSTALLING YOUR OVEN ACCESSORIES • Once the indents have passed the front edge of the side rack, the shelf can be pushed completely in. • When fully inserted the shelf/tray should not interfere with the closed door. Installing burners • The burner crown must be fi...
Page 11 - INSTALLING YOUR COOKTOP ACCESSORIES; INSTALLING BURNERS
11 INSTALLING YOUR COOKTOP ACCESSORIES Lighting the burners Electronic ignition These hobs are fitted with mains powered electronic ignition. When the appliance has been connected and the power is on, depressing any knob will release sparks to all burners. To light a burner, depress the correspondin...
Page 12 - GETTING TO KNOW YOUR COOKTOP; Ceramic hotplates Model WFE946SB
12 GETTING TO KNOW YOUR COOKTOP GETTING TO KNOW YOUR COOKTOP Model WFEP915SB & WFE914SB 2 1 3 4 1. Low heat burner (5.1MJ/h) Used for simmering with small cookware items. 2. Medium heat burner (9.0MJ/h) Used for normal cooking and simmering with mid size cookware items. 3. High heat burner (12.1...
Page 13 - The bottom of pans and cooking zones should be the
13 GETTING TO KNOW YOUR COOKTOP WARNING WARNING If the ceramic glass is cracked, switch off the appliance to avoid the possibility of electric shock. The heating elements are concealed under the smooth glass surface which has a pattern to show the location of the elements. • Use pans with smooth, cl...
Page 14 - Ceramic cooktop controls; ICONS SENSOR FIELD; Displays; DISPLAY; GETTING TO KNOW YOUR CERAMIC COOKTOP
14 GETTING TO KNOW YOUR CERAMIC COOKTOP Ceramic cooktop controls 1. On/Off with power indicator2. Lock with pilot light3. Pause4. Triple ring cooking zone5. Zone indicator6. Heat setting selection7. Timer setting selection8. Multipurpose cooking zone The appliance is operated using Touch Control sen...
Page 15 - USING YOUR CERAMIC COOKTOP
15 USING YOUR CERAMIC COOKTOP Switching the ceramic cooktop on and off CONTROL PANEL DISPLAY Switch on Touch for 2 seconds / Switch off Touch for 2 seconds / none TIPS & INFORMATION TIPS AND INFORMATION After switching on, within approx. 10 seconds a heat setting or a function must be set, other...
Page 16 - Using the child safety device
16 USING YOUR CERAMIC COOKTOP USING YOUR CERAMIC COOKTOP The length of time that the automatic warm up function operates depends on the heat setting selected. HEAT SETTING AUTOMATIC WARM UP (MIN:SEC) 0.30 1.00 1.40 4.50 6.30 10.10 2.00 3.30 4.30 – – – Using the child safety device The child safety d...
Page 17 - Pause
17 USING YOUR CERAMIC COOKTOP Using the timer FUNCTION CONDITION OUTCOME AFTER THE TIME HAS LAPSED Automatic cut-out a heat setting is set acoustic signal 00 flashes Cooking zone switches off Countdown timer cooking zones not in use acoustic signal 00 flashes TIPS & INFORMATION TIPS AND INFORMAT...
Page 18 - USING YOUR CERAMIC COOKTOP/ OVEN; USING YOUR CERAMIC; HEAT SETTING; USING YOUR OVEN
18 USING YOUR CERAMIC COOKTOP/ OVEN USING YOUR CERAMIC COOKTOP AUTOMATIC SWITCH OFF Cooking surface • If after switching on the cooking surface, a heat setting is not set for a cooking zone within approx. 10 seconds, the cooking surface automatically switches itself off. • If one or more sensor fiel...
Page 22 - Operating the Programmable Controller
22 USING YOUR OVEN Changing the oven temperature 1. Press “–” or “+” symbols to decrease or increase the temperature setting. The temperature setting changes in increments of 5°C. NOTE: The temperature can be adjusted at any time. Oven temperature cannot be changed for the Defrost function. For mode...
Page 23 - To check or cancel settings; Safety cut-out feature; DEMO mode
23 USING YOUR OVEN USING YOUR OVEN To check or cancel settings 1. To check your settings, press “Timer” until the setting you want to check is displayed. 2. To cancel “delayed start” press “Timer” until “End time” symbol “ ” appears flashing with the “Timer arrow” symbol “ “. Press and hold “–” symb...
Page 24 - Get to know your new oven with this ‘Simple Test Cake’; NOTE: If desired substitute butter for either margarine; COOKING TEST
24 USING YOUR OVEN Get to know your new oven with this ‘Simple Test Cake’ Although we strive for a perfect performing oven, it’s possible that there will be some variation in colour when baking. Therefore, we suggest this simple, easy and delicious to make Simple Test Cake, it can help you understan...
Page 25 - Oven shelf location; COOKING GUIDE
25 USING YOUR OVEN • For best baking results preheat oven for 30 minutes.• Select the correct shelf location for food being cooked. • The grill tray can be used in the oven as a baking dish, except in oven shelf location 1. • Make sure dishes will fit into the oven before you switch it on. • Keep ed...
Page 26 - Choosing the best oven settings; The following table is intended as a guide and; Modes without oven fan
26 COOKING GUIDE COOKING GUIDE Choosing the best oven settings The following table is intended as a guide and experience may show some variation in cooking times necessary to meet individual requirements. We recommend that you preheat your oven for 30 minutes. Modes without oven fan FOOD TEMPERATURE...
Page 27 - Roasting Meat; Grilling Guide; Always clean the grill/oven dish after every use.; Grilling is conducted with the oven door closed; Bacon; Guide to better grilling; Steak; Fan Grill
27 COOKING GUIDE COOKING GUIDE Roasting Meat 1. Place the meat in the oven and set the temperature between 180°C and 200°C. (It is recommended to wrap your meats in an oven roasting bag or foil to prevent fats and oils from splattering, making it easier to clean your oven.) 2. Use the grill/oven dis...
Page 28 - DEALING WITH COOKING PROBLEMS
28 DEALING WITH COOKING PROBLEMS PROBLEM CAUSES REMEDIES Uneven cooking: • Incorrect shelf position. • Oven tray too large. • Trays not centralised. • Air flow in oven uneven. • Grill dish affecting thermostat. – Select shelf that puts food in the centre of the oven. – Experiment with other trays or...
Page 29 - NOTE: Make sure you follow the polish or brushing lines; • Remove all spilt food and fat with the supplied; Note: Items with high sugar content not only include jam; CLEANING YOUR APPLIANCE
29 CLEANING YOUR APPLIANCE WARNING WARNING • Always make sure that the oven is electrically isolated before cleaning. This can be done by the functional switch nearby. • Do not line the bottom of the oven with foil or cookware. • Do not use steam cleaners. Stainless steel WARNING WARNING • The oven ...
Page 30 - CLEANING YOUR OVEN ACCESSORIES; Removing the trays and shelves from your
30 CLEANING YOUR OVEN ACCESSORIES CLEANING YOUR OVEN ACCESSORIES Removing the trays and shelves from your appliance • Slide the dish and grill tray towards you until they reach the front stop. • Tilt them up at the front to clear the side supports, taking care not to spill the contents. • Lift them ...
Page 31 - CLEANING YOUR OVEN; Pyrolytic cleaning of the oven cavity; CLEANING YOUR PYROLYTIC OVEN; IMPORTANT; Pyrolytic cleaning; Do not turn off the mains power supply to the oven
31 CLEANING YOUR OVEN WVEP916SB & WFEP915SB Pyrolytic cleaning of the oven cavity The oven has the Pyrolytic self-cleaning function, it cleans by burning off the spatters and accumulated dirt and grease from the oven liner, at high temperature. This process produces ash which can then be wiped o...
Page 32 - Cleaning your oven door; Make sure the appliance power is switched off at the; Changing the light globes; DO NOT store flammable or combustible items in the
32 CLEANING YOUR OVEN ACCESSORIES Cleaning your oven door WARNING WARNING • DO NOT use the oven without the inner and middle door glass fitted. • NEVER spray any caustic cleaners on any surface of the door or damage to the surface coatings will result. • DO NOT use metal utensils, scrapers, scourers...
Page 33 - Faults; PROBLEM; TROUBLESHOOTING
33 TROUBLESHOOTING Faults If there is a problem with the oven and/or grill, please:• Check the points listed below before calling for service. It may be possible to avoid a call by fixing the problem yourself – and so continue cooking. PROBLEM POSSIBLE CAUSE WHAT TO DO Oven or grill not working Powe...
Page 34 - Further information
34 TROUBLESHOOTING PROBLEM POSSIBLE CAUSE WHAT TO DO Flames not staying on when knob released Knob not held down long enough in ‘High’ position for flame safeguard (where fitted) to engage Repeat lighting procedure and hold knob down for 5 seconds in ‘High‘ position Knob not set between ‘High’ and ‘...
Page 35 - INSTALLATION OF THE APPLIANCE; Gas model clearance requirements; Cabinet requirements; The cooker MUST be checked every five years.
35 INSTALLATION OF THE APPLIANCE INSTALLATION OF THE APPLIANCE Gas model clearance requirements Models WFE914SB AND WFEP915SB • Ensure the appliance is installed in accordance with clauses 6.2.5 and 6.10.1.1 of AS/NZS 5601.1 or clauses 6.9.1 and 6.9.5 of AS/NZS 5601.2 with regard to clearances to co...
Page 36 - FREESTANDING INSTALLATION; Freestanding installation
36 FREESTANDING INSTALLATION INSTALLATION OF THE APPLIANCE The freestanding type installation uses the appliance as supplied, and can be fitted in between cabinets, with cabinets on one side or without adjacent cabinets. There is no clearance requirement to adjacent side cabinets. To ensure cooker s...
Page 37 - Freestanding installation continued; • The anti-tilt brackets must be secured to the floor at
37 FREESTANDING INSTALLATION Freestanding installation continued Installation of anti-tilt brackets and hook • The anti-tilt brackets must be secured to the floor at rear of cavity with an appropriate fastener according to dimensions in diagram. • The hook is to be secured to the back wall in the lo...
Page 38 - To remove the appliance kick panel; Carefully lay down the appliance onto one side; Slot in conversion
38 SLOT-IN INSTALLATION Slot-in Installation INSTALLATION OF THE APPLIANCE To remove the appliance kick panel • Remove all loose parts i.e. Burner crowns and caps, trivets, oven shelves. • Carefully lay down the appliance onto one side onto foam packaging and remove the screws as shown from each cor...
Page 39 - Installation of anti-tilt brackets and stops; Installation sequence for freestanding
39 FREESTANDING INSTALLATION INSTALLATION OF THE APPLIANCE Installation of anti-tilt brackets and stops • The brackets are to be secured to the back wall with appropriate fasteners. • The bottom edge of the the brackets rest on the horizontal support surface. • Two stops are to be screwed to the pli...
Page 40 - BUILT-IN INSTALLATION; Cabinet construction for built in oven; For the best integration within a kitchen, install this; Oven dimensions
40 BUILT-IN INSTALLATION INSTALLATION OF THE APPLIANCE Cabinet construction for built in oven For the best integration within a kitchen, install this appliance in a cupboard that gives a flush fit with the surrounding cupboard fronts. A recess of 20mm is ideal. NOTE: Your appliance must be mounted o...
Page 41 - UNDERBENCH AND CABINET APPLIANCE; NOTE: If a powerpoint is fitted it must be accessible; Underbench installation
41 UNDERBENCH AND CABINET APPLIANCE INSTALLATION OF THE APPLIANCE NOTE: If a powerpoint is fitted it must be accessible with the appliance installed. Underbench installation Your underbench oven looks best when the control panel is directly under the benchtop. An upper infill panel may be added if t...
Page 42 - WIRING REQUIREMENTS; For New Zealand Only:; Rated power input; MODEL; Before you cook in your new oven it is important that; Connecting to services and commissioning; Hard wiring detail
42 WIRING REQUIREMENTS WIRING REQUIREMENTS The cooker MUST be installed in compliance with: • wiring connections in AS/NZS 3000 Wiring Rules. • local regulations, municipal building codes and other statutory regulations. For New Zealand Only: The cooking range must be connected to the supply by a su...
Page 43 - INSTALLING THE FREESTANDING COOKER; Gas connection; Gas pressures; Checking piping size
43 INSTALLING THE FREESTANDING COOKER INSTALLING THE FREESTANDING COOKER Gas connection Read these points before connecting to the gas supply: • The appliance is preset for natural gas use, if LPG is to be used see Conversion to LPG section. • Gas installation must be made in accordance with AS/ NZS...
Page 44 - LPG CONVERSION
44 LPG CONVERSION LPG CONVERSION MODELS WFE914SB & WFEP915SB This appliance is supplied set up for Natural Gas usage. A conversion kit is included with the product for Universal LPG usage. The conversion kit contains 6 injectors and 1 LPG sticker.Please follow the procedure below if a conversion...
Page 45 - TESTING THE GAS COOKER; TESTING THE OPERATION OF THE GAS; Checking gas supply
45 TESTING THE GAS COOKER TESTING THE OPERATION OF THE GAS COOKER NOTE: You MUST test the cooker after installation, before you hand it over to the customer. You MUST have a manometer and a connecting tube. Checking gas supply 1. Check the manometer zero point is correct. 2. Connect the manometer to...
Page 46 - NOTES
Page 47 - WARRANTY; Warranty; Important Notice
47 WARRANTY This document sets out the terms and conditions of the product warranties for Electrolux Appliances. It is an important document. Please keep it with your proof of purchase documents in a safe place for future reference should you require service for your Appliance. 1. In this warranty: ...
Page 48 - TOP SERVICE; Top Service encompasses the after sales service
AUSTRALIA phone: 1300 363 640fax: 1800 350 067 email: [email protected]web: www.westinghouse.com.au NEW ZEALAND phone: 0800 436 245fax: 0800 225 088 email: [email protected]web: www.westinghouse.co.nz For more information on all Westinghouse appliances, or for dimension and installation information,...


 Westinghouse DSP635S
User Manual
Westinghouse DSP635S
User Manual
 Westinghouse GOR474SLPG
User Manual
Westinghouse GOR474SLPG
User Manual
 Westinghouse GOR476S
User Manual
Westinghouse GOR476S
User Manual
 Westinghouse GOR476SLPG
User Manual
Westinghouse GOR476SLPG
User Manual
 Westinghouse GXR650WLPG
User Manual
Westinghouse GXR650WLPG
User Manual
 Westinghouse PAK557W
User Manual
Westinghouse PAK557W
User Manual
 Westinghouse PDR790S
User Manual
Westinghouse PDR790S
User Manual
 Westinghouse PGR659S
User Manual
Westinghouse PGR659S
User Manual
 Westinghouse POR663S
User Manual
Westinghouse POR663S
User Manual
 Westinghouse POR667S
User Manual
Westinghouse POR667S
User Manual
 Westinghouse WFE512SC
User Manual
Westinghouse WFE512SC
User Manual
 Westinghouse WFE612SC
User Manual
Westinghouse WFE612SC
User Manual
 Westinghouse WFE614SC
User Manual
Westinghouse WFE614SC
User Manual
 Westinghouse WFE647SA
User Manual
Westinghouse WFE647SA
User Manual
 Westinghouse WFE914SA
User Manual
Westinghouse WFE914SA
User Manual
 Westinghouse WFE915SD
User Manual
Westinghouse WFE915SD
User Manual
 Westinghouse WFE916DSD
User Manual
Westinghouse WFE916DSD
User Manual
 Westinghouse WFE916SA
User Manual
Westinghouse WFE916SA
User Manual
 Westinghouse WFE946SA
User Manual
Westinghouse WFE946SA
User Manual
 Westinghouse WFE946SB
User Manual
Westinghouse WFE946SB
User Manual