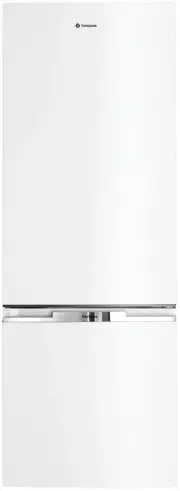
Page 2 - Important – check for any damages or marks; IMPORTANT SAFETY INSTRUCTIONS
2 3 SAFETY CONTENTS Please read the user manual carefully and store in a handy place for later reference. Pass the user manual on to new owners of the refrigerator. TIPS & INFORMATION Important – check for any damages or marks If you find the refrigerator is damaged or marked, you must report it...
Page 3 - Electronic controls
4 5 FEATURES FEATURES TOP MOUNT (TM) REFRIGERATOR FEATURES 1 Freezer light (where fitted) 2 Freezer air delivery vents 3 Glass freezer shelf 4 Twist & Serve ice cube tray and bin 5 Freezer air return vents 6 Refrigerator light 7 Manual temperature controls (where fitted, not illustrated) 8 Elect...
Page 4 - SINGLE DOOR ALL REFRIGERATOR (AR) FEATURES
6 7 FEATURES ACCESSORIES FEATURES SINGLE DOOR ALL REFRIGERATOR (AR) FEATURES 1 Refrigerator light 2 Temperature control 3 Adjustable glass shelves 4 Deli bin 5 Bottle holder 6 Humidity control 7 Crisper bin on telescopic extension slides 8 Adjustable rollers 9 Twin dairy compartments 10 Storesafe™ b...
Page 5 - Adequate ventilation around your refrigerator; The clearances shown above are the recommended; INSTALLING YOUR NEW APPLIANCE; CAUTION
8 9 INSTALLATION ACCESSORIES FEATURES 1 Temperature control 2 Freezer light 3 Twist & Serve ice cube tray and bin 4 Adjustable glass shelves 5 Freezer bins on telescopic extension slides 6 Adjustable rollers 7 Stabilising foot 1 4 2 3 5 7 6 SINGLE DOOR ALL FREEZER (AF) FEATURES Features may vary...
Page 6 - WARNING; x water filter with push fit connections
11 ICE & WATER 10 ACCESSORIES INSTALLATION INSTALLING YOUR NEW APPLIANCE ICE AND WATER INSTALLATION INITIAL START-UP 8. When you have the appliance in its final position, it needs to be stablisied. Wind the stability foot down to the floor until it just makes contact with the floor. Lift the fro...
Page 7 - ICE AND WATER INSTALLATION; filter
12 13 ICE & WATER ICE & WATER ICE AND WATER INSTALLATION INITIAL START-UP Never install the water filter in an area of direct sunlight. Check for water leaks at all water connection points in the first 2 to 3 hours after installation, and correct it in case of any water leak. Recheck after 2...
Page 8 - Controlling the temperature; Changing the refrigerator temperature
14 15 ELECTRONIC CONTROLS ACCESSORIES INSTALLING YOUR NEW APPLIANCE USING YOUR ELECTRONIC CONTROLS - ICE & WATER MODELS Step 15. Using a large container run the water dispenser to clear air from lines. This may take a few minutes. Purge and dispense a minimum of 2 litres of water. Initial water ...
Page 9 - USING YOUR ELECTRONIC CONTROLS - ICE & WATER MODELS
16 17 ELECTRONIC CONTROLS ELECTRONIC CONTROLS USING YOUR ELECTRONIC CONTROLS - ICE & WATER MODELS USING YOUR ELECTRONIC CONTROLS - ICE & WATER MODELS Door alarm If the fridge or freezer door is left open for more than two minutes, the alarm will buzz and the refrigerator icon in the centre o...
Page 10 - CHILD LOCK; ELECTRONIC DISPLAY CONTROLS – ELECTRONIC MODELS; ELECTRONIC CONTROLS
18 19 ELECTRONIC CONTROLS Freezer temperature alarm If the alarm sounds for no apparent reason, check whether anything is keeping the door open. If the freezer becomes too warm due to the freezer door being left open or warm food being placed too close to the temperature sensor, a buzzer will sound....
Page 11 - USING YOUR APPLIANCE
20 21 MANUAL CONTROLS For top mount and bottom mount models, the coldest freezer setting is not recommended in normal or very hot climates. It will limit the cooling to the refrigerator section. In very cold climates (where temperatures are below 10°C) the freezer may need to be set colder. Single d...
Page 12 - Note: this is only possible on Top Mount models.; CARE AND MAINTENANCE
22 23 USING YOUR APPLIANCE To replace the drawer , 1. With the telescopic slides pushed in all the way. 2. Slide the drawer into place over the slides and push the bin in until it stops. The bin will not be closed all the way. 3. Open the bin to access the finger tabs at the ends of the telescopic s...
Page 13 - ALWAYS DO THIS; GENERAL INFORMATION; TROUBLESHOOTING; PROBLEM; PROBLEM
24 25 GENERAL INFORMATION Cleaning the refrigerator WARNING BEFORE CLEANING: Turn the refrigerator off at the power point and unplug the cord to prevent any chance of electrocuting yourself. • Doors and exterior (white & pacific silver) You should only clean the doors with lukewarm soapy water a...
Page 14 - I & W TROUBLESHOOTING; ICE + WATER TROUBLESHOOTING; problem; Warranty; Important Notice
26 I & W TROUBLESHOOTING ICE + WATER TROUBLESHOOTING problem solution Automatic ice-makerThe ice maker is not making any ice • See Ice maker section in user manual: turn icemaker on. • Turn on the water tap.• See the Problem section: ‘If the temperature in the refrigerator is too warm’.• The ice...
Page 15 - Top Service encompasses the after sales service
AUSTRALIA phone: 1300 363 640 fax: 1800 350 067 email: [email protected] web: www.westinghouse.com.au NEW ZEALAND phone: 09 573 2384fax: 0800 363 600 email: [email protected]web: www.westinghouse.co.nz For more information on all Westinghouse appliances, or for dimension and installation information...